-
- Abundante
- Adquirentes de pagos
- Ajustes
- Analítica
- Citas en línea
- Comercio Electrónico del Sitio Web de Odoo
- Configuración el Sitio Web de Comercio Electónnico
- Diseñe la Página de Su Sitio Web
- Gestión de Productos
- Gestión de Varios Idiomas
- Grupos
- Herramientas de fragmento
- Lista de precios
- Listado de productos
- Métodos de envío
- Múltiples compañías
- Múltiples sitios web
- Operaciones de blog en backd
- Pedido
- Personalización de la Página del Catálogo de productos
- Personalización del catálogo de productos
- Personalizar el menú y las apariencias
- Porcos
- Programas de cupón y promoción
- Publicar contenido específico para el sitio web
- RedirracionAmiento
- Salas de chat
- Sesión de Productos en la PESTAÑA CONFIGURACIÓN
- Sitio Web
- Tablero de Comercio Electrónico
- Tarjeta de Regalo
- Twitter Wall
- Visitantes
- Vistas de la Página
-
- Activo
- Adquirentes de pagos
- Biblioteca de contabilidad
- Catálogo de cuentas
- Conabilidad miscelána
- Configuración de Datos Bancario
- Contabilidad
- Contábilidad analíta
- Diario
- Estados de Cuenta Bancario
- Factura de Clientes al Pago
- Fechas de Bloqueo
- Fiscales de posiciones
- Gastos de Empleados
- Informa de de Socios
- Informa de seguimiento
- Informa en contabilidad
- Ingresos y Gastos Diferidos
- Mandatos de débito directo
- Notas de Crédito
- Pagos
- Pagos por lotes
- Presupuesto
- Reconciliatura
- Redondeo en efectivo
- Tablero de contabilidad
- Tipos de contabilidad
- Transferencias automáticas
- Términos de Pago
-
- Abundante
- Adquisico de Plomo
- CREACIÓN DE COTIZACIONES DE VENTAS
- CRM
- Caracteríssticas de Odoo 15 CRM
- Convertir LOS Cables en Oportunidades
- Cómo Odoo CRM Gestiona Las Oportunidades Perdidas
- FluJo de trabajo general de Odoo CRM
- Formulario de generación de plomo múltiples fuentes
- Funcionando -Con Clientes Potenciales
- Manejo de Liderazgo
- Nuevas Opciones en la ventana de configuración de Odoo 15
-
- Análisis de producción
- CREANDO CENTROS DE TRABAJO
- Fabricación
- Facturas de materiales
- Gestión de Chatarra
- Gestión de Mantenimiento
- Gestión de órdenes para no consultor
- Informe General de Efectividad del Equipo
- Pedidos de Fabricación
- Planificación de Pedidos Laborales por producción
- Planificación de órdenes de Trabajo por WorkCenter
- Programa de producció Maestra
- Órdenes de Trabajo
-
- Abundante
- Ajustes de Inventario
- Anuncios
- CARACTERÍSTICAS DEL MÓDULO DE INVENTARIO DE ODOO
- Categorizacia de productos
- Categorías de Almacenamiento
- Configuración del producto
- Confirmación de SMS en la Entrega
- Confirmación por Correo Electrónico en la Entrega
- Costos de Aterrizaje
- Empaquetado del producto
- Entrega
- Entregar Paquetes
- Estategias de Eliminación
- Gestión de Almacenes
- Gestión de Chatarra
- Integrando el Remitente de Terceros en Odoo
- Inventario
- Operaciones de inventario
- Planificadores
- Reglas de Caída
- Reglas y rutas
- Tiempos de Programació
- Trazabilidad del Producto
- Ubicacia
- Unidad de Medida
- Variantes de productos
-
- APEGO Salarial
- Abundante
- Configuración
- Contratos
- Entradas de Trabajo
- Estructuras salariales
- Información personal
- Nómina de Odoo
- OTROS TIPOS DE ENTRADA
- Parámetros de la regla salarial
- Reanudar
- Salarios de reglas
- Salpicaduras
- Tablero
- Tiempos de Trabajo
- Tipo de estructura salarial
- Tipos de Entrada de Trabajo
- Ventajas
Employee - Odoo 15 Enterprise Book
Employees Dashboard
When you select the Employees menu, you will indeed enter into the home dashboard window of the Odoo Employees menu. The screenshot of the Employees home dashboard window is depicted below.
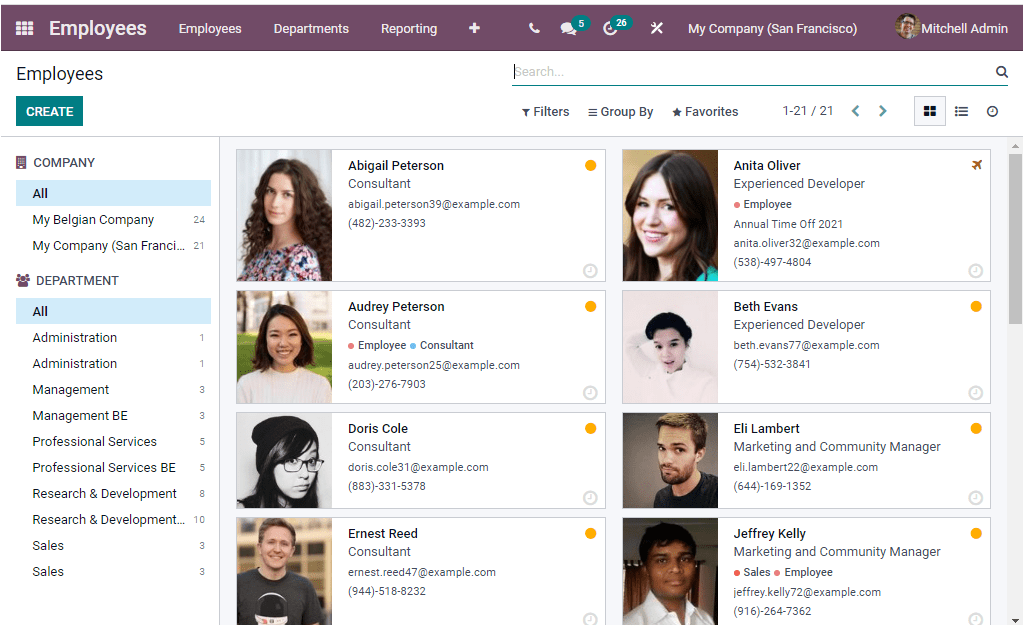
In the Employees home dashboard window, you can view the details of every Employee that is already described in the platform. The details of the employees are displayed along with their photographs. The above-depicted screenshot is the kanban view of the Employees dashboard. Odoo also displays the window in the List and Activity view. The various activities connected with each Employee can be viewed in the Activity window. In the Kanban view, the details of the Employee will be displayed in the right portion of the window. In the left part, the window will depict categorizing options where you can view the icons to view employees with their respective Company and Department wise. This option is beneficial when the platform is operating on a multi-company basis. Moreover, you can also view the employees in their Department. The employee count in each Company and each Department is displayed along with the respective Department and Company. The details of the window can also be sorted by applying various default as well as customizable options such as Filters, Group By, Favourite, and Search options available on the top of the window. The image of the List view of the window is depicted below.
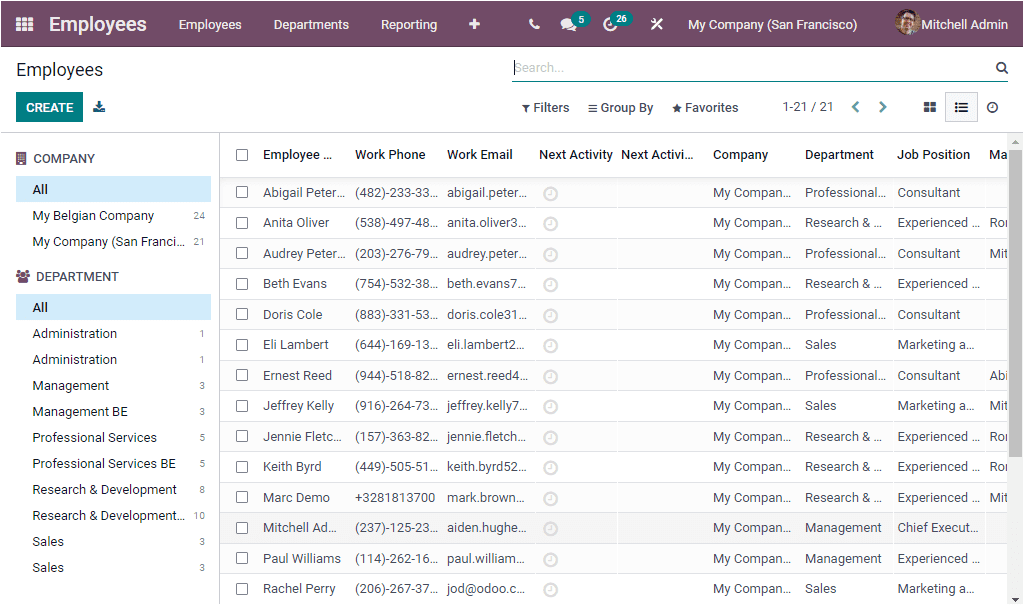
The List view also depicts all the employees being defined in the platform along with the Employee Name, Work Phone, Work Email, Next Activity, Next Activity Deadline, Company, Department, Job Position, Manager. Each of the employees can be selected and viewed in detail.
For creating new Employee details, you can just click on the CREATE icon, which can be accessed from the top left corner of the window.
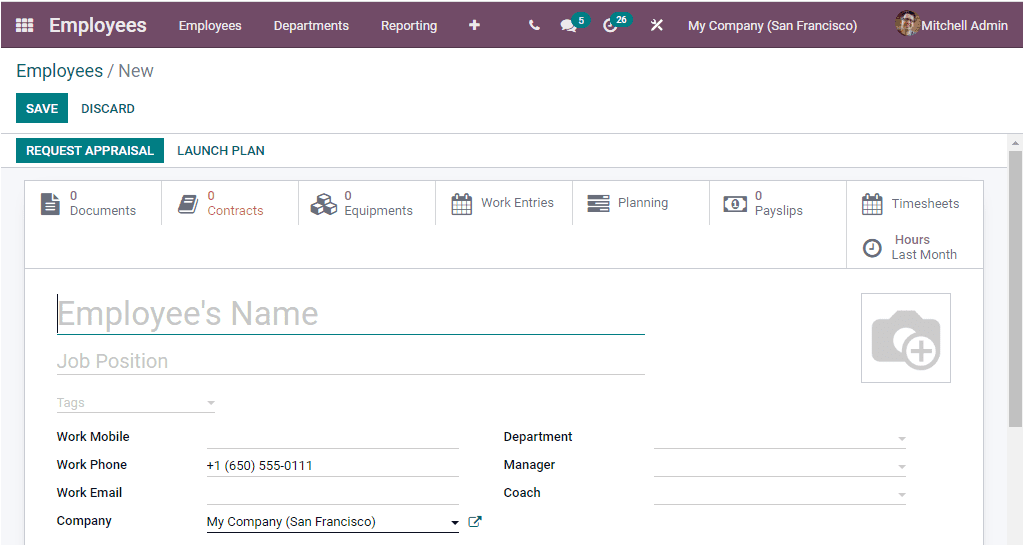
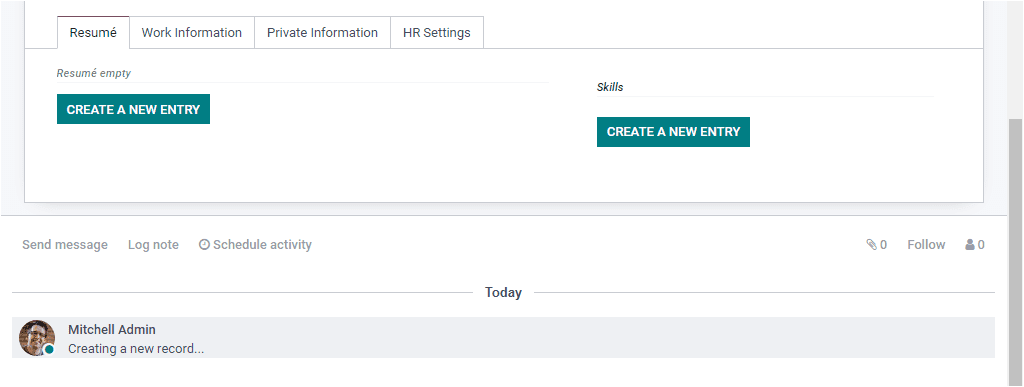
In the Employee creation window, you can provide detailed information of the Employee such as Employeeâs Name, Job Position, Tags, Work Mobile Number, Work Phone Number, and Work Email. And also, you will be able to allocate the Company and Department associated with this Employee along with the details of the Manager and Coach. In addition, you are also able to paste a photograph of the Employee in the space given. The resume and the details about the qualification and skills can be defined under the Resume tab of the employee creation form. The Resume details can be provided by selecting the CREATE A NEW ENTRY button available. Upon selecting this button, you will be depicted with a pop-up where you can create resume lines.
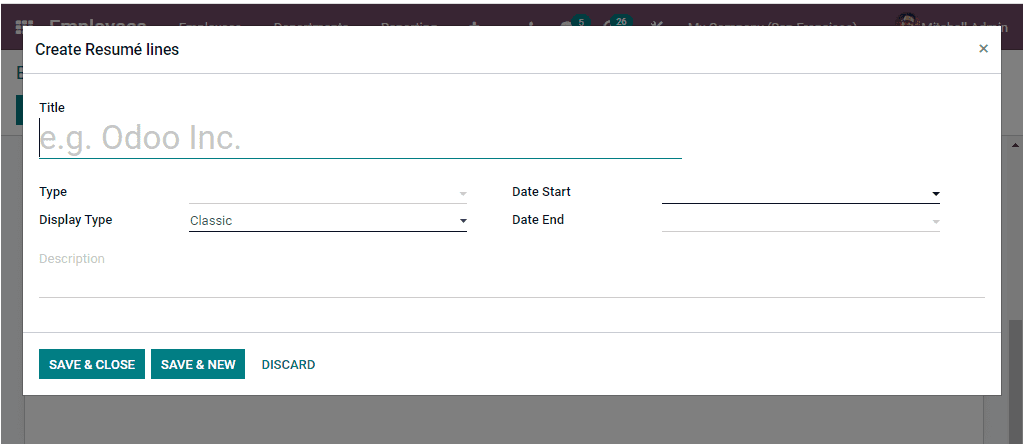
In the pop-up window, you can provide the Title of the resume, Type of resume, Display Type, starting date, and ending date, along with the description. In the same way, you can also create Skills where you also have to provide the Skill Type, Skill, Skill Level, and Progress.

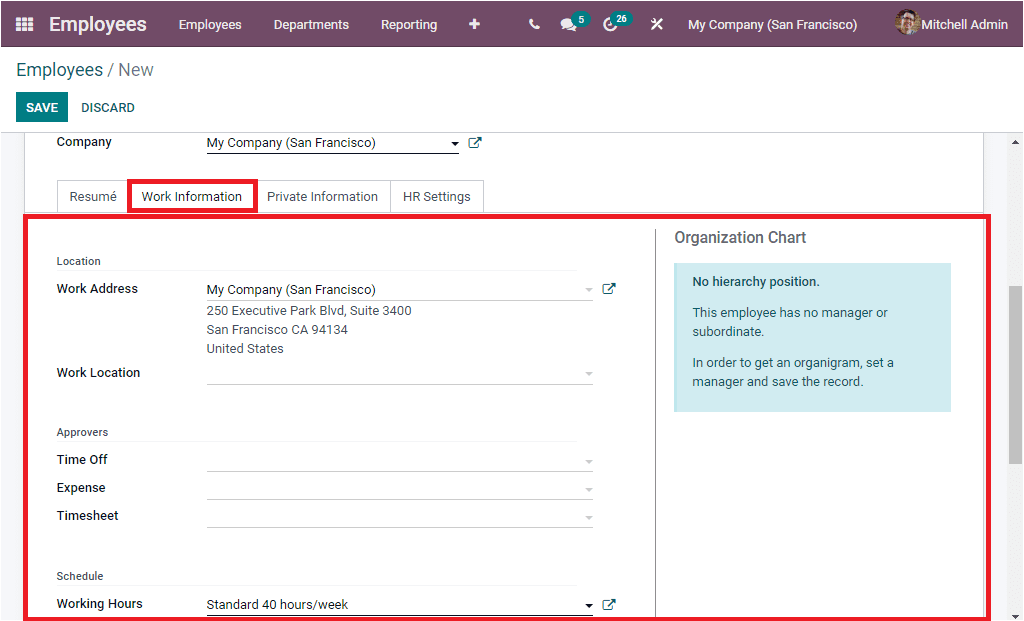
Under the Work Information tab, you can define the work-related information such as Location, Approvers, schedule, and Planning. That is, the Work Location can be allocated, and the Work address will be auto allocated. Additionally, the Approvers required for the respective Employee to approve Time Off, Expense, and Timesheet can be specified in the respective fields. Moreover, the Working Schedule details such as Working Hours and Time zone can be defined. Furthermore, the default Planning Role and Planning Roles can also be described.
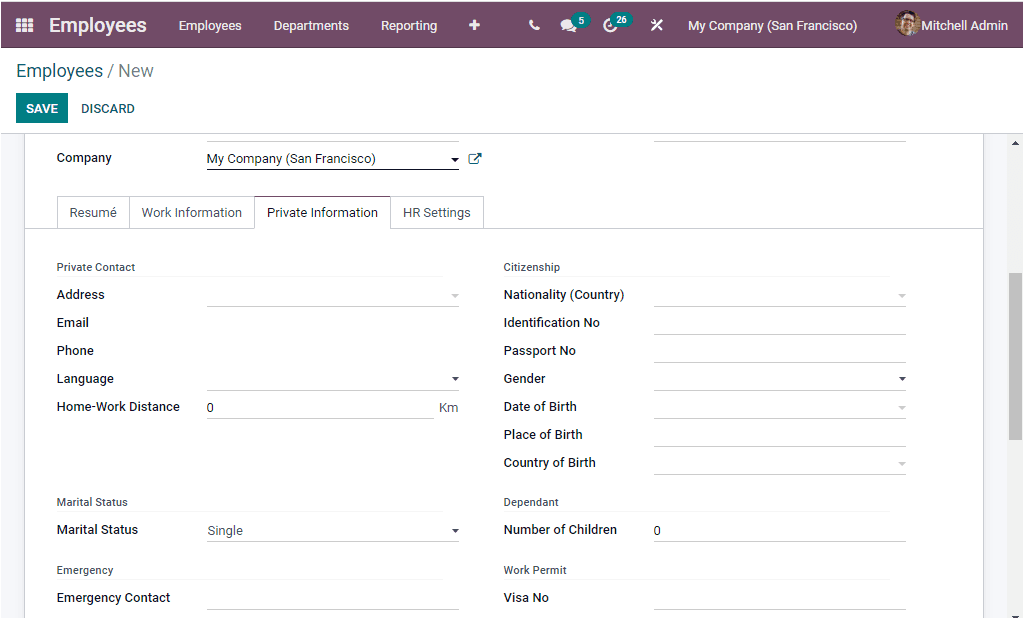
Under the Private Information tab the personal details of the Employee can be defined. Where you can provide the Private Contact details such as Address, Email, Phone Number, Language, and the Home - Work Distance in kilometers. The address mentioned here is the private address of the Employee and it is not the one that is linked to your Company. Moreover, the Marital Status and the Number of dependencies can be defined along with the Emergency Contact Details and Emergency Phone number. Then you can describe the educational details such as Certificate Level, Field of Study, and School. Under the Citizenship, you can mention the Nationality, Identification Number, Passport Number, Gender, Date of Birth, Place of Birth, and Country of Birth. Similarly, the Work Permit details such as Visa Number, Work Permit Number, Visa Expire Date, Work Permit Expiration Date can be defined.
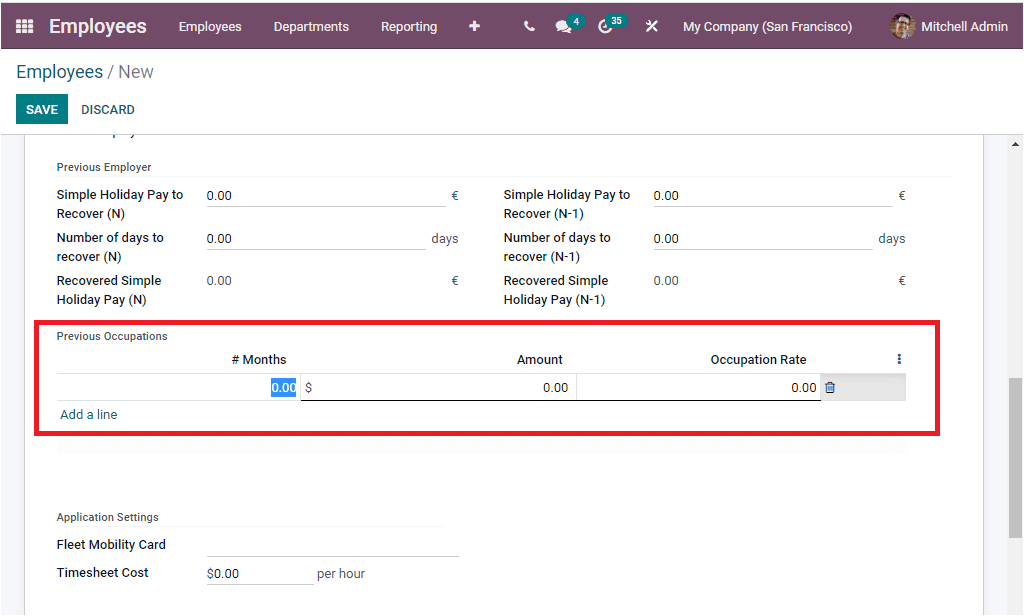
Under the HR Settings tab of the Employee creation window, you have to fill in the details to list out the employee details that are the required data for the HR department of your Company. So that you can describe the details of Employee Type and this will be very helpful for categorizing employees and also helps to keep contract history. Then the Related User name can be allocated for the resource to manage its access. The managerial aspects and employee identification for the employee registration, attendance, and fleet operations can be described. Under the timesheet descriptions, the employee remuneration based on the hourly aspects of the employee functioning can be defined. Moreover, the Payroll section details such as Current Contract, Job Position, Registration Number of the Employee can be allocated. In the Previous Employer section, you have to fill in the details. You can specify the amount of the holiday pay paid by the previous employer to recover in the simple Holiday Pay to Recover(N) field. Also can mention the Number of Days to Recover(N), along with the Recovered Simple Holiday Pay(N) that is the amount of the holiday pay paid by the previous employer already recovered. Additionally, the Previous Occupations can be allocated by clicking on the Add a Line option available. Where you can provide the Months, Amount and Occupation Rate
Apart from these described tabs, you can also view various smart buttons on the top of the window, as highlighted in the below image.
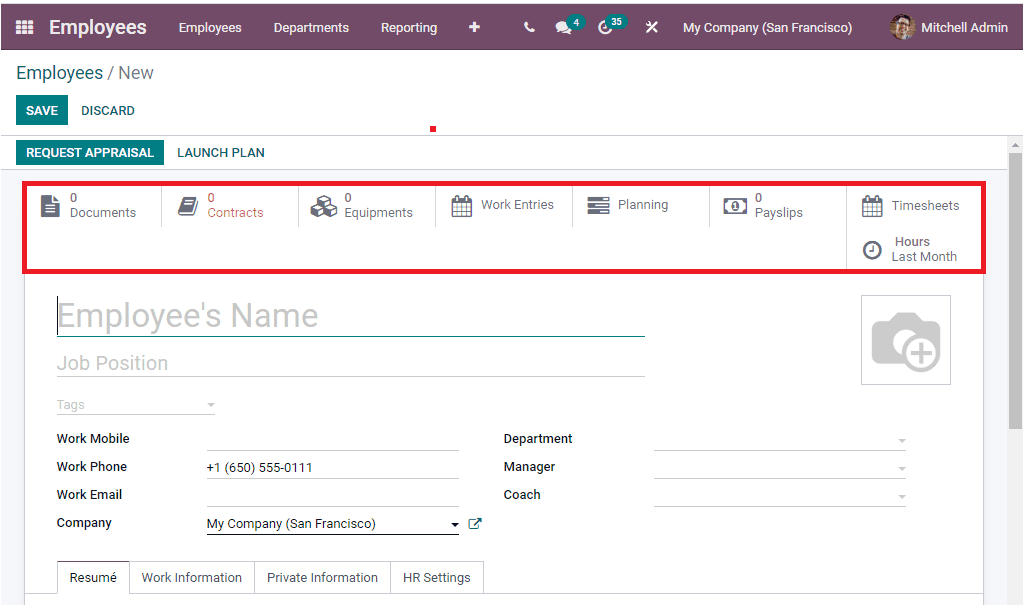
These are the Documents, Contracts, Equipments, Work Entries, Planning, Payslips, Timesheets, Attendance, and Hours Last Month. You should keep in mind that these smart buttons will be displayed based on the modules you installed.
Documents
Document smart buttons available under each of the Employee windows will allow you to jump into the employee documents window where you can describe both Employee specific documents and the other associated documents connected with this Employee. This documents window is interrelated with the documents application of the Odoo system.
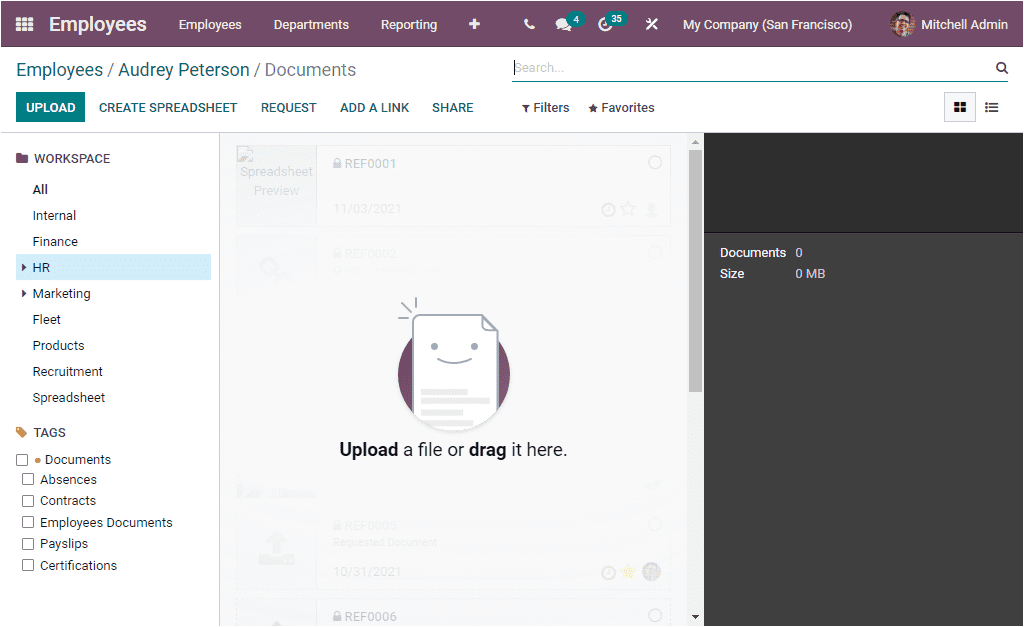
This window provides you the provision to create, remove or modify documents based on your requirements. You can upload related documents from your system by clicking on the UPLOAD icon available on the top left corner of the window. The Document window can also be filtered using various predefined and customizable options. The predefined filters are My Documents, My Favourites, PDF/Document, Spreadsheet, Image/Video, URL, Locked, Requested, and Archived. We will discuss the Document window in detail in the Documents module.
Timesheet
In every Employee window, you can also view the Timesheet menu that will allow you to enter into a new window where you can view and access the timesheet operations of that particular Employee. This timesheet data table will enable you to record the time duration your Employee spent on his tasks, projects, and many other aspects of his works. These timesheet records can be used for the employer to track a particular employee's time durations on his works. The image of the window is depicted below.
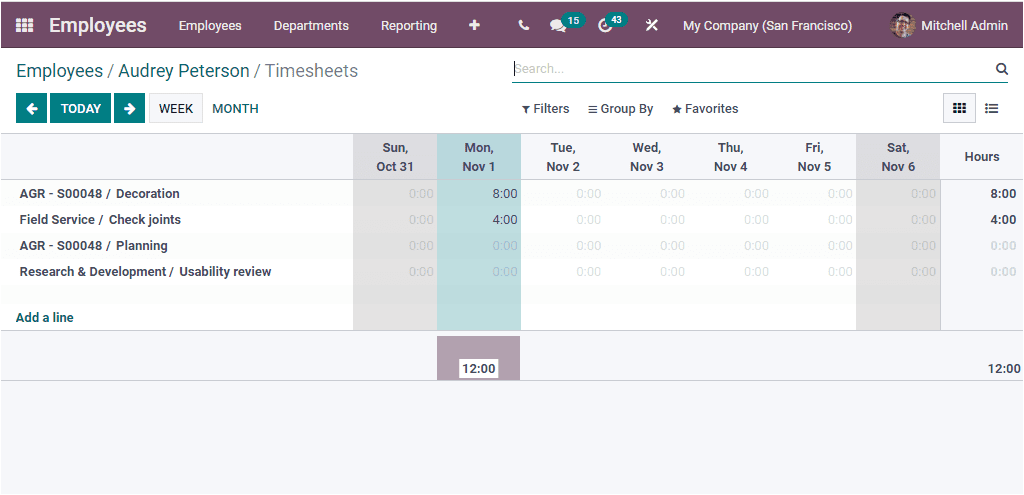
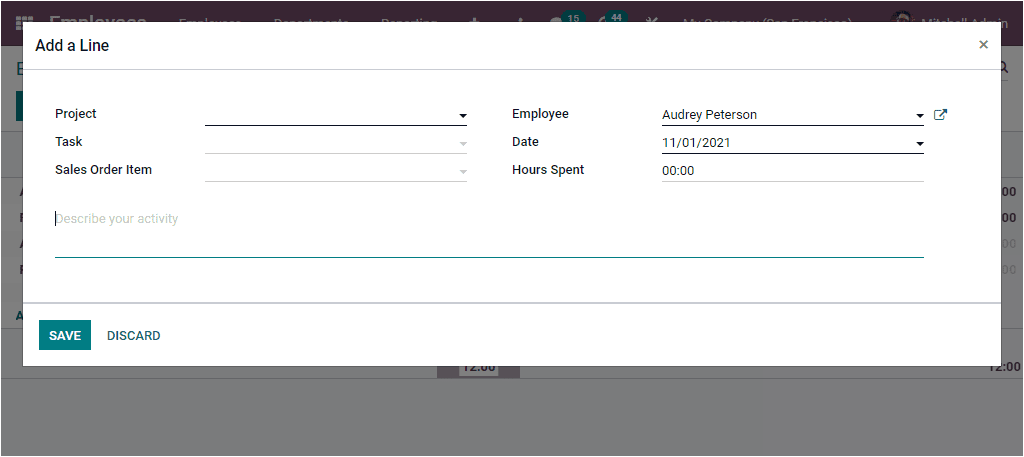
It is the Kanban view of the Timesheet window where you can view all the described timesheet operations. You have various default and customizable options such as Filters, Group By, Favourite, and Search options that allow you to sort out your data quickly. For creating a new Timesheet operation, you have to press the Add a line icon available. Upon selecting this icon, you will depict a pop-up window to add the timesheet description. You can fill up the specific project details on which the time has been sent. Then you can allocate the task of the project along with the Sale Order Item. Moreover, you can assign the Hours spent field. The Employee and Date will be auto allocated. Furthermore, you can include a customized description of your project in the Describe your activity field.
Odoo also manages the timesheet operations in the List format. The List view of the Timesheet window will include all the described Timesheet operations along with the details of Date, Project, Task, Description, and Hours spent.
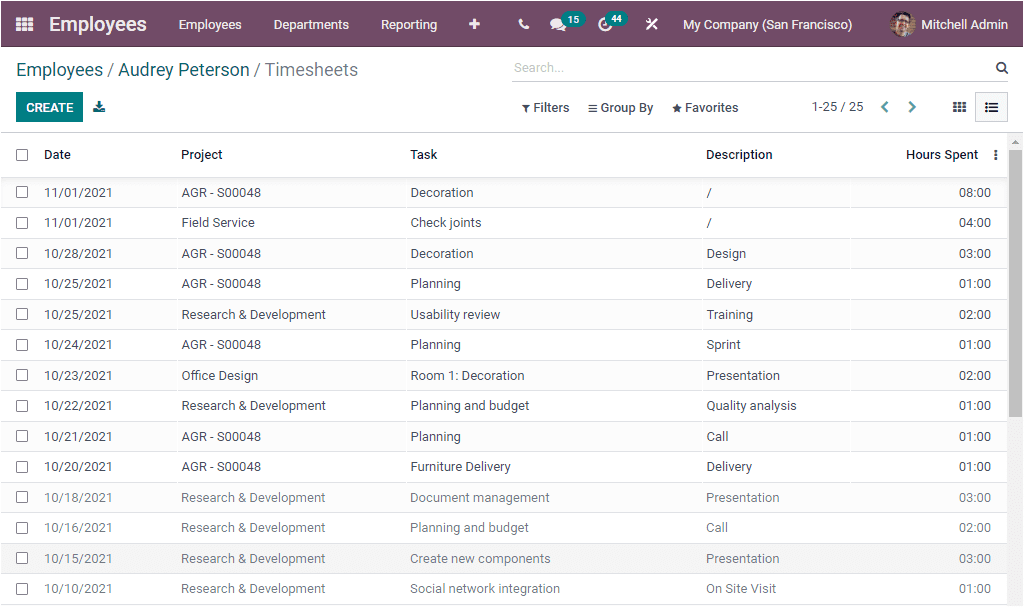
You can view each of the records in detail by clicking on the respective one. You can click on the CREATE icon to create a new timesheet operation.
Contracts
The Contracts window can also be directly accessed from the Employee's window. Under the Contracts window of the respective Employee, you can view the Contracts history of that particular Employee.
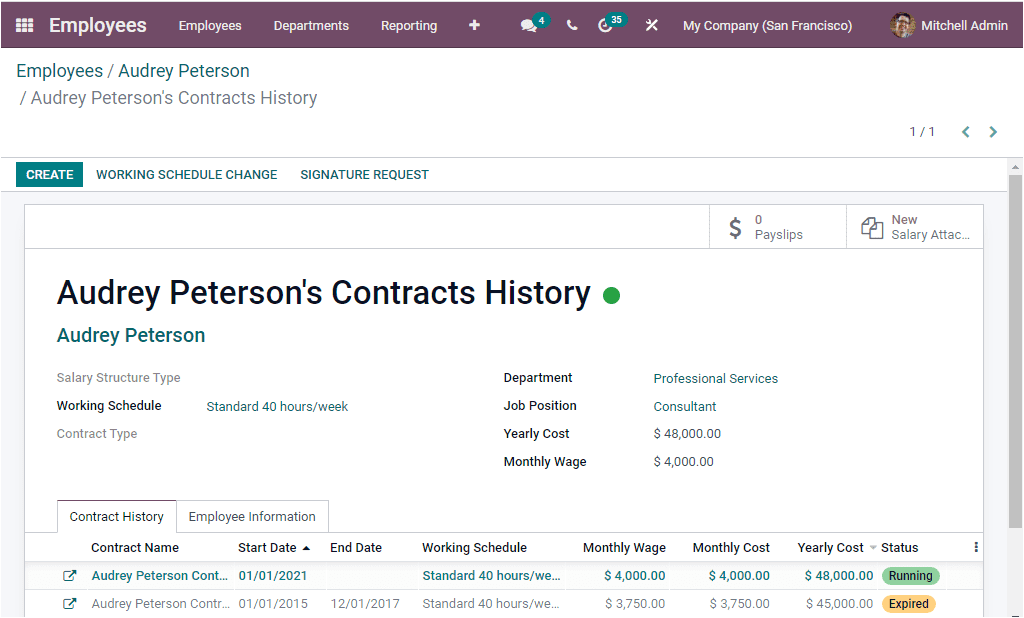
Odoo also manages the Contract history of every Employee in a separate menu. Under the Employees tab of the Odoo Employees module, you can access two menus such as Contracts and All Contracts. When you click on the Contracts menu, you will navigate to the Contracts window as depicted below.
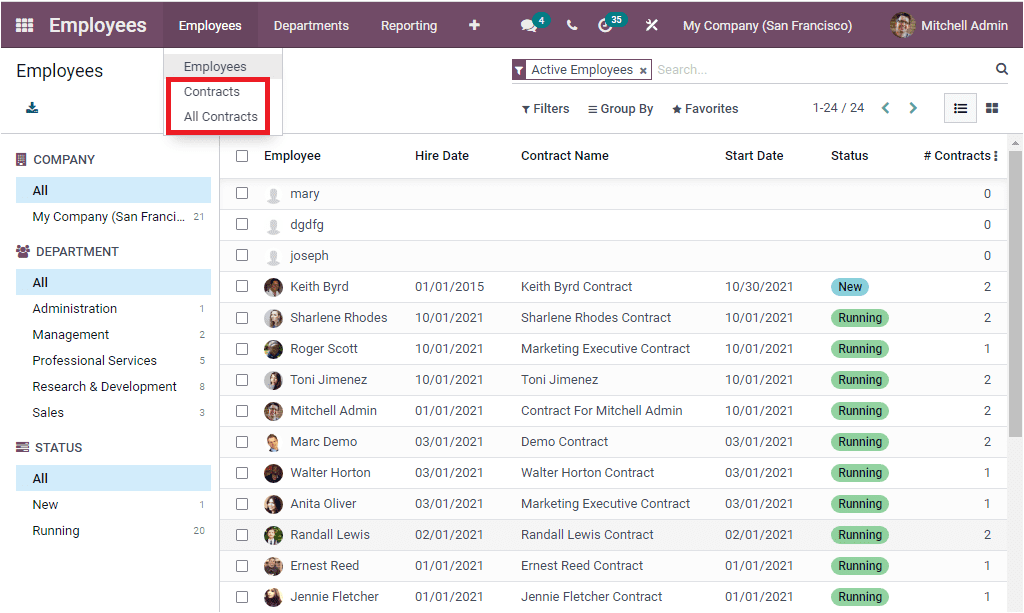
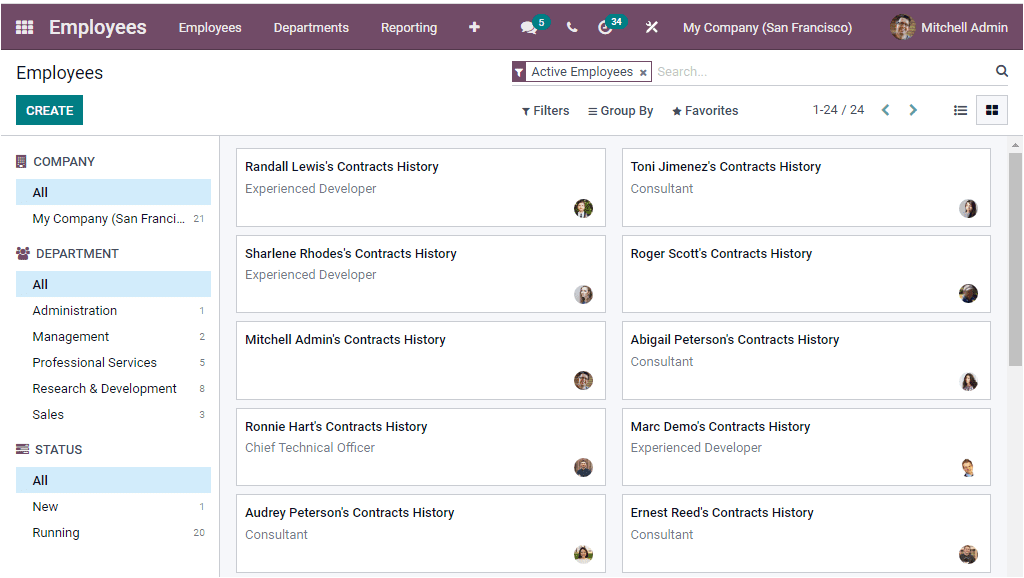
In this Contract window, Odoo depicts all the employee contracts along with the details such as Employee, Hire Date, Contract Name, Start Date, Status, Number of Contracts. The window allows you to view the Employee Contracts history Company, Department, and Status basis. You can view each of the contract histories by clicking on the respective record. In addition, you can use Filters for viewing contracts based on criteria. Here you have the default Filters options such as Running Contracts, Contracts to Review, No Contracts, Part-Time, Currently Under Contract, and Active Employees. The Add Custom Filter option allows you to customize new filters. Likewise, you can group the contract records using the Group By option available. Here also you have predefined and customizable options. The default options are Job Position, Status, Reference Working Time, and Salary Structure Type. Furthermore, you have the Favourites menu where also you have so many options such as Save current search, Import records, Link menu in spreadsheet, Add to my dashboard, and Add to Google Spreadsheet. Similarly, you can access this window in both Kanban and List format. The Kanban view of the Employees contracts window is depicted below.
Now let us have a look into the All Contracts window.