-
- Abundante
- Adquirentes de pagos
- Ajustes
- Analítica
- Citas en línea
- Comercio Electrónico del Sitio Web de Odoo
- Configuración el Sitio Web de Comercio Electónnico
- Diseñe la Página de Su Sitio Web
- Gestión de Productos
- Gestión de Varios Idiomas
- Grupos
- Herramientas de fragmento
- Lista de precios
- Listado de productos
- Métodos de envío
- Múltiples compañías
- Múltiples sitios web
- Operaciones de blog en backd
- Pedido
- Personalización de la Página del Catálogo de productos
- Personalización del catálogo de productos
- Personalizar el menú y las apariencias
- Porcos
- Programas de cupón y promoción
- Publicar contenido específico para el sitio web
- RedirracionAmiento
- Salas de chat
- Sesión de Productos en la PESTAÑA CONFIGURACIÓN
- Sitio Web
- Tablero de Comercio Electrónico
- Tarjeta de Regalo
- Twitter Wall
- Visitantes
- Vistas de la Página
-
- Activo
- Adquirentes de pagos
- Biblioteca de contabilidad
- Catálogo de cuentas
- Conabilidad miscelána
- Configuración de Datos Bancario
- Contabilidad
- Contábilidad analíta
- Diario
- Estados de Cuenta Bancario
- Factura de Clientes al Pago
- Fechas de Bloqueo
- Fiscales de posiciones
- Gastos de Empleados
- Informa de de Socios
- Informa de seguimiento
- Informa en contabilidad
- Ingresos y Gastos Diferidos
- Mandatos de débito directo
- Notas de Crédito
- Pagos
- Pagos por lotes
- Presupuesto
- Reconciliatura
- Redondeo en efectivo
- Tablero de contabilidad
- Tipos de contabilidad
- Transferencias automáticas
- Términos de Pago
-
- Abundante
- Adquisico de Plomo
- CREACIÓN DE COTIZACIONES DE VENTAS
- CRM
- Caracteríssticas de Odoo 15 CRM
- Convertir LOS Cables en Oportunidades
- Cómo Odoo CRM Gestiona Las Oportunidades Perdidas
- FluJo de trabajo general de Odoo CRM
- Formulario de generación de plomo múltiples fuentes
- Funcionando -Con Clientes Potenciales
- Manejo de Liderazgo
- Nuevas Opciones en la ventana de configuración de Odoo 15
-
- Análisis de producción
- CREANDO CENTROS DE TRABAJO
- Fabricación
- Facturas de materiales
- Gestión de Chatarra
- Gestión de Mantenimiento
- Gestión de órdenes para no consultor
- Informe General de Efectividad del Equipo
- Pedidos de Fabricación
- Planificación de Pedidos Laborales por producción
- Planificación de órdenes de Trabajo por WorkCenter
- Programa de producció Maestra
- Órdenes de Trabajo
-
- Abundante
- Ajustes de Inventario
- Anuncios
- CARACTERÍSTICAS DEL MÓDULO DE INVENTARIO DE ODOO
- Categorizacia de productos
- Categorías de Almacenamiento
- Configuración del producto
- Confirmación de SMS en la Entrega
- Confirmación por Correo Electrónico en la Entrega
- Costos de Aterrizaje
- Empaquetado del producto
- Entrega
- Entregar Paquetes
- Estategias de Eliminación
- Gestión de Almacenes
- Gestión de Chatarra
- Integrando el Remitente de Terceros en Odoo
- Inventario
- Operaciones de inventario
- Planificadores
- Reglas de Caída
- Reglas y rutas
- Tiempos de Programació
- Trazabilidad del Producto
- Ubicacia
- Unidad de Medida
- Variantes de productos
-
- APEGO Salarial
- Abundante
- Configuración
- Contratos
- Entradas de Trabajo
- Estructuras salariales
- Información personal
- Nómina de Odoo
- OTROS TIPOS DE ENTRADA
- Parámetros de la regla salarial
- Reanudar
- Salarios de reglas
- Salpicaduras
- Tablero
- Tiempos de Trabajo
- Tipo de estructura salarial
- Tipos de Entrada de Trabajo
- Ventajas
Accounting - Odoo 15 Enterprise Book
Customer Invoice to Payment
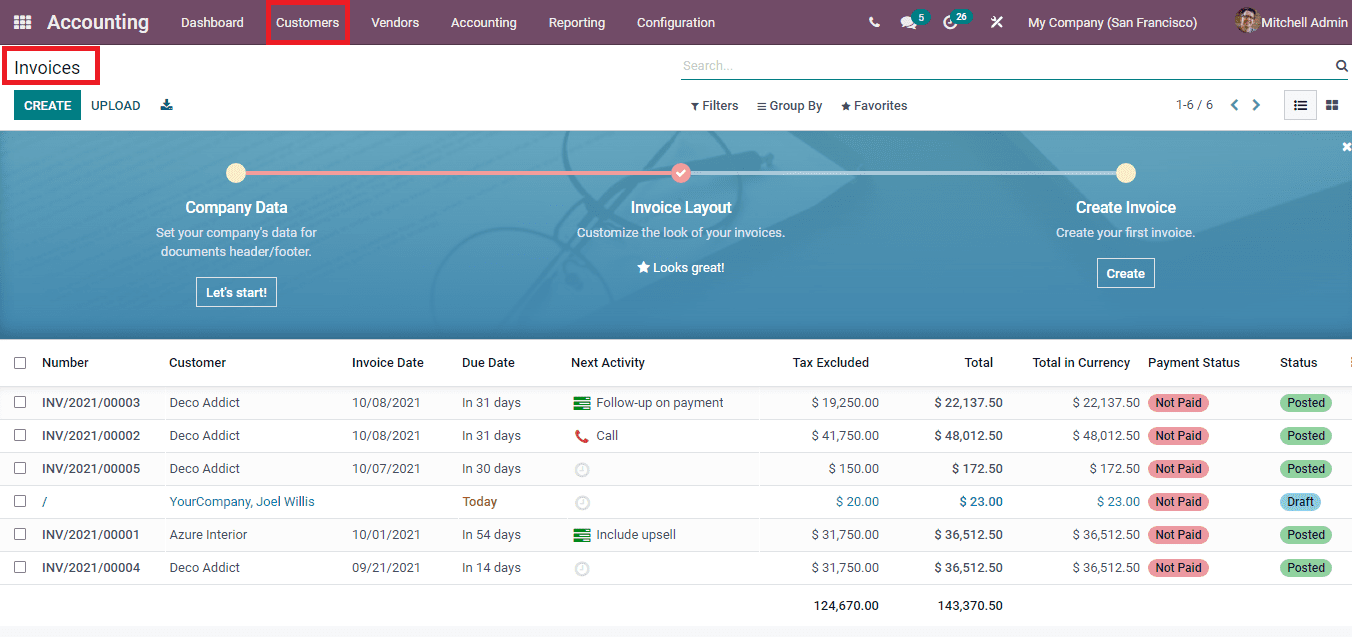
Al seleccionar la opción de facturas en la pestaña CLIENTES, puede ver las facturas que han realizado la empresa.Los detalles de las facturas que se muestran en la lista incluyen el número de la factura, el nombre del cliente a quien se envía la factura, fecha de factura, fecha de vencimiento de la factura, próxima actividad programada, cantidad de impuestos excluidos, monto total,Monto total en moneda, estado de pago de la factura y estado de la factura.Se pueden ver más detalles de cada factura seleccionando el.También puede hacer cambios y agregar información editando las facturas.
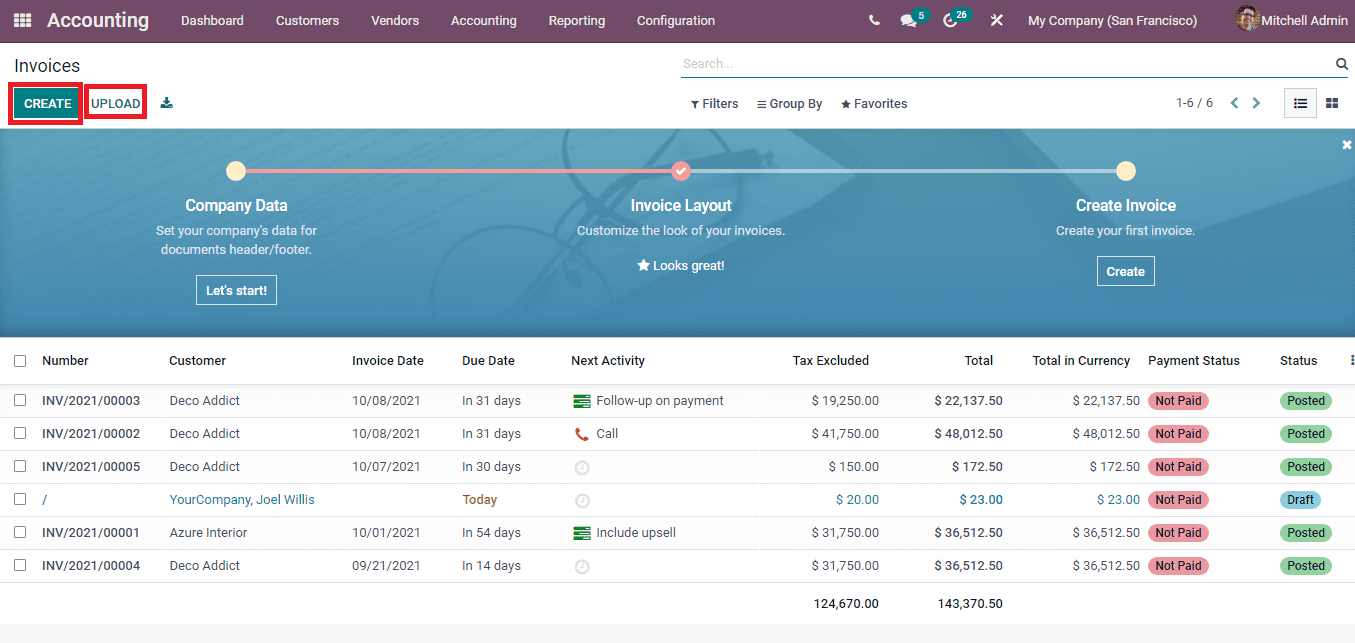
Para crear una nueva factura, seleccione el botón Crear.En la ventana de la nueva factura, ingrese los detalles relevantes en los campos proporcionados.La misma acción se puede realizar seleccionando el nuevo botón de factura en el tablero.Las facturas también se pueden cargar desde el sistema seleccionando el botón de carga.
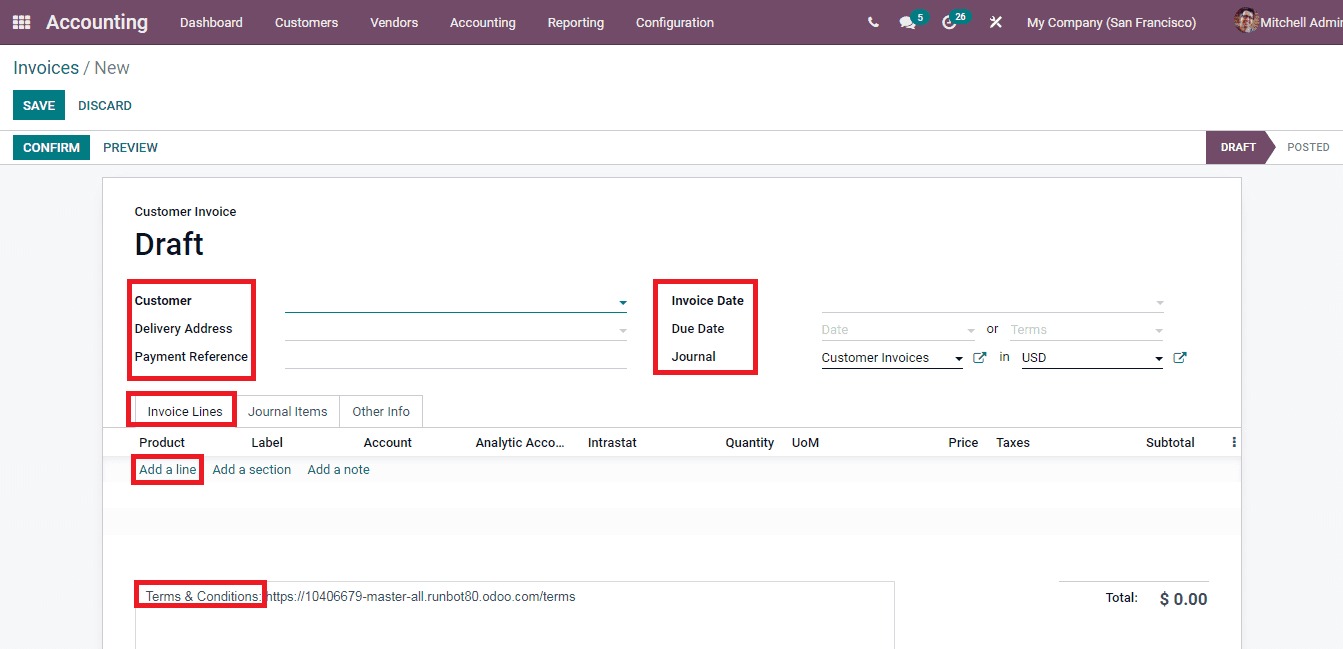
Puede realizar el borrador de la factura agregando los detalles, como el nombre del cliente, la dirección de entrega, la referencia de pago, la fecha de la factura, la fecha de vencimiento, la revista y la moneda utilizada.Otros campos que deben llenarse son líneas de factura, elementos de diario y otra información.En el menú de líneas de factura, agregue el nombre del producto, etiqueta, cuenta, cuenta analítica, intastat (si la transacción es entre dos países de la UE), cantidad, unidad de medición, precio, impuestos y cantidad subtotal.Se pueden incluir varios productos en el espacio proporcionado seleccionando Agregar una opción de línea.Se pueden establecer términos y condiciones de la empresa en el campo proporcionado.También puede configurar y establecer los términos y condiciones que deben mostrarse desde la pestaña Configuración.
En los elementos del diario, agregue la cuenta, la etiqueta, el monto del débito, el monto del crédito y las redes fiscales.Se pueden agregar varias cuentas seleccionando la opción Agregar una línea y la cantidad se puede acreditar o debitar en múltiples cuentas con una sola factura.

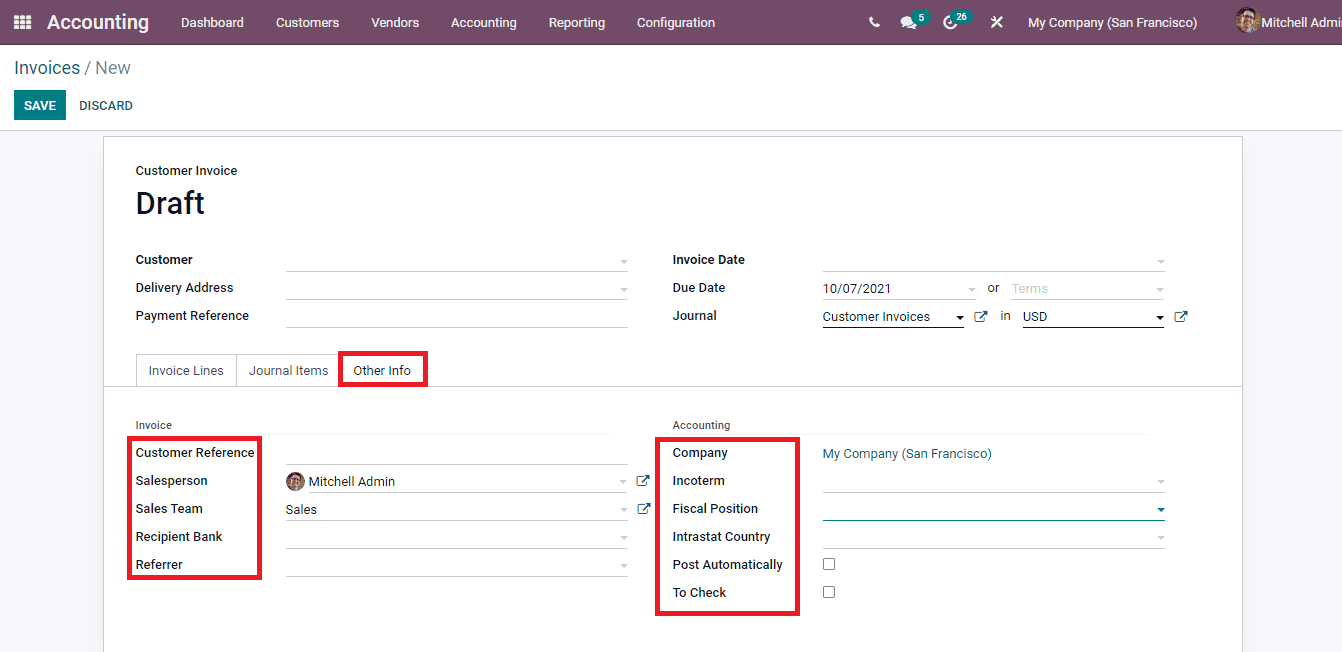
The details that have to be added at the Other Info menu are Customer Reference, name of the Salesperson, Sales Team, Recipient Bank, Referrer, name of the Company, Incoterm, Fiscal Position, Intrastat Country, whether the invoice should be Posted Automatically or not, and whether the information entered in this specific invoice should be Checked again or not.
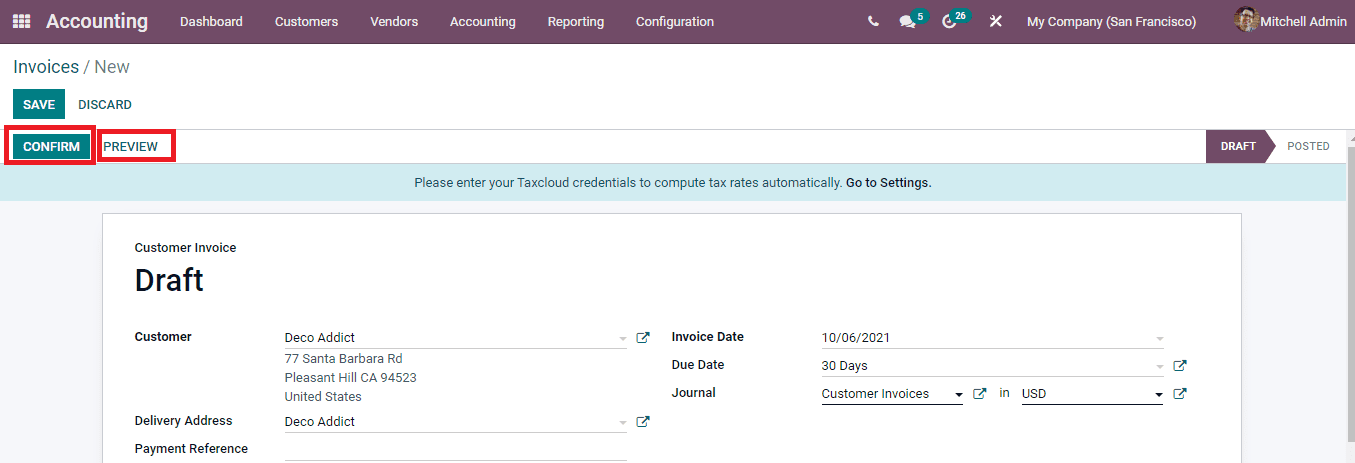
After entering all the relevant information in the form you can view the preview of the invoice by selecting the PREVIEW button. This will give you a picture of what the customer will be receiving. After checking the preview if satisfied you can click on the CONFIRM button to change the status of the invoice from DRAFT to POSTED.
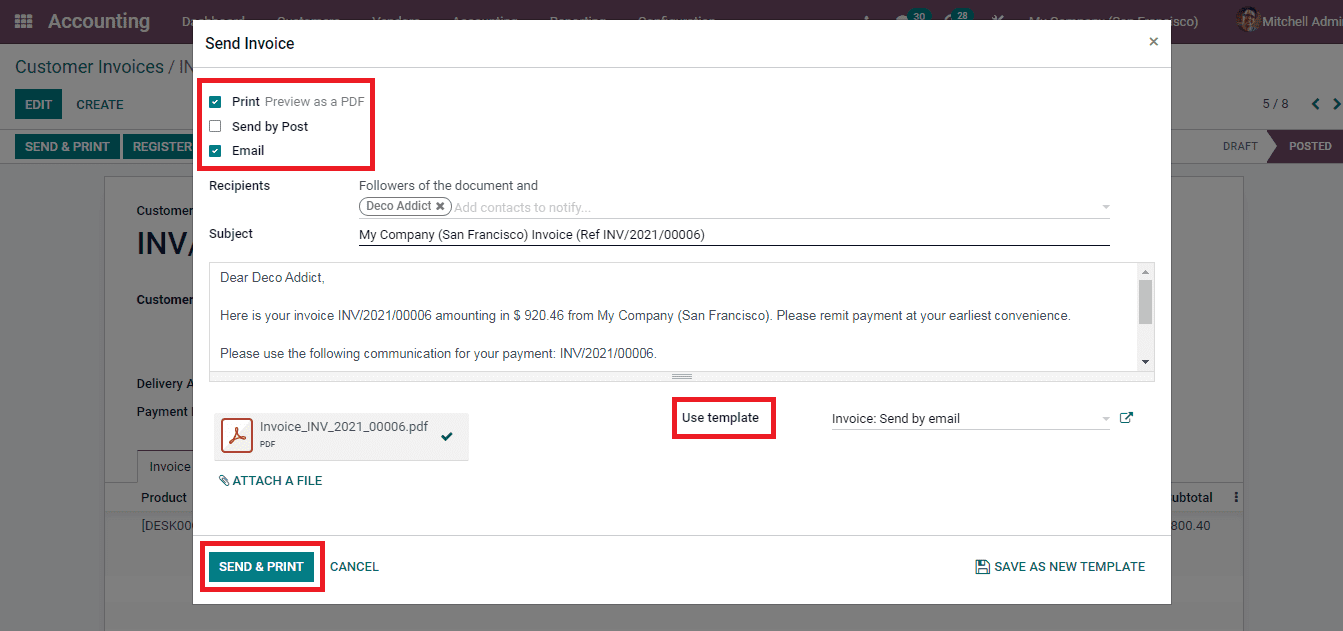
You can send as well as print the invoice by selecting the SEND & PRINT button. The Send Invoice window will pop up, where you will have to enter the details such as whether the invoice must be Printed, Send by Post, or send by Email. Then add the Recipients of the email, Subject of the email and add the message that has to be sent along with the invoice. Templates can be chosen from the already configured templates. Click on the SEND & Print button to send your invoice to the customer.
When the customer makes the payment you can record it in the invoice by selecting the REGISTER PAYMENT button. At the popped up Register Payment window enter the information regarding the payment such as the Journal, Payment Method used, Recipient Bank Account, Amount, Currency used, Payment Date and Memo. Press the CREATE PAYMENT button to register the payment.

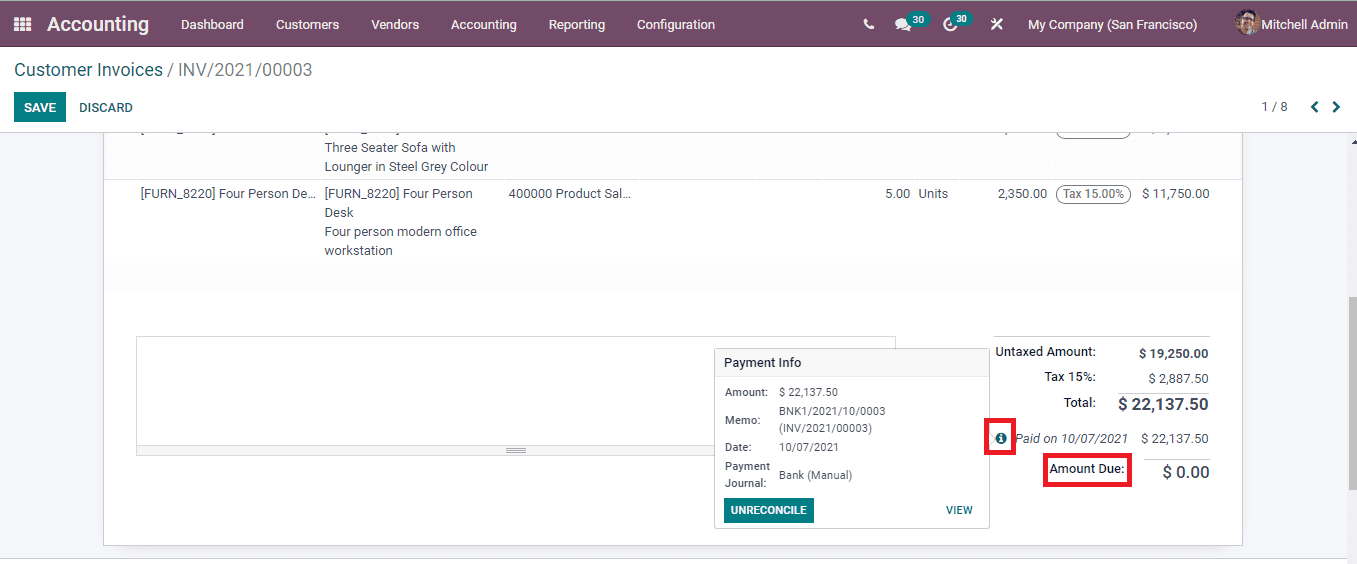
After registering the payment the invoice gets a badge of IN PAYMENT. At the invoice profile , under the Invoice Lines menu you can see the Paid amount and Amount Due. Next to the Paid amount is situated an information icon, by selecting it, you can view the details of the payment in a nutshell. The state of the payment will be changed automatically to Paid after the reconciliation process.
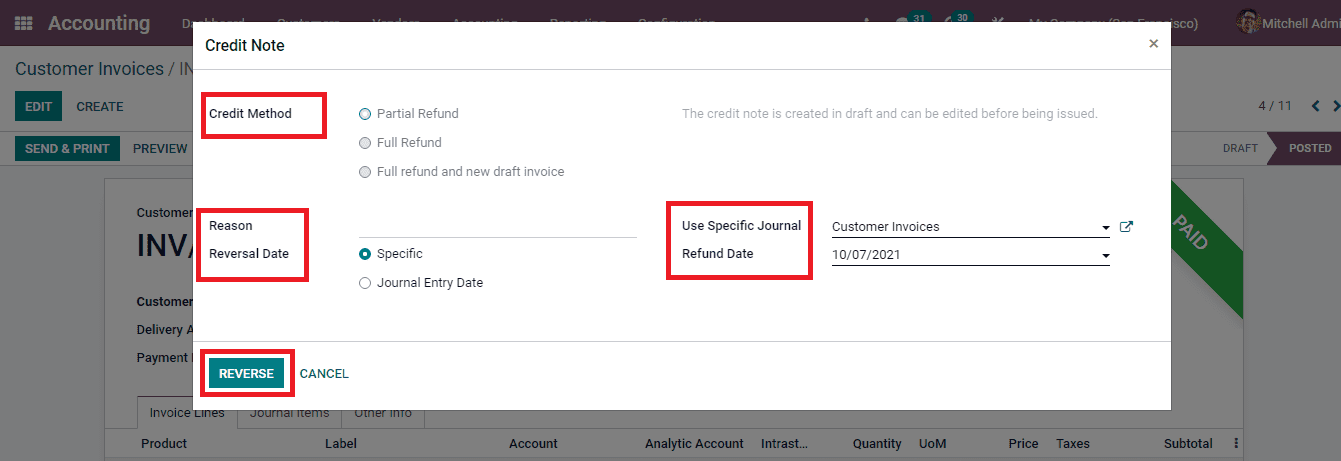
In cases where you wanted to add credit notes to the invoice, you can select the ADD CREDIT NOTE option. At the displayed Credit Note pop up window, enter the details such as the Credit Method whether it is a partial refund, full refund or full refund and new draft invoice), the Reason for refunding, Reversal Date ( specific or journal entry date), Specific Journal and Refund Date. In the Odoo 15 Accounting module, the credit notes are created in drafts You can edit it before issuing the credit note. After entering all the relevant information, select the REVERSE button to add the credit note to the accounts.
Like adding credit notes to the invoice you can also add debit notes to the invoice for reminding the customer about an immediate payment. In the Odoo 15 Accounting module you can create debit notes by selecting the ADD DEBIT NOTES. The Debit Note pop up window will appear. Here you will have to enter details such as the Reason for adding debit note, Debit Note Date, whether to Copy Line and the Specific Journal. After entering the details select the CREATE DEBIT NOTE button to record the debit note.

The invoice can be printed with or without payments by selecting the Print option. Actions such as Generate a Payment Link and Switch Into Refund/ Credit Note can be undertaken using the Action option.

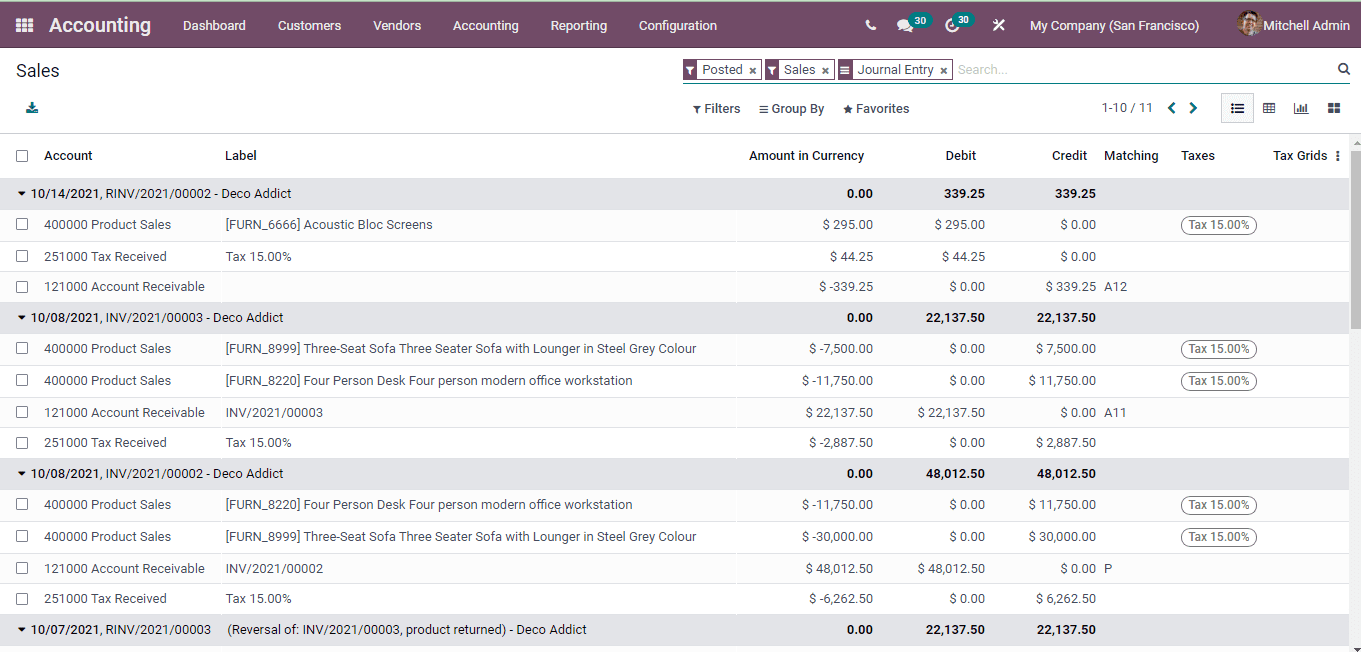
The journal entry for registering the payment will be automatically added to the journals. To view this, you can select the Sales option from the Accounting tab.
