-
- Abundante
- Adquirentes de pagos
- Ajustes
- Analítica
- Citas en línea
- Comercio Electrónico del Sitio Web de Odoo
- Configuración el Sitio Web de Comercio Electónnico
- Diseñe la Página de Su Sitio Web
- Gestión de Productos
- Gestión de Varios Idiomas
- Grupos
- Herramientas de fragmento
- Lista de precios
- Listado de productos
- Métodos de envío
- Múltiples compañías
- Múltiples sitios web
- Operaciones de blog en backd
- Pedido
- Personalización de la Página del Catálogo de productos
- Personalización del catálogo de productos
- Personalizar el menú y las apariencias
- Porcos
- Programas de cupón y promoción
- Publicar contenido específico para el sitio web
- RedirracionAmiento
- Salas de chat
- Sesión de Productos en la PESTAÑA CONFIGURACIÓN
- Sitio Web
- Tablero de Comercio Electrónico
- Tarjeta de Regalo
- Twitter Wall
- Visitantes
- Vistas de la Página
-
- Activo
- Adquirentes de pagos
- Biblioteca de contabilidad
- Catálogo de cuentas
- Conabilidad miscelána
- Configuración de Datos Bancario
- Contabilidad
- Contábilidad analíta
- Diario
- Estados de Cuenta Bancario
- Factura de Clientes al Pago
- Fechas de Bloqueo
- Fiscales de posiciones
- Gastos de Empleados
- Informa de de Socios
- Informa de seguimiento
- Informa en contabilidad
- Ingresos y Gastos Diferidos
- Mandatos de débito directo
- Notas de Crédito
- Pagos
- Pagos por lotes
- Presupuesto
- Reconciliatura
- Redondeo en efectivo
- Tablero de contabilidad
- Tipos de contabilidad
- Transferencias automáticas
- Términos de Pago
-
- Abundante
- Adquisico de Plomo
- CREACIÓN DE COTIZACIONES DE VENTAS
- CRM
- Caracteríssticas de Odoo 15 CRM
- Convertir LOS Cables en Oportunidades
- Cómo Odoo CRM Gestiona Las Oportunidades Perdidas
- FluJo de trabajo general de Odoo CRM
- Formulario de generación de plomo múltiples fuentes
- Funcionando -Con Clientes Potenciales
- Manejo de Liderazgo
- Nuevas Opciones en la ventana de configuración de Odoo 15
-
- Análisis de producción
- CREANDO CENTROS DE TRABAJO
- Fabricación
- Facturas de materiales
- Gestión de Chatarra
- Gestión de Mantenimiento
- Gestión de órdenes para no consultor
- Informe General de Efectividad del Equipo
- Pedidos de Fabricación
- Planificación de Pedidos Laborales por producción
- Planificación de órdenes de Trabajo por WorkCenter
- Programa de producció Maestra
- Órdenes de Trabajo
-
- Abundante
- Ajustes de Inventario
- Anuncios
- CARACTERÍSTICAS DEL MÓDULO DE INVENTARIO DE ODOO
- Categorizacia de productos
- Categorías de Almacenamiento
- Configuración del producto
- Confirmación de SMS en la Entrega
- Confirmación por Correo Electrónico en la Entrega
- Costos de Aterrizaje
- Empaquetado del producto
- Entrega
- Entregar Paquetes
- Estategias de Eliminación
- Gestión de Almacenes
- Gestión de Chatarra
- Integrando el Remitente de Terceros en Odoo
- Inventario
- Operaciones de inventario
- Planificadores
- Reglas de Caída
- Reglas y rutas
- Tiempos de Programació
- Trazabilidad del Producto
- Ubicacia
- Unidad de Medida
- Variantes de productos
-
- APEGO Salarial
- Abundante
- Configuración
- Contratos
- Entradas de Trabajo
- Estructuras salariales
- Información personal
- Nómina de Odoo
- OTROS TIPOS DE ENTRADA
- Parámetros de la regla salarial
- Reanudar
- Salarios de reglas
- Salpicaduras
- Tablero
- Tiempos de Trabajo
- Tipo de estructura salarial
- Tipos de Entrada de Trabajo
- Ventajas
Odoo eLearning - Odoo 15 Enterprise Book
How to define a new Course in Odoo eLearning?
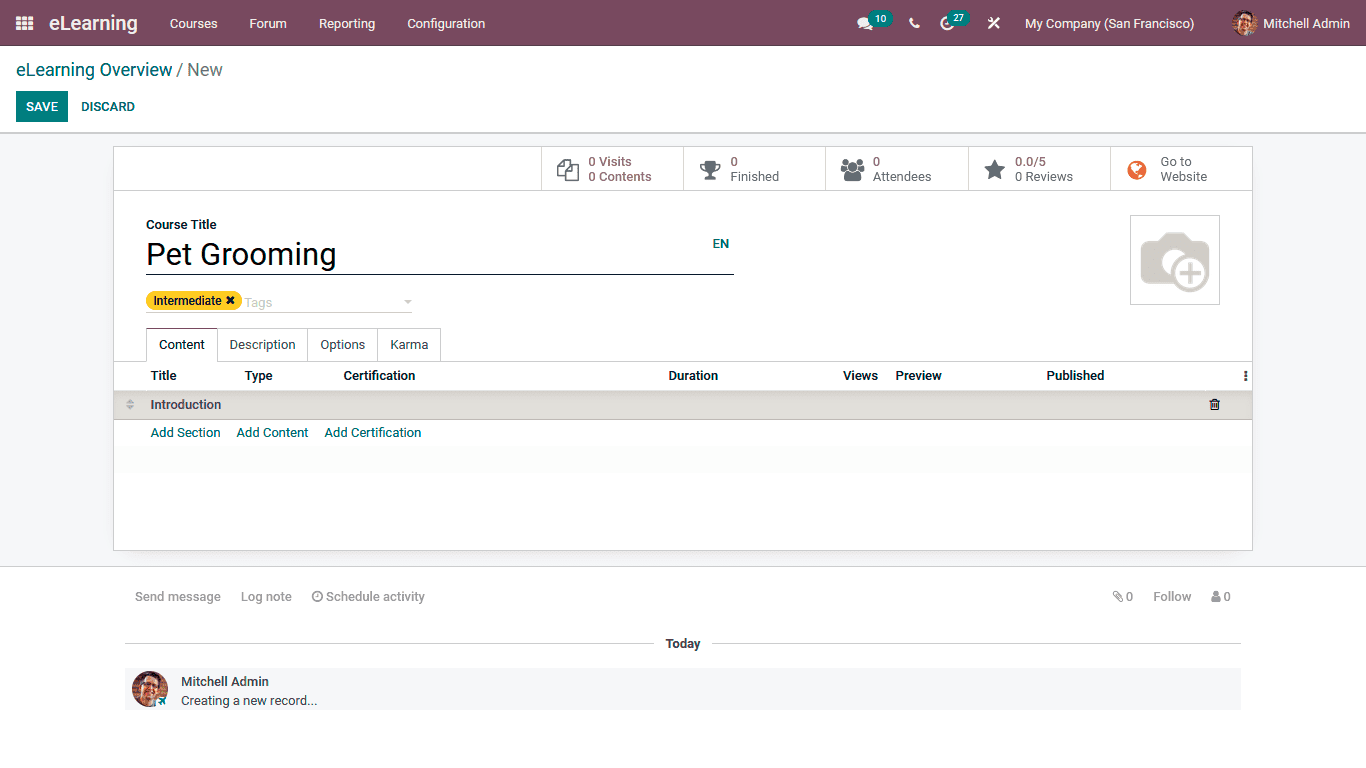
Defining a new Course with the help of the Odoo eLearning module quickly by selecting the Create option which is available in the eLearning Dashboard. Then you will be depicted with the Creation window as shown in the following image. Here, you will have to initially provide the Title Name of the Course and the Tags allocated. Moreover, in the Course Menu, it can be defined as Intermediate, Beginner, or Professional in the Tabs. The custom Tags can be determined based on the need. Under the Contents tab, the Course Content can be described. Initially, the Content Section should be defined to select the Add Section option available.
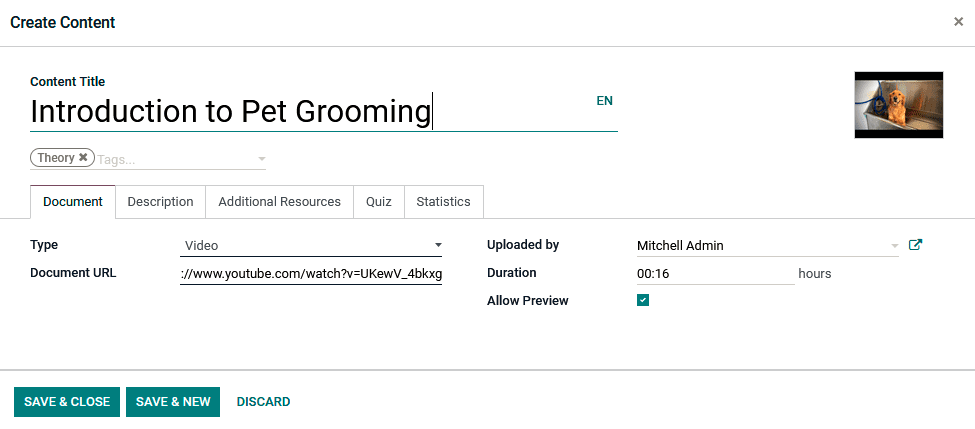
Once the Sections are being added, the respective Contents can be added to the distinctive section; for that, you can select the Add Content option that is available. To add the Contents, you will be depicted with the following description window where the Content Title can be described along with the Tags allocated. Further, the Content-type can be defined as Document, Video, Webpage, Presentation, or Quiz. Additionally, a link or the URL can be provided for accessing the Content. The Uploaded By responsible person and the Duration of the Content in case of a Video or an Audio will be described. If the Content Preview is to be depicted to the candidates, the Allow Preview option can be defined.
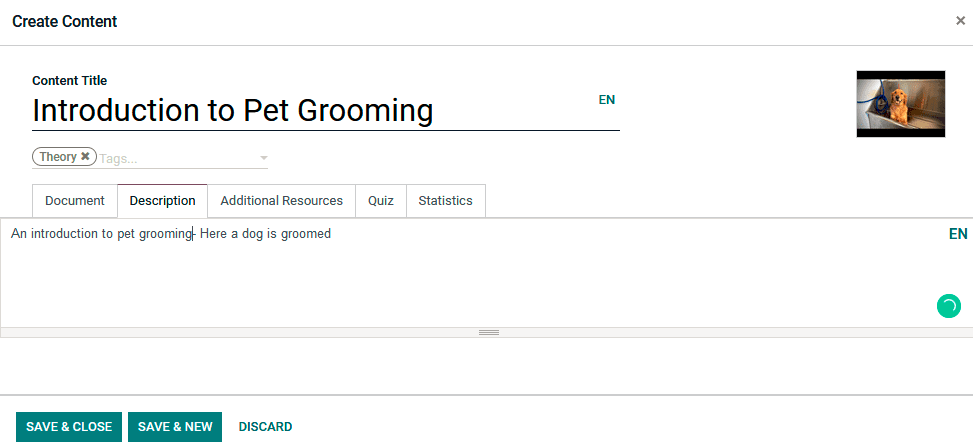
Additionally, in the Description tag of the respective Content, a detailed, informative description can be provided, depicting the candidates initially.
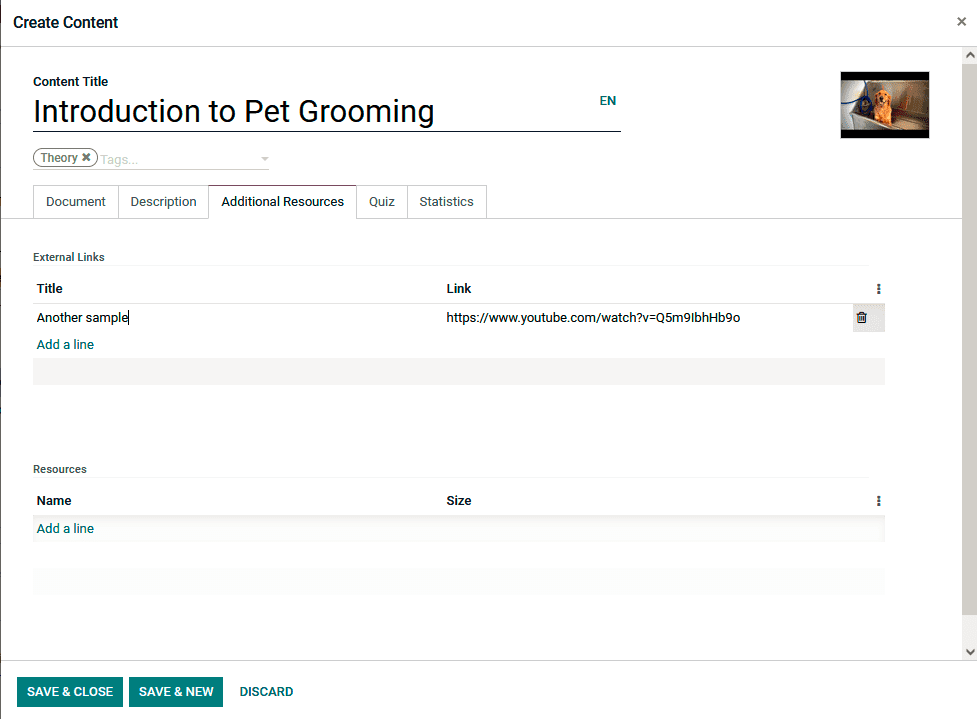
Regarding the Configuration of the Additional Resources regarding Content, it can be defined in the tab where the External Links and the Resources can be defined. The External Link Title and the Link can be defined by selecting the Add a line option. In the case of the Resources, the same Add an a line option is also available.
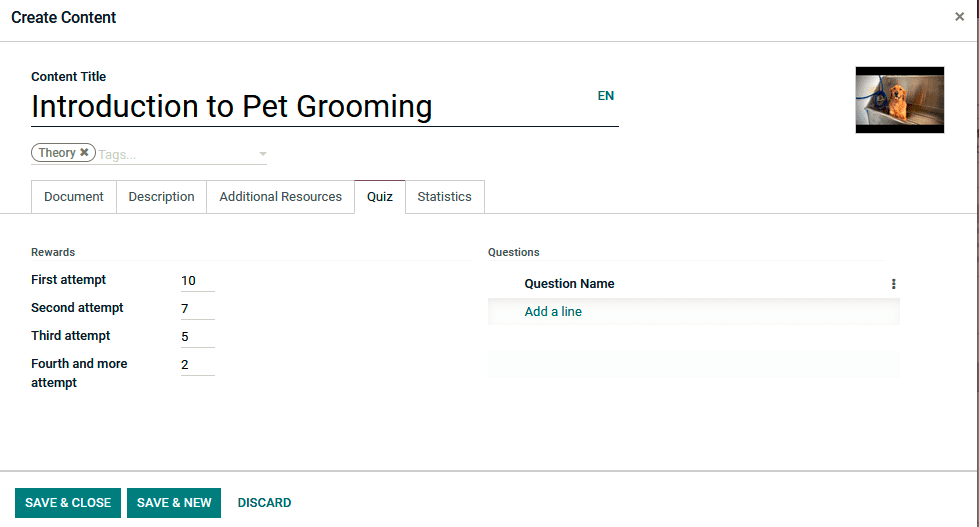
The Rewards and the Question can be defined under the Quiz tab, the Rewards and the Question can be determined. Here the Rewards for the First attempt, Second attempt, Third attempt, and Fourth attempt can be described. Further, under the Questions, the Question of the Quizzes can be defined by selecting the Add a line option available.
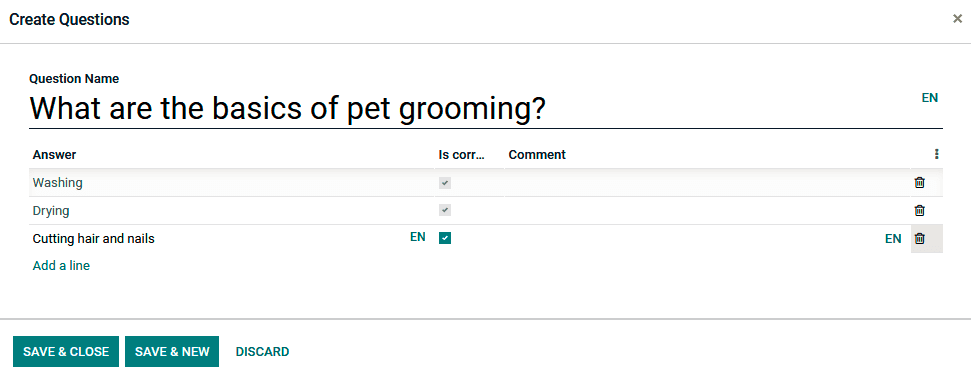
Upon selecting to add a Question using the Add a line option, you will be depicted with the Question configuration window in the following screenshot. Here, the Question Name and the Answers can be defined. If the respective answers defined are correct, the option can be enabled.
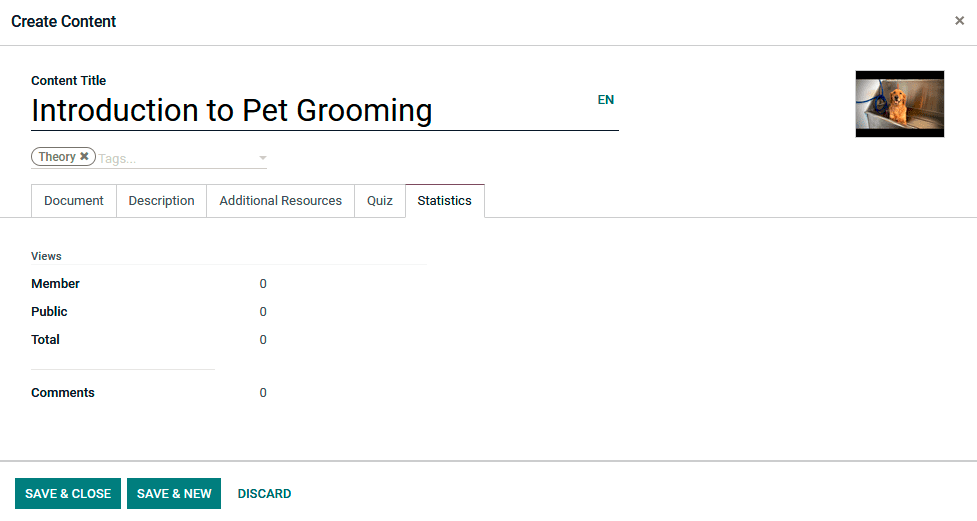
Once the Questions have been defined for the Quiz, the Save and Close options can be selected. Further in the Statistics menu of the View, details for the respective Content will be described. Here the number of Members who have viewed the content will be defined. Further, the total number of Public Members and the complete Total will be defined. In addition, the number of Comments being provided for the respective content will be depicted.
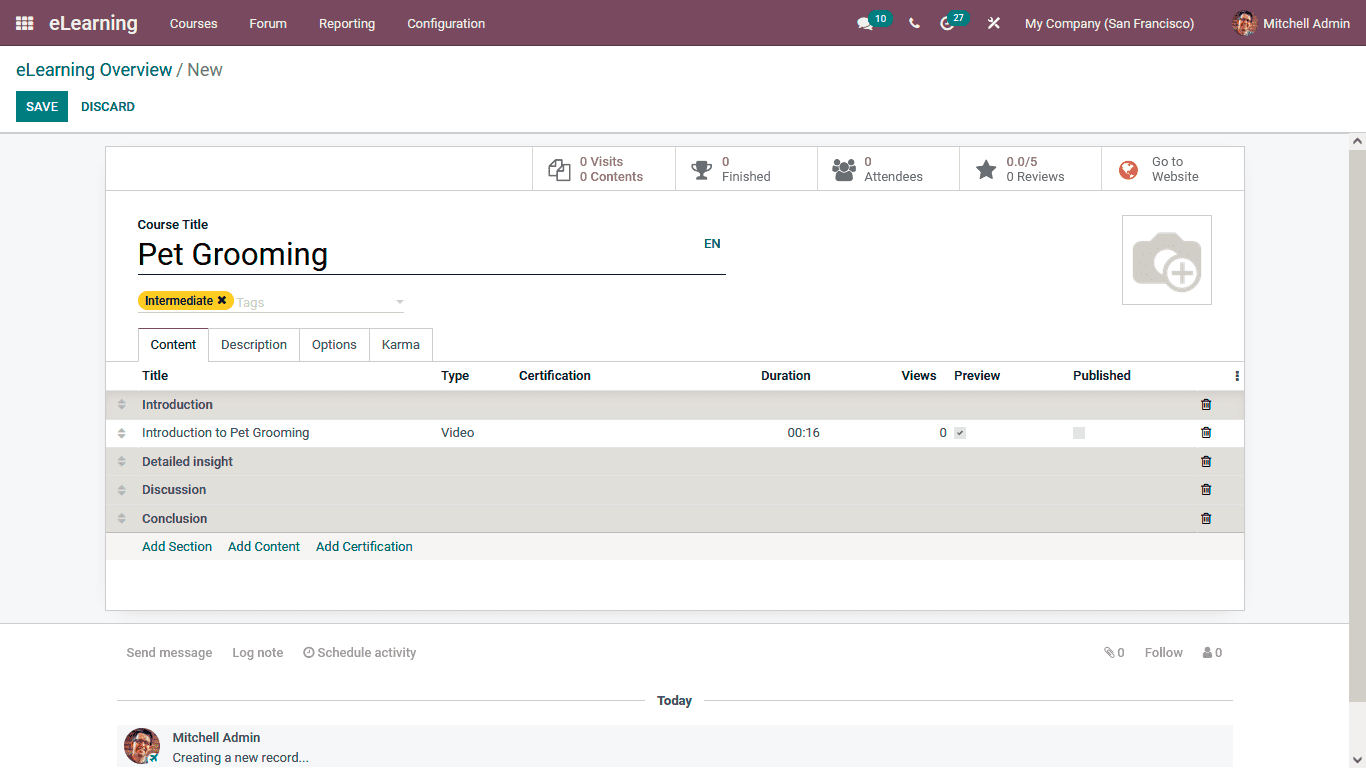
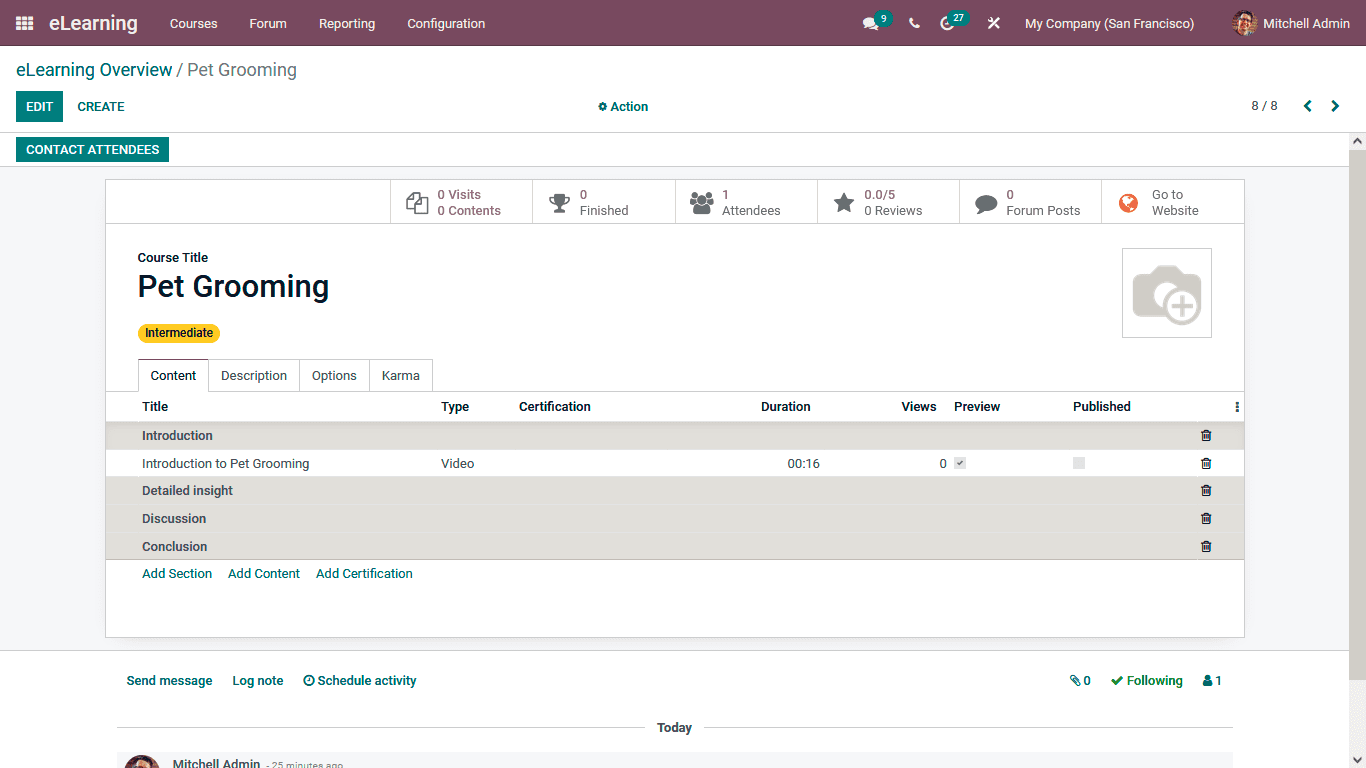
Once the Contents are described, they will all be depicted in the Content menu of the respective Couse being defined as in the following screenshot.
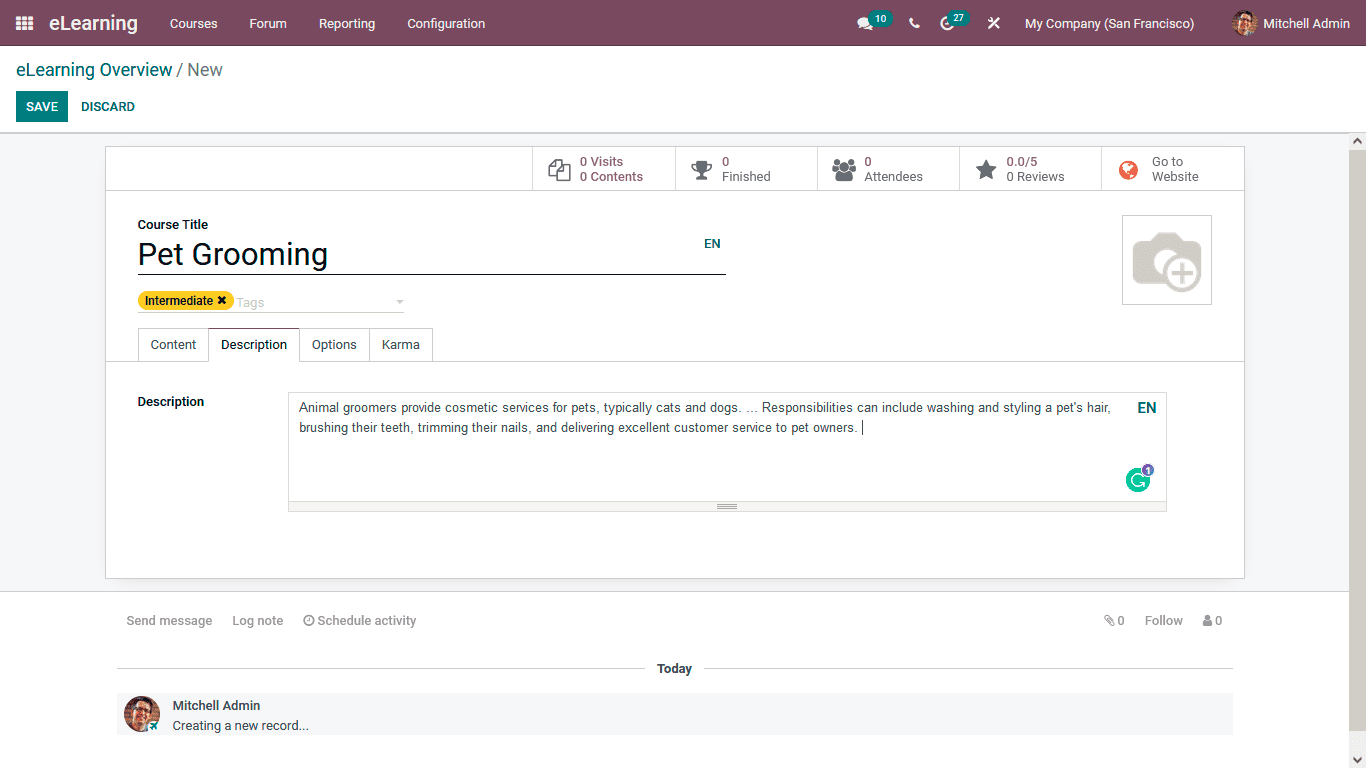
Under the description menu, the Course descriptions to be depicted to the candidates can be defined. Moreover, the Course content can be described in any language based on the language selected in the platform.
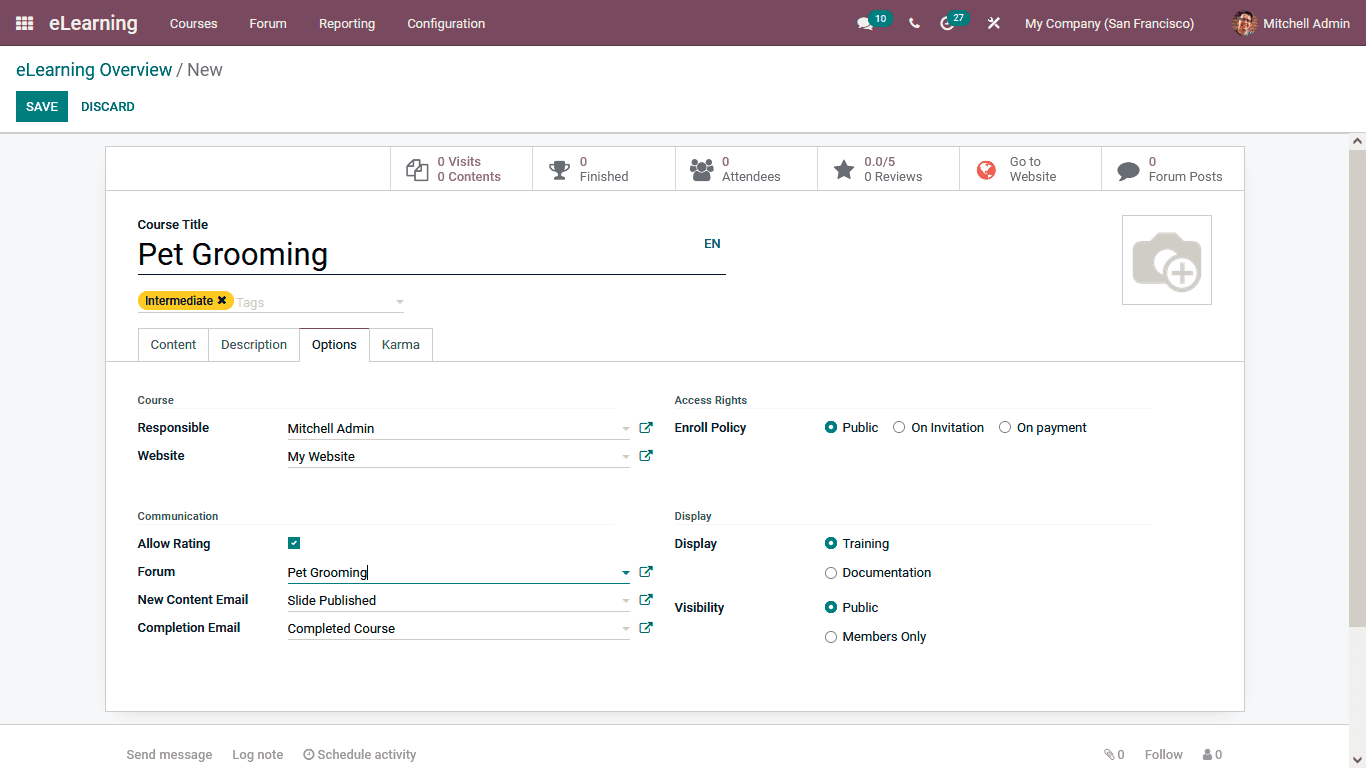
Under the Options tab of the Course creation just as depicted in the following screenshot, there are Course Configuration options such as Responsible Person and the Website in which the Course should be defined. Further, the Communications options such as the Allow Rating option can be enabled and disabled, as well as the Forum in which the respective Course should be discussed, can be defined. In addition, the New Content Email, as well as the Completion Email, can be determined. Additionally, under the Access Rights options, the Enroll Policy can be defined as Public, On Invitation, or On Payment. Under the Display options, it can be either defined as Training or Documentation. Moreover, the Visibility can be either set as Public or Members only.
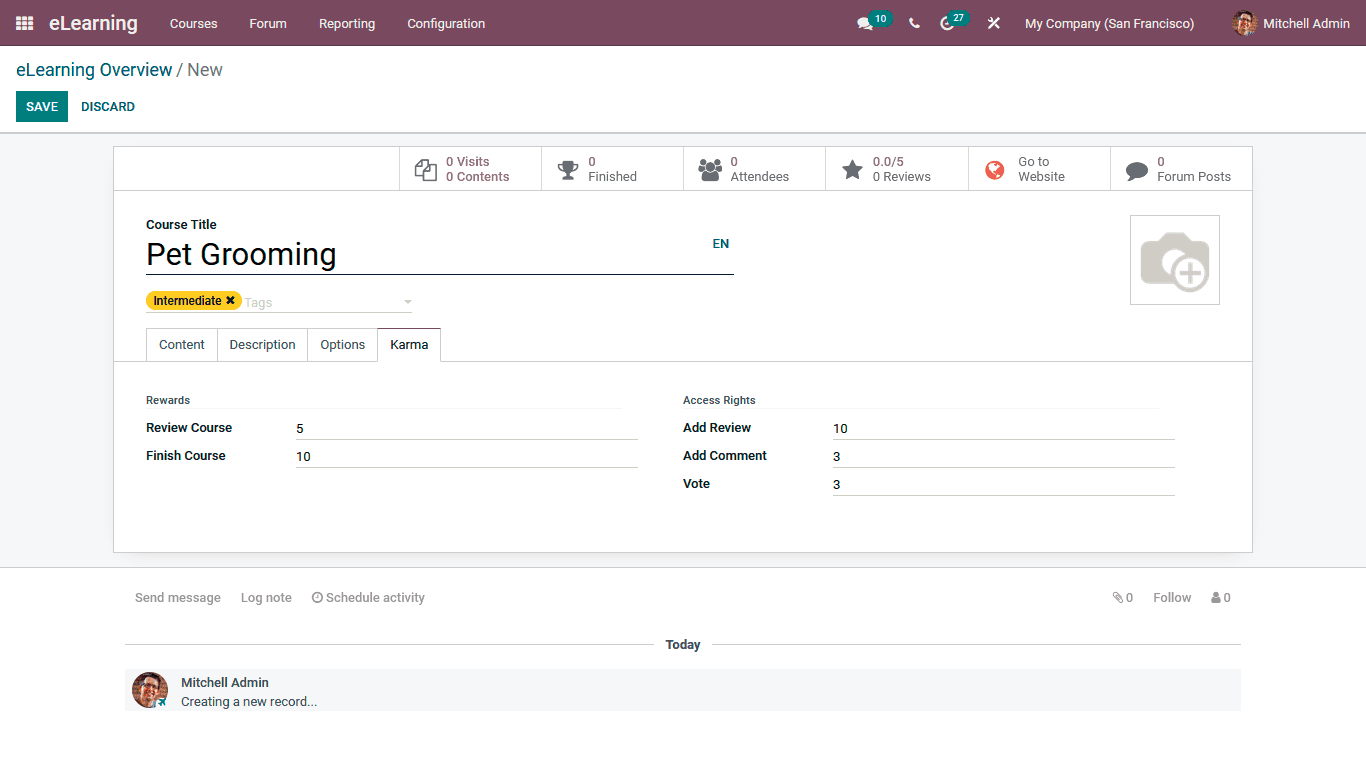
Further, the Karma options for the Course takers can be defined under the Karma menu where the Rewards for Review Course and the Finish Course details can be defined. In addition, the Access Rights such as the Add Review, Add Comment, and the reward for the Votes can also be defined.
All the Course content and the sections described will be defined in the respective Course menu as depicted in the following screenshot.
Once all the Course Content and the Configurations are completed, you can select the Go to Website options to view how the course is depicted to the visitors.
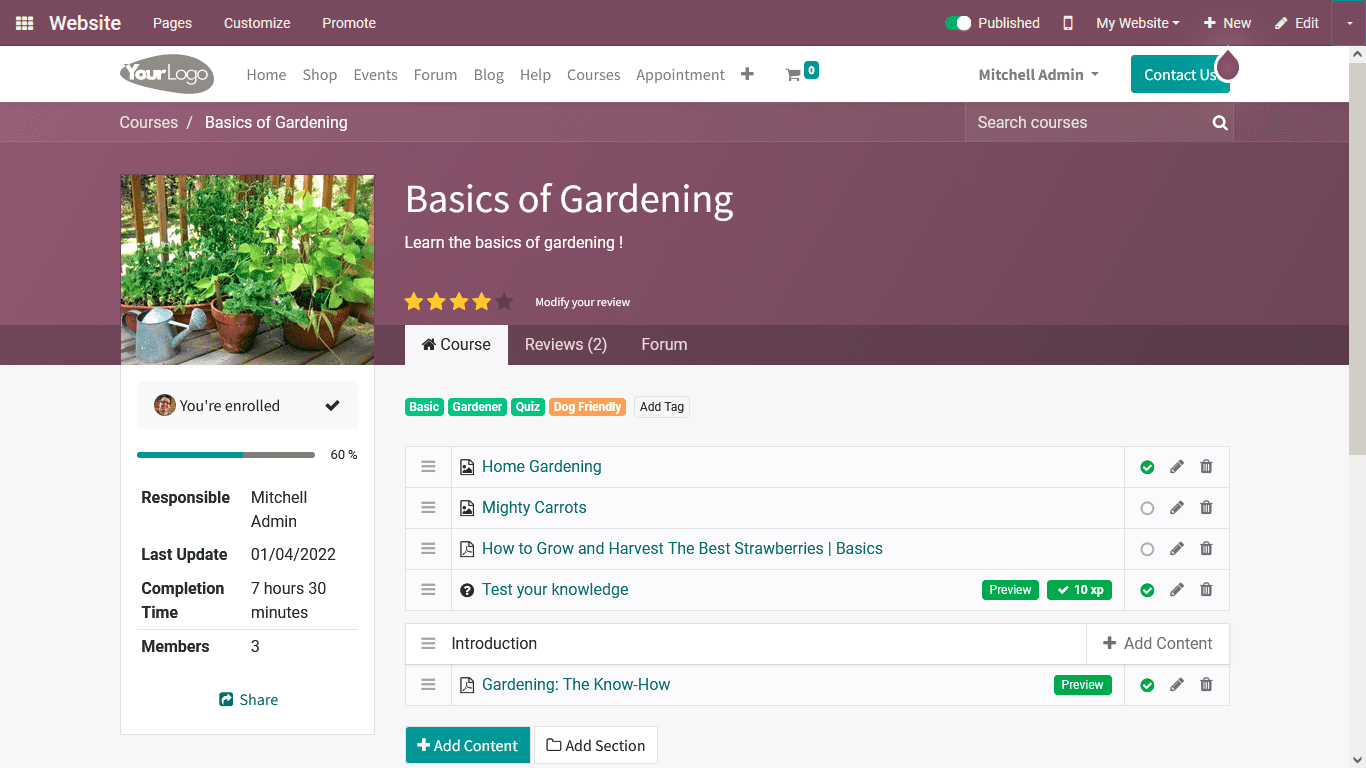
You will create multiple courses to be defined in the Odoo eLearning module. Once the Courses are defined with the help of definite tools, they can be effectively managed. You will now understand how the Courses can be created and defined in the Odoo eLearning module. Let now move on to the next section where the Configuration settings of the Odoo eLearning module have been described.