-
- Abundante
- Adquirentes de pagos
- Ajustes
- Analítica
- Citas en línea
- Comercio Electrónico del Sitio Web de Odoo
- Configuración el Sitio Web de Comercio Electónnico
- Diseñe la Página de Su Sitio Web
- Gestión de Productos
- Gestión de Varios Idiomas
- Grupos
- Herramientas de fragmento
- Lista de precios
- Listado de productos
- Métodos de envío
- Múltiples compañías
- Múltiples sitios web
- Operaciones de blog en backd
- Pedido
- Personalización de la Página del Catálogo de productos
- Personalización del catálogo de productos
- Personalizar el menú y las apariencias
- Porcos
- Programas de cupón y promoción
- Publicar contenido específico para el sitio web
- RedirracionAmiento
- Salas de chat
- Sesión de Productos en la PESTAÑA CONFIGURACIÓN
- Sitio Web
- Tablero de Comercio Electrónico
- Tarjeta de Regalo
- Twitter Wall
- Visitantes
- Vistas de la Página
-
- Activo
- Adquirentes de pagos
- Biblioteca de contabilidad
- Catálogo de cuentas
- Conabilidad miscelána
- Configuración de Datos Bancario
- Contabilidad
- Contábilidad analíta
- Diario
- Estados de Cuenta Bancario
- Factura de Clientes al Pago
- Fechas de Bloqueo
- Fiscales de posiciones
- Gastos de Empleados
- Informa de de Socios
- Informa de seguimiento
- Informa en contabilidad
- Ingresos y Gastos Diferidos
- Mandatos de débito directo
- Notas de Crédito
- Pagos
- Pagos por lotes
- Presupuesto
- Reconciliatura
- Redondeo en efectivo
- Tablero de contabilidad
- Tipos de contabilidad
- Transferencias automáticas
- Términos de Pago
-
- Abundante
- Adquisico de Plomo
- CREACIÓN DE COTIZACIONES DE VENTAS
- CRM
- Caracteríssticas de Odoo 15 CRM
- Convertir LOS Cables en Oportunidades
- Cómo Odoo CRM Gestiona Las Oportunidades Perdidas
- FluJo de trabajo general de Odoo CRM
- Formulario de generación de plomo múltiples fuentes
- Funcionando -Con Clientes Potenciales
- Manejo de Liderazgo
- Nuevas Opciones en la ventana de configuración de Odoo 15
-
- Análisis de producción
- CREANDO CENTROS DE TRABAJO
- Fabricación
- Facturas de materiales
- Gestión de Chatarra
- Gestión de Mantenimiento
- Gestión de órdenes para no consultor
- Informe General de Efectividad del Equipo
- Pedidos de Fabricación
- Planificación de Pedidos Laborales por producción
- Planificación de órdenes de Trabajo por WorkCenter
- Programa de producció Maestra
- Órdenes de Trabajo
-
- Abundante
- Ajustes de Inventario
- Anuncios
- CARACTERÍSTICAS DEL MÓDULO DE INVENTARIO DE ODOO
- Categorizacia de productos
- Categorías de Almacenamiento
- Configuración del producto
- Confirmación de SMS en la Entrega
- Confirmación por Correo Electrónico en la Entrega
- Costos de Aterrizaje
- Empaquetado del producto
- Entrega
- Entregar Paquetes
- Estategias de Eliminación
- Gestión de Almacenes
- Gestión de Chatarra
- Integrando el Remitente de Terceros en Odoo
- Inventario
- Operaciones de inventario
- Planificadores
- Reglas de Caída
- Reglas y rutas
- Tiempos de Programació
- Trazabilidad del Producto
- Ubicacia
- Unidad de Medida
- Variantes de productos
-
- APEGO Salarial
- Abundante
- Configuración
- Contratos
- Entradas de Trabajo
- Estructuras salariales
- Información personal
- Nómina de Odoo
- OTROS TIPOS DE ENTRADA
- Parámetros de la regla salarial
- Reanudar
- Salarios de reglas
- Salpicaduras
- Tablero
- Tiempos de Trabajo
- Tipo de estructura salarial
- Tipos de Entrada de Trabajo
- Ventajas
Odoo Projects- Odoo 15 Enterprise Book
Creating Tasks
Al crear el proyecto, será redirigido a la página del proyecto donde puede crear tareas asociadas con el nuevo proyecto.Mientras crea las tareas, puede ver ejemplos de las tareas haciendo clic en la opción VEA Ejemplos situada junto al título de la columna.Se mostrará una ventana que muestra los ejemplos de Kanban, desde donde puede seleccionar plantillas para su proyecto.
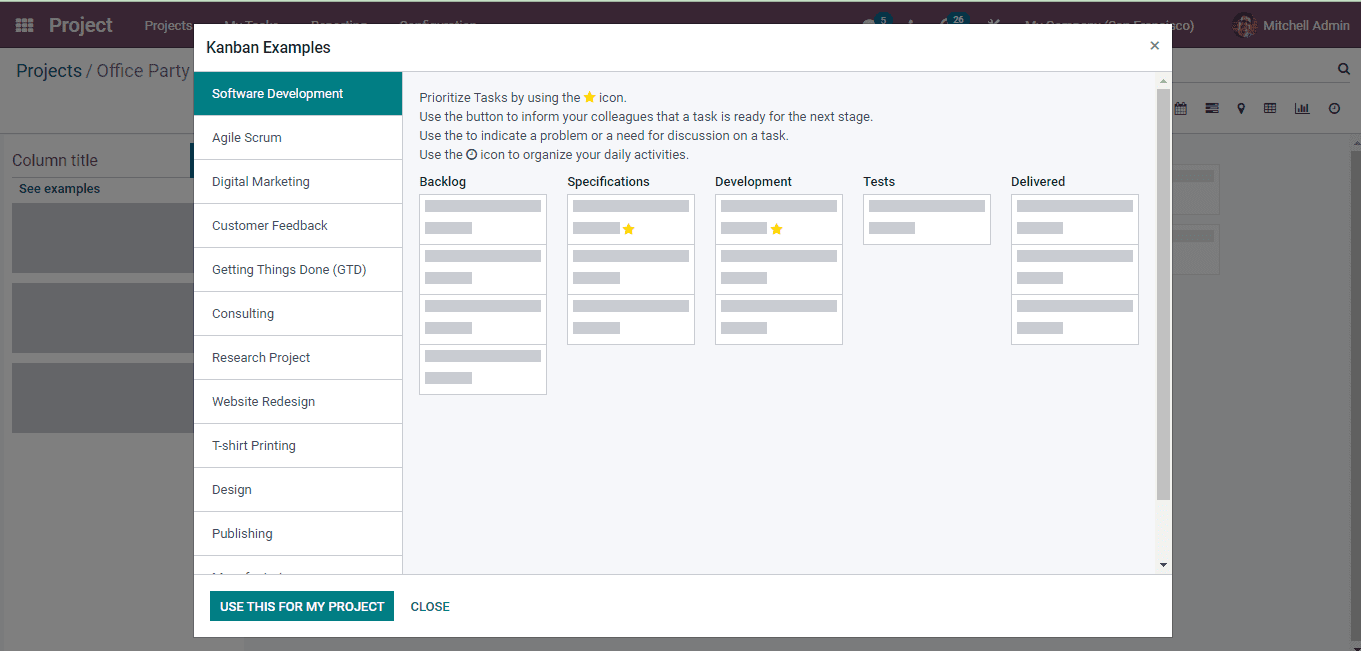
Después de seleccionar la plantilla, puede comenzar a crear las tareas.En el módulo de proyecto Odoo 15, puede usar las actividades y el estado de las tareas para realizar el proyecto.También se pueden usar chat y correo electrónico en tiempo real para colaborar de manera eficiente.Para crear una nueva tarea, seleccione el botón Crear.Puede agregar los detalles de la tarea al formulario enumerado justo debajo de la primera etapa del proyecto.Establezca un título de tarea, plantilla de hoja de trabajo y cesionarios que serán responsables de la tarea.
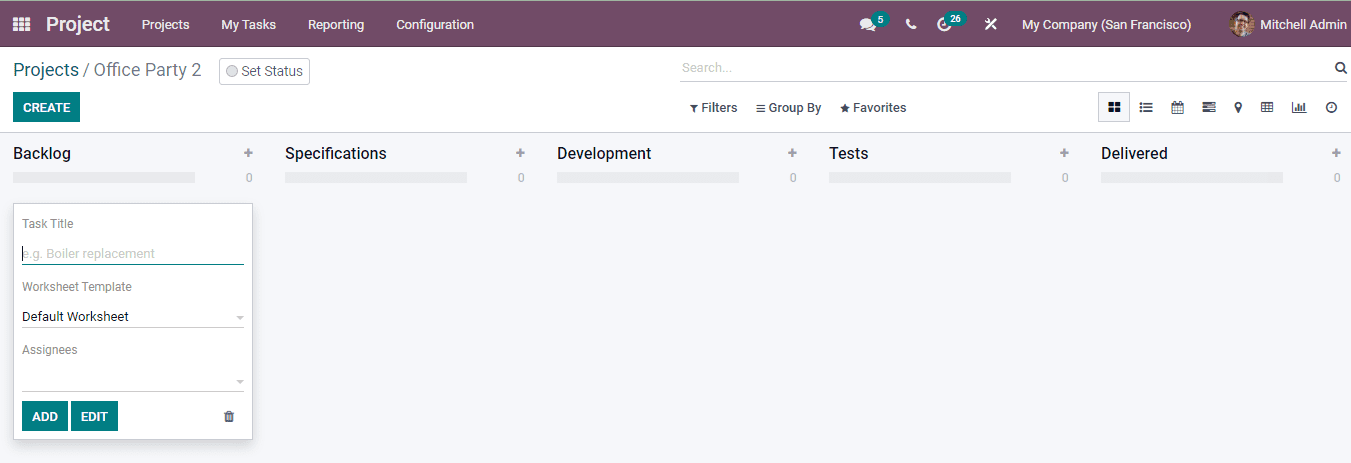
After entering these details, select the ADD button. The task will be added to the stage. You add further details to the task by selecting them and press the EDIT button. More details such as, you can select the Customer associated with the task, Planned Date for starting and ending the task, Deadline for completing the task, Tags related to the task and whether the task is a Recurring one or not.
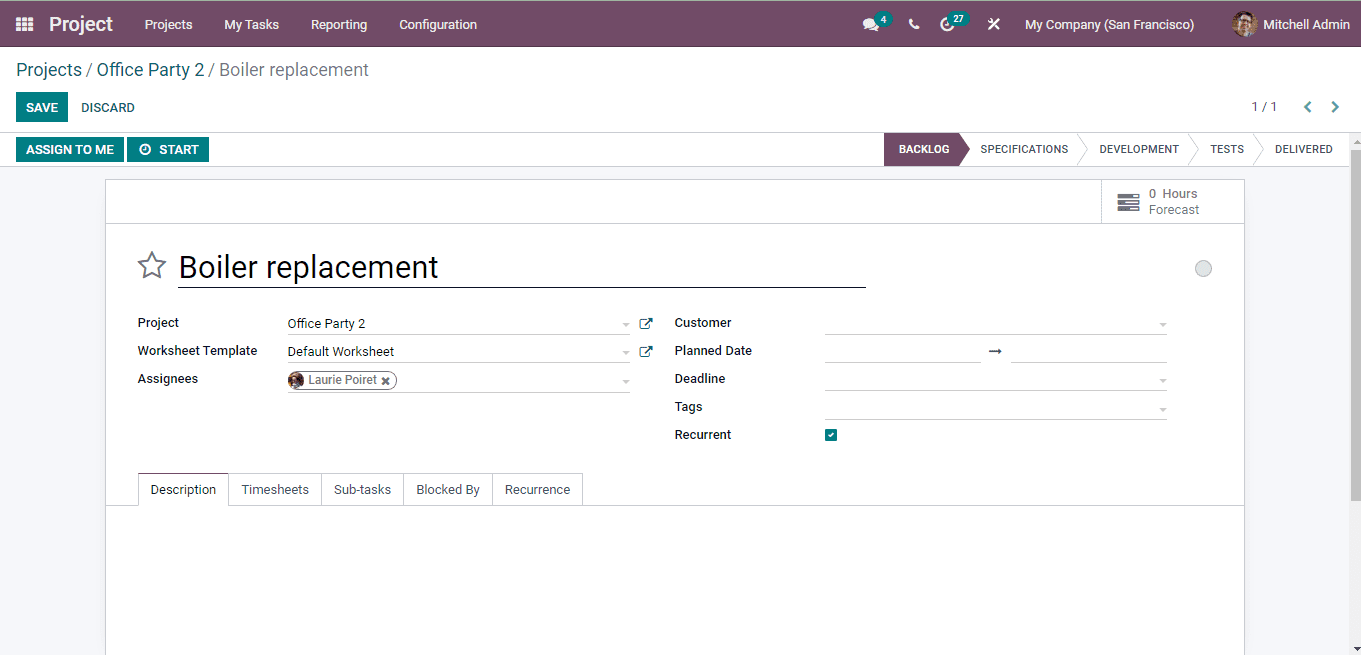
You can add the extra details regarding the task at the space provided in the Description tab. At the Timesheets tab, enter the details such as the Initially Planned Hours of the task, percentage of task Progress, the details of the duration by the employee taken while doing the task along with its description.
At the Sub Task tab you can add any sub tasks to the parent task and insert the Assignees, Deadline and Stage of the sub task. Multiple sub tasks can be added to a parent task. At the Blocked By tab enter the name and details of the task that must be blocked in order to complete the current creating task.
If the Recurrent option is enabled, then you can view the Recurrence tab. At the tab you can enter when the task should be repeated and until when. According to the selected recurrence terms, the next occurrences are listed.
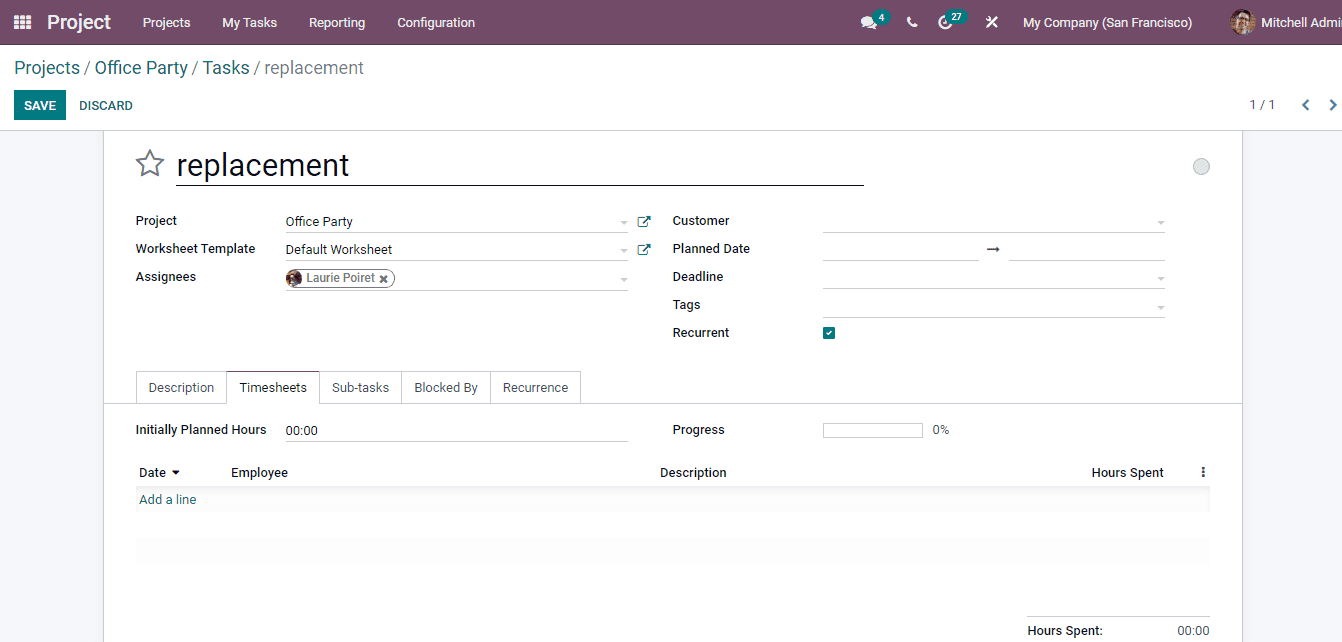
Press SAVE after entering all the details. The created task will be displayed under the belonging stage.
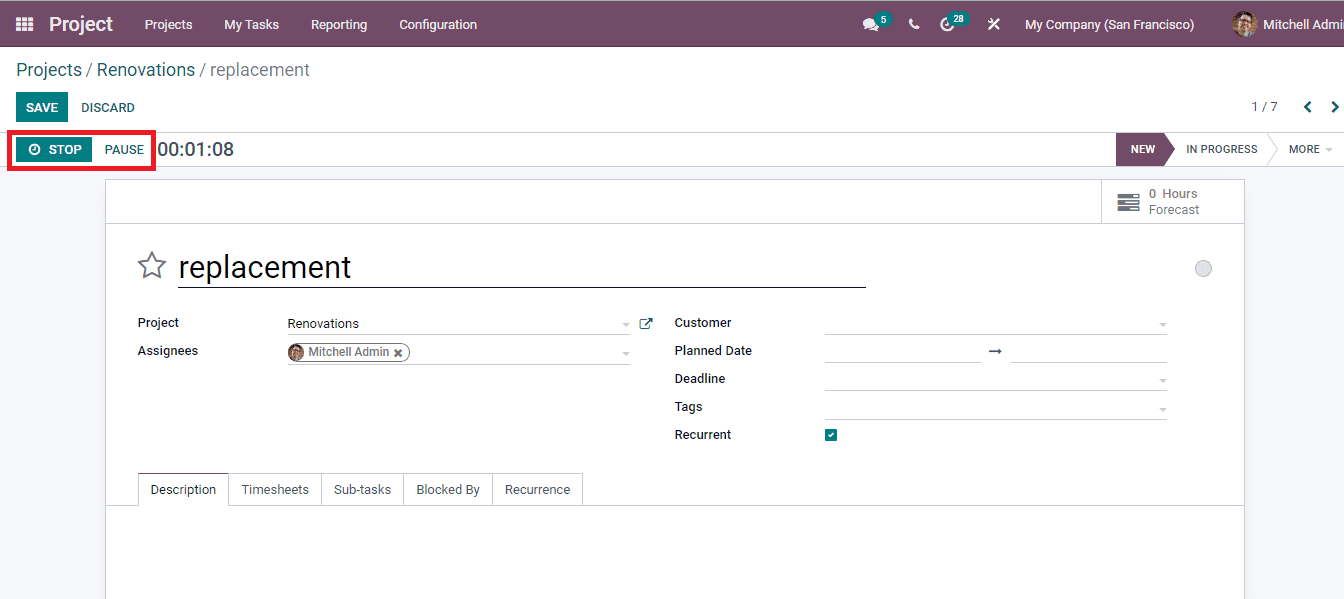
The task can be assigned to yourself by selecting the ASSIGN TO ME button. When the task starts to function you can select the START button. Through this you can calculate the duration of the task. The timer which appears after selecting the START button can be paused whenever necessary with the help of the PAUSE button. And the timer can be stopped with the STOP button. After stopping the task you can confirm the duration spent and give a description of the task at the popped up window.
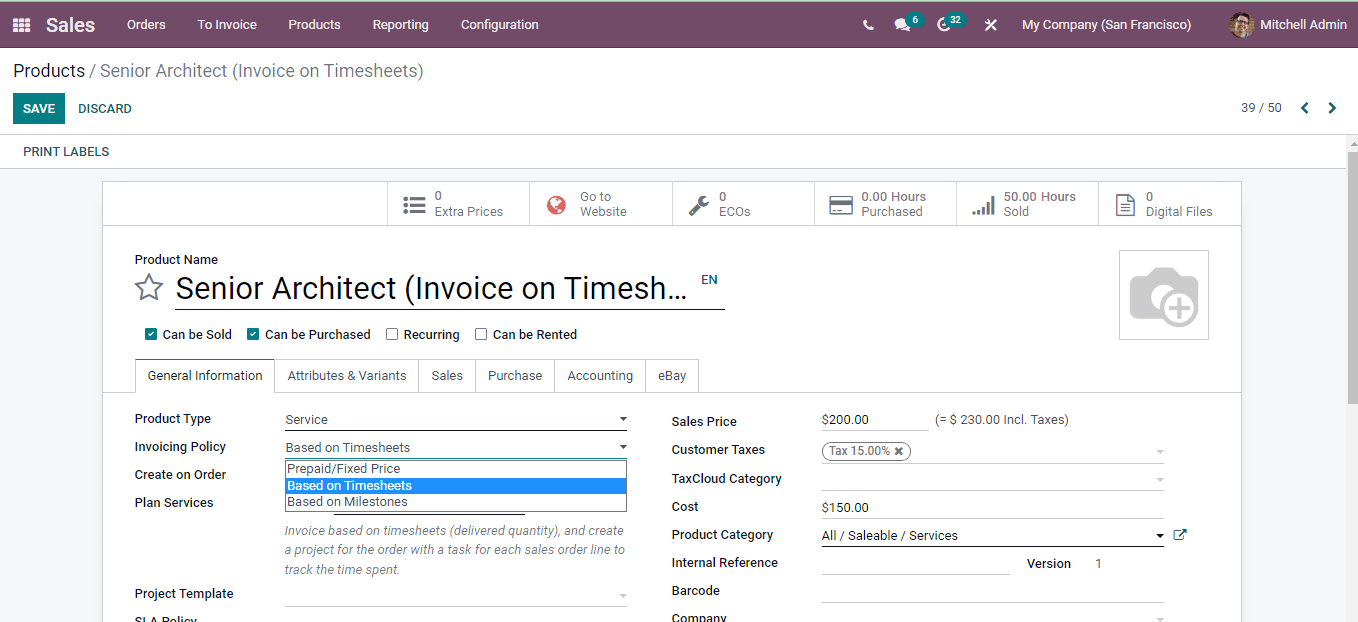
After completing the task, you can invoice the service to the customer. In Odoo you have three options on which basis the invoice should be created. It can be Prepaid/ Fixed Price, Based on Timesheets or Based on Milestones. If you have selected the invoicing policy as Prepaid/ Fixed Price, and as per the contract you promised to complete the work within 5 months, but the project gets finished within 3 months. In such cases the customer cannot reduce the cost as the work gets finished soon. As the invoice policy is Prepaid/ Fixed Price the cost paid is the same amount which was fixed earlier. In the same case if the Based on Timesheet invoicing policy was chosen, then the customer needs only to pay the amount based on the time invested on the project. By choosing the Based on Milestones, the invoice will be generated on the basis of the completed milestones.
