-
- Acuerdos de compra
- Advertencia
- Atributos del producto
- Categoria de ProductO
- Coincidencia de Recibos de Compra y Facturas de 3 Vías
- Compra
- Gestión de Productos
- Gotero
- Ordenes de Compra
- Receptores productos
- Reportes
- RequestForQuotationPurchaserOrder
- Unidad de Medida
- UnitfMeAsurectatecturaciones
- Vendorbills
- Vendormanagació
-
- Administrador
- Billofmateriales
- CREACIÓN DE DOCUMENTOS
- Categoría de equipos
- Configuraciones de WorkCenters
- CorrectiveMaintenancerequest
- Creando Merman Oferta
- Creando una orden de reparacia
- Enrutamiento
- Fabricación
- Gerencia
- Gerencia de Reparacia
- Gestión de la Calidad
- Gestión del Ciclo de Vida del Producto
- HowtounBuildOrder
- Manejo de Mantenimiento
- ManufacturingOrderManagement
- Mermanes de Creendo
- Nobildaproducto
- Orden
- Planificación de Trabajadores
- Planificante
- Preventivemaintenancerequest
- Productora de administración
- QualityControlpoints
- Reportes
- Subcontratacia
- WorkCenters y Rutings
- Workcenters
-
- Ajustes de Inventario
- Anuncios
- Capacidad de Productos
- Categorizacia de productos
- Configuración del producto
- Confirmación de Correo Electrónico de Entrega
- Consiguio un
- Coste de Aterrizaje
- Entrega
- Gestión de Almacenes
- Horario de Programació
- IntegratingthirdPartyshipper
- Inventario
- Operaciones de inventario
- Paquetes de Entrega
- Parpadeo
- Planificador
- ProductVariants
- Ratidrategas
- Reglas y rutas
- Reportes
- SMSCONFirmationAtDelivery
- Ubicacia
- Unidades de Medida
Odoo 14 book
Vendor bills to payment in Odoo
A user can pay vendors the correct amount at the right time (not too late, not very early; contingent upon the vendor policy) if the vendor bills are registered or enlisted in Odoo. The process becomes effortless with Odoo. Odoo also helps to generate reports to follow your aged payable balances.
If a user wants to control vendor bills received from the vendors, the user can make use of the Odoo Purchase application. This enables the user to control and pre-complete based on past buying/purchase orders.
Configuration
This feature can be configured in two different ways. First method is to click the option New Bill from Accounting Dashboard under Vendor Bill section. The second option is to go to Accounting>Vendors>Bills.
The user will be navigated to a new window as given below upon clicking the CREATE button
Here, the user can easily register the new vendor bill by choosing the vendor and contributing their invoice as the Vendor Reference. The user can also add and confirm the product lines. Here, one has to be careful to ensure correct product quantities, taxes/expenses and prices.
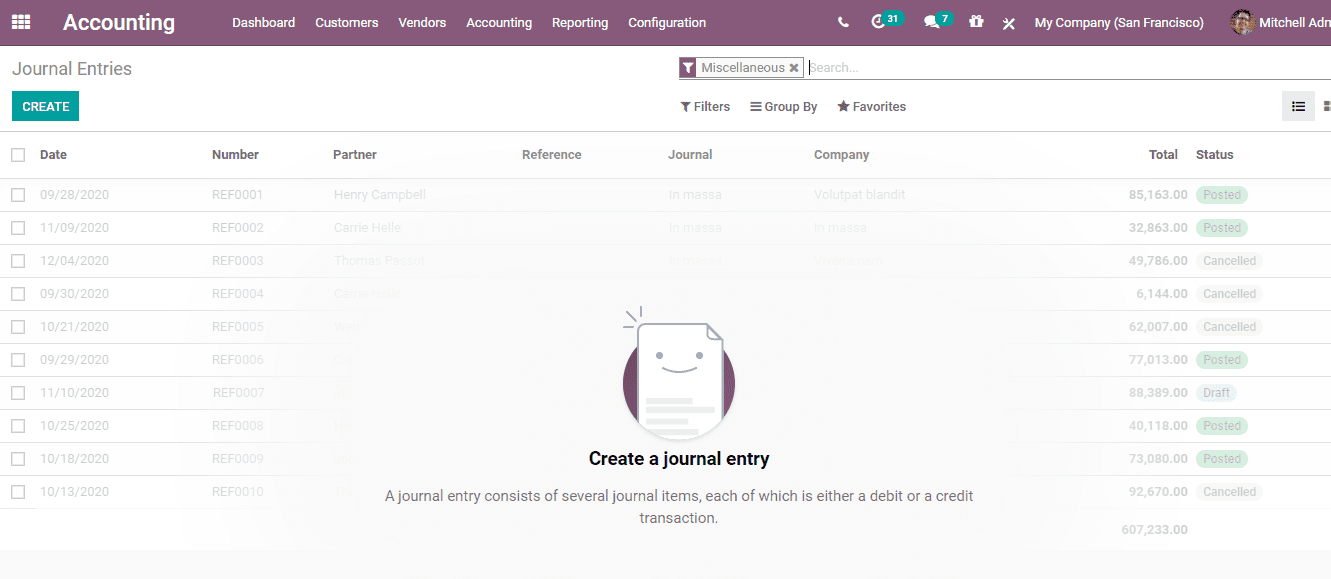
To view all Journal Entries,
Configuration
Got to Accounting-> Accounting->Journal Entries
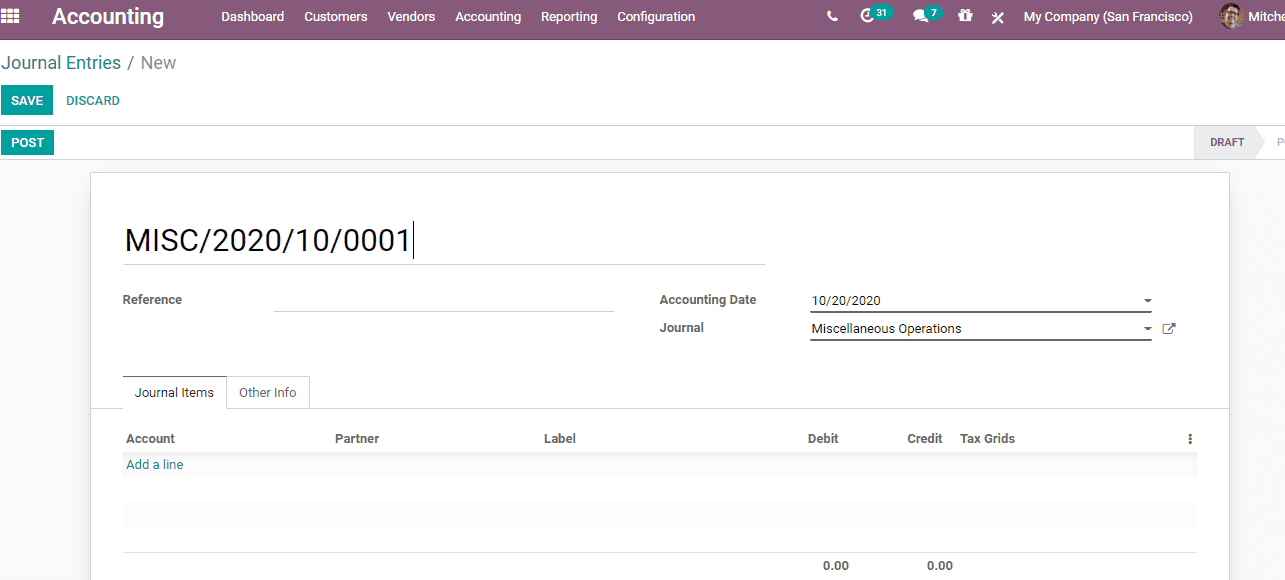
Here, the user can create the journal entries manually.

Here, as you could see, the filter would be MISSCELENEOUS OPERATIONS.
Here, you can create a new journal entry by clicking CREATE button
Vendor bills to payment in Odoo
A user can make payment to vendors easily with Odoo. The correct amount can be paid at the right time (not too late, not very early; based on the vendor policy). This is possible if the vendor bills are registered or enlisted in Odoo. Odoo can help the user to generate reports to follow your aged payable balances.
The user can make use of the Odoo Purchase application if the user wants to control vendor bills received from the vendors. This helps the user to effortlessly control and pre-complete the process based on past buying/purchase orders.
Configuration
The user can configure this feature in two different ways.
1. Click the option New Bill from Accounting Dashboard under Vendor Bill section
2. Go to Accounting>Vendors>Bills

The user will be redirected upon clicking the CREATE button
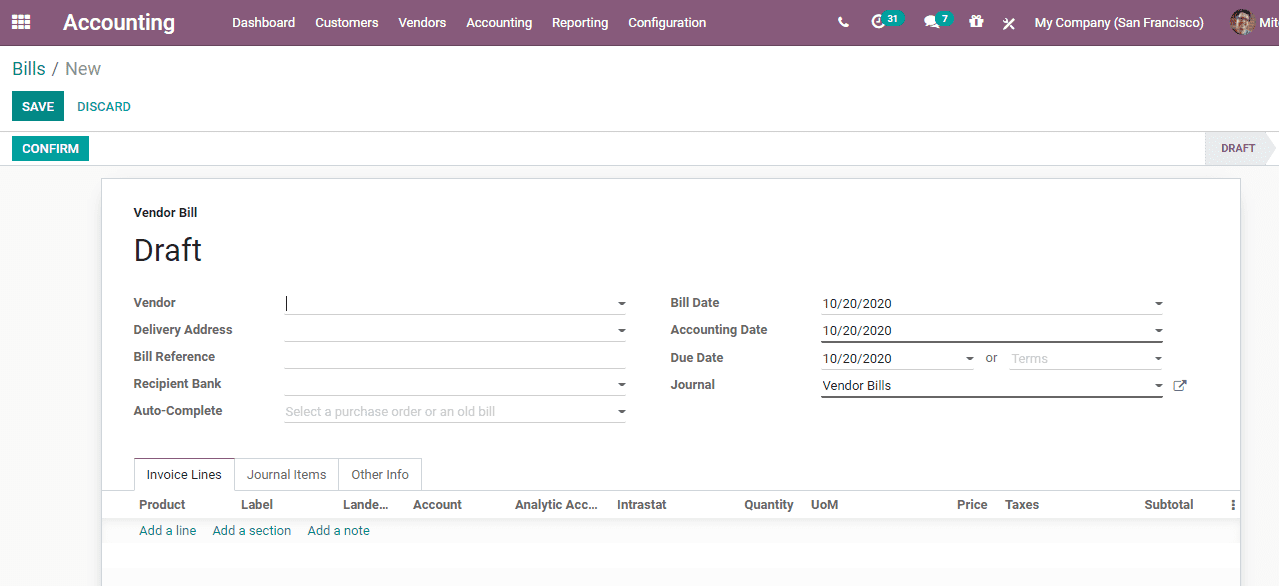
The user can easily register the new vendor bill here by choosing the vendor. This can also be done by contributing their invoice as the Vendor Reference. The user is also able to add and confirm the product lines. A user has to be alert to entre correct product quantities, taxes/expenses and prices.
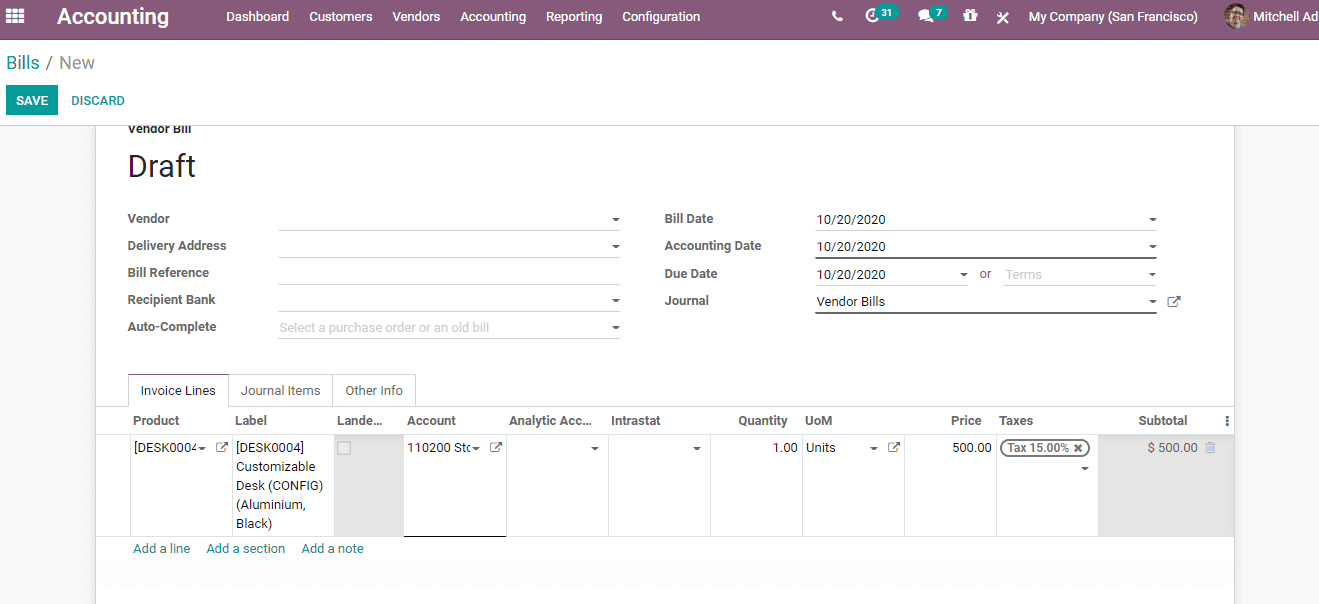
A user can also configure an account to which the product is linked. This can be done by clicking the Account section,
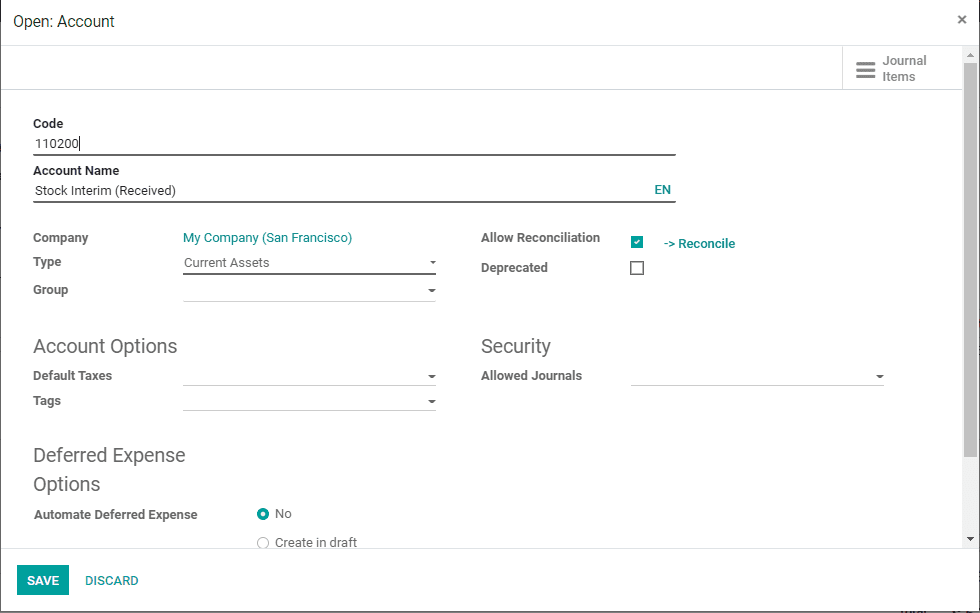
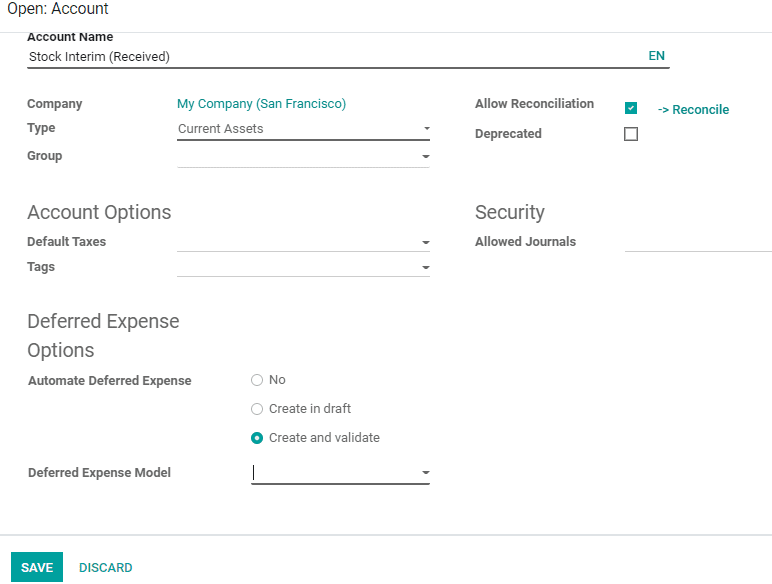
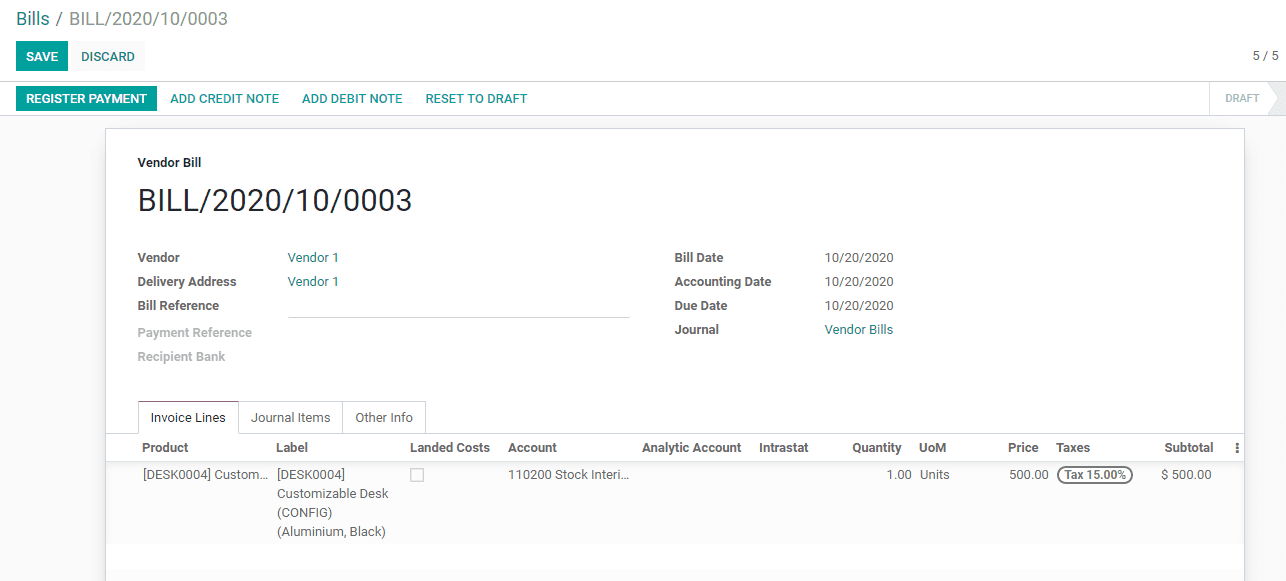
On clicking Register payment you will get a new window. Here, you can CREATE PAYMENT.
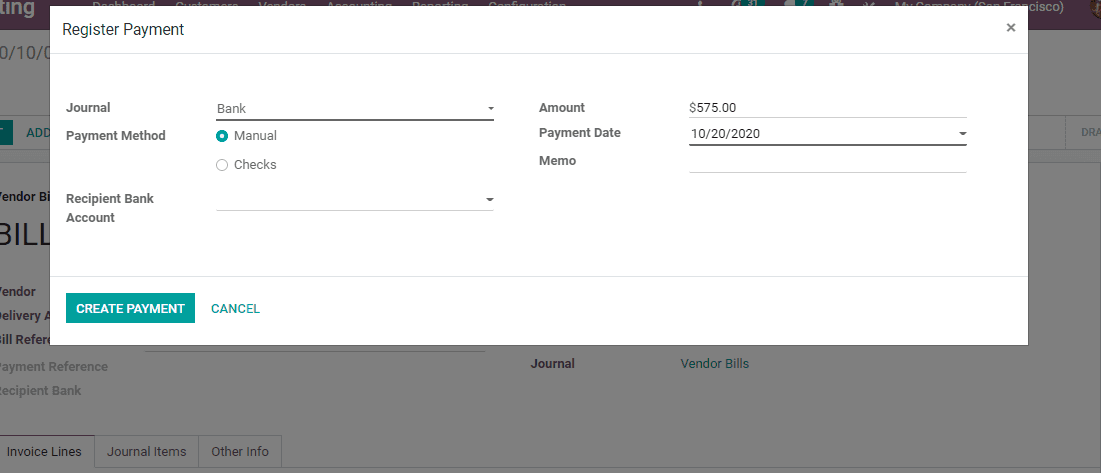
Now Click CREATE Payment. Then the status will change to in payment.
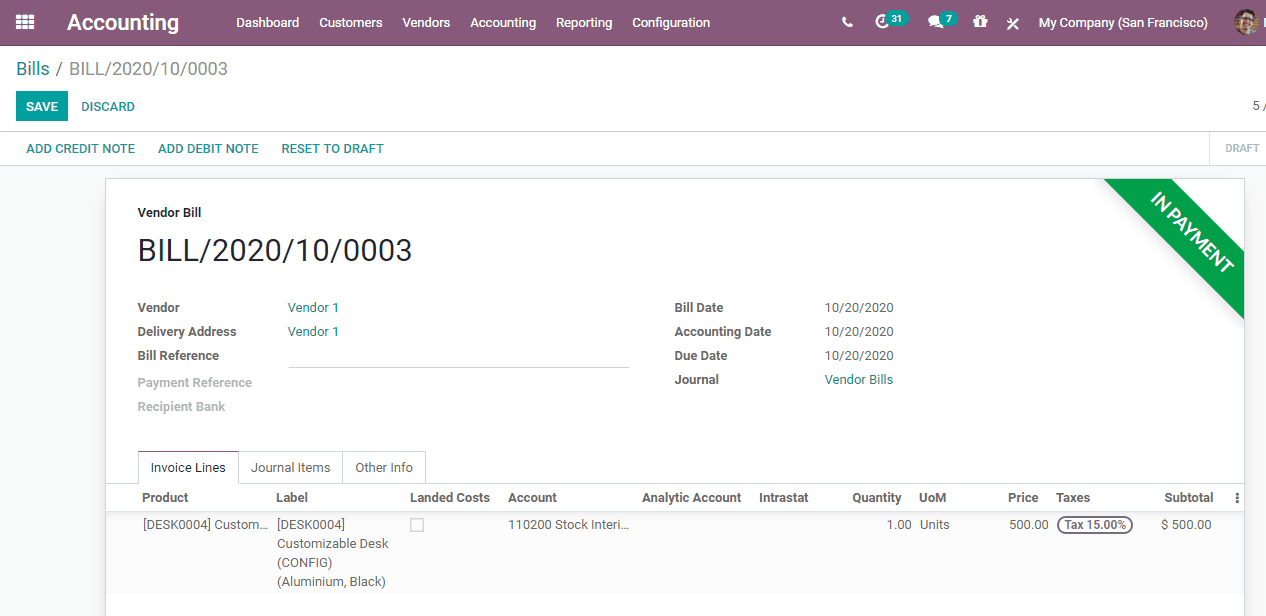
A journal entry will automatically be crafted depending on the invoice. The user can see the journal entry in a few steps. Go to Accounting> Journals>Purchase.
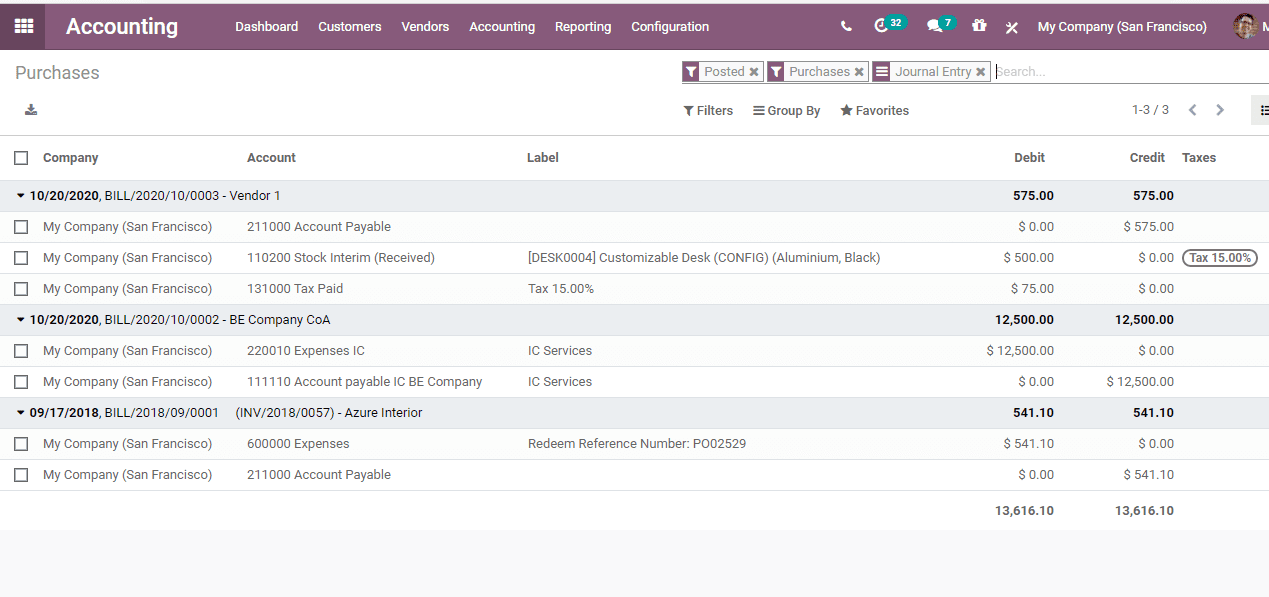
The journal entry may vary depending up on the accounting package you choose to use.
In short, for most of the European nations, the journal entry will utilize the accompanying records:
Accounts Payable: Mentioned on vendor form
Taxes: As mentioned on the items and per line
Expenses: Characterized on line item utilized
Instead, for Anglo-Saxon (US) bookkeeping, the journal entry will utilize the accompanying records:
Accounts Payable: Characterized on the vendor form
Taxes: Characterized on the items and per line
Merchandise Received: Characterized on product form.
A user can examine the Profit & Loss or the Balance Sheet reports. This can be done after validating few vendor bills.
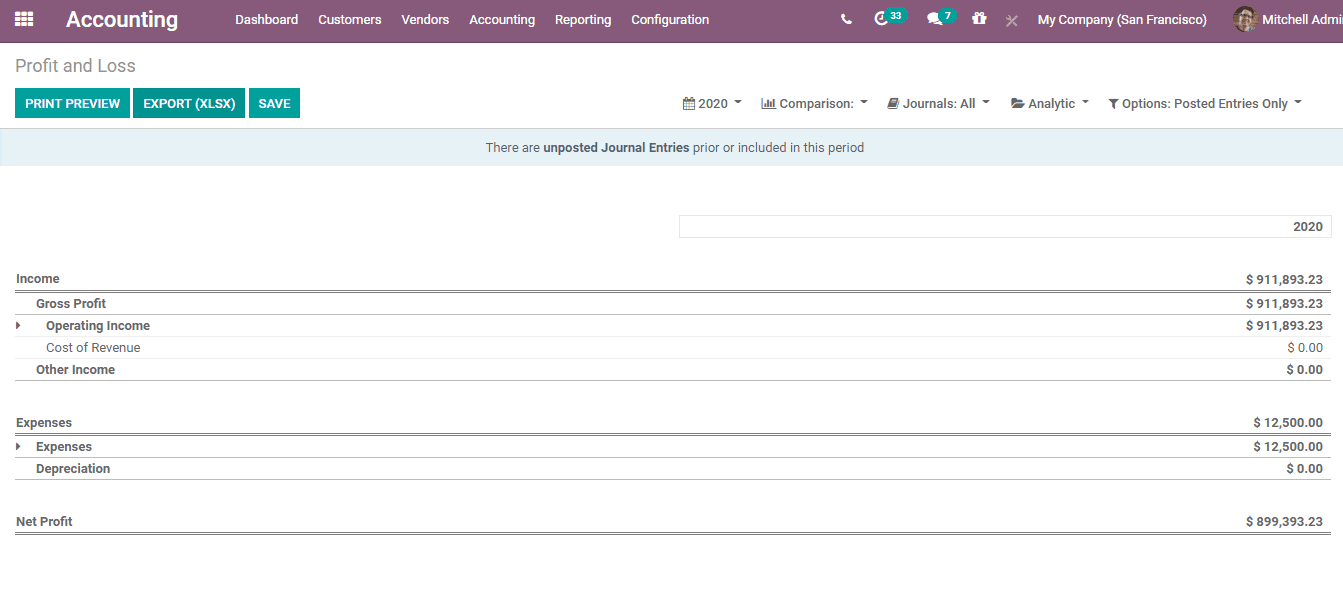
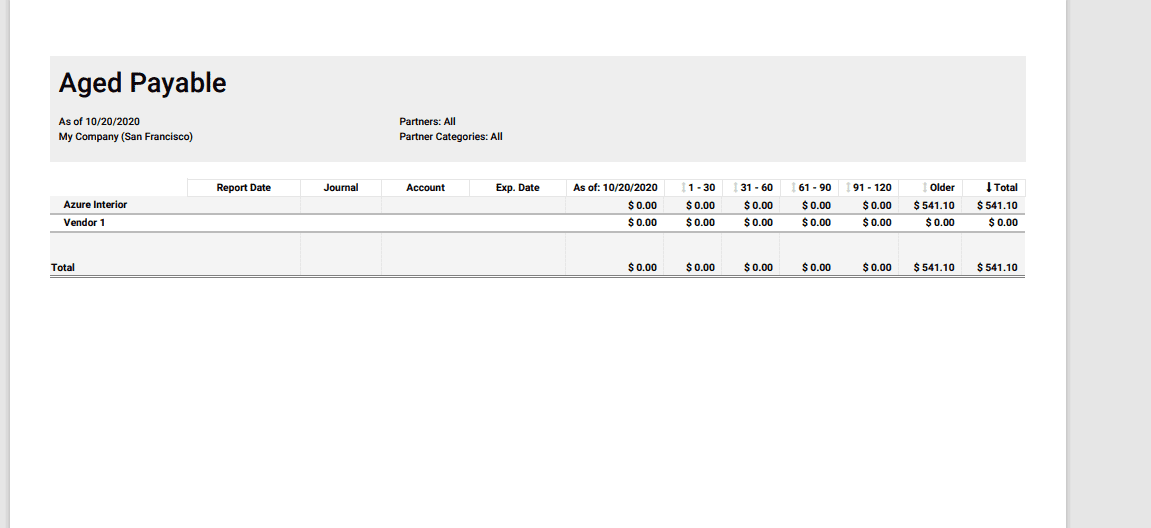
Aged payable balance
That means, in order to get a rundown of open vendor bills and their related due dates, the user can go to Aged Payable report, under reporting menu.
Configuration
Reporting > Partner Reports > Aged payable.
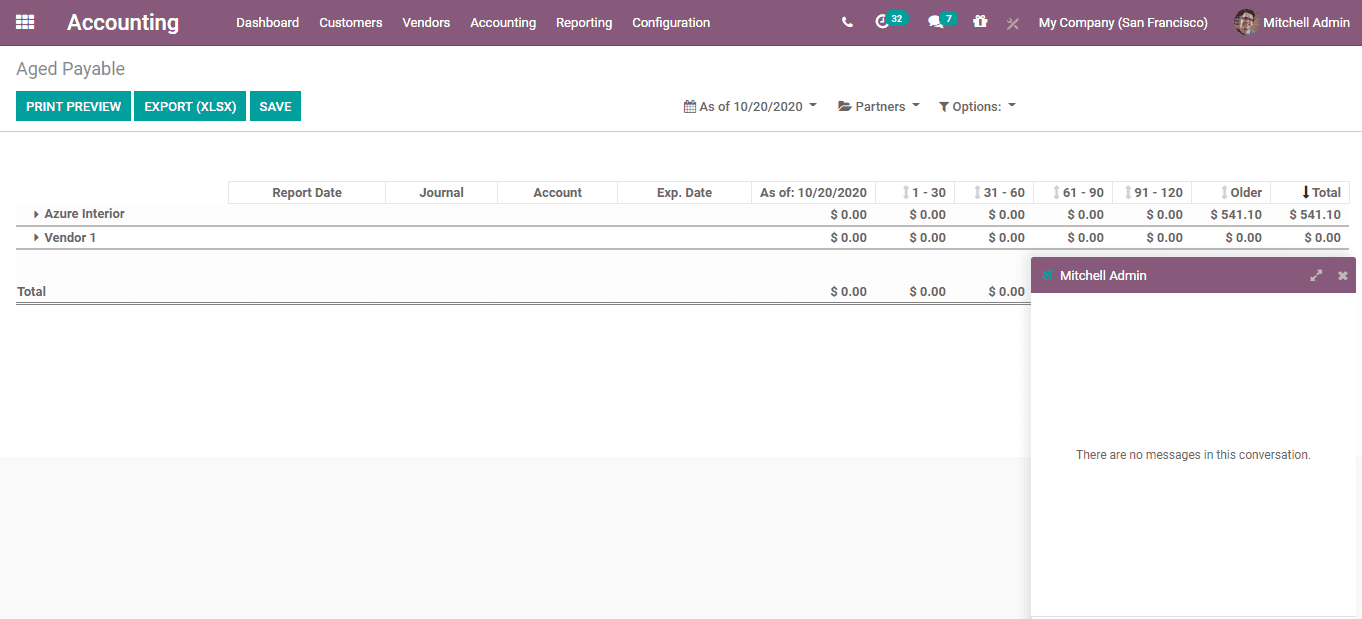
The user can access the details of outstanding bills and dues by directly clicking open the merchants. The user can also comment on any line to alert the management about it.
The user can also make use of Odoo to print the report in Excel or PDF formats.
Cash Rounding Methods
Cash Rounding is made possible when the base unit of an account is smaller than the most reduced denomination category of the currency.
Cash rounding is an important feature for any type of business. IT is this feature that enables the vendor to round off the cost of any request when instalment is made. Odoo supports cash rounging. Odoo also helps the user to round the total amount of a bill to the nearest 5 cents. A vendor using Odoo will be able to create a bill with a rounded total amount.
You can enable this quickly. Go to Accounting module > Configuration > Settings > Taxes > Rounding Method
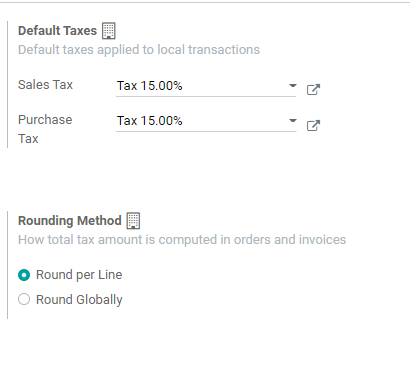
Round per Line: Rounding per line can be used if your prices are tax-included. Round per line helps to calculate the sum of line subtotals as equal to the total with taxes.
Round Globally: The user can directly select this or go to Accounting module -> Configuration -> Management -> Cash Rounding.

Click create button to create a new cash rounding method in Odoo.
The user can find the following parameters in the form:
Name: Name of rounding
Rounding Precision: We can define the precision of a numeric value as the number of digits that are used to express that value. The digits on the left and right of any decimal point are considered here. The rounding precision will also affect the rounding of the computed value.
Rounding Strategy: The user can do cash rounding with the help of two strategies.


1. Modify tax amount: Add the rounding to the tax. Select the highest tax amount.
2. Add a rounding line: Add the rounding in a new line.
Account: It is the account where the rounding will go.
Rounding Method: Odoo offers three types of rounding methods.

1. UP: Here, Value rounds towards plus infinity based on the rounding precision.
2. DOWN: Value rounds towards minus infinity based on the rounding precision on choosing down.
3. HALF-UP: If the fraction part of a value is greater than or equal to 0.5, then round half towards plus infinity. If the fraction part is less than 0.5 then round half towards minus infinity.
Bank Statement and Reconciliation
It is the process of matching a personâs accounting records with respect to cash account with the information available in his bank statement. This process aims to find out the difference between these two records. This will help to keep the accounting records as appropriate as possible. The bank information encompasses all transactions records for a month. In short, we can say that the reconciliation process should be carried out at regular intervals to ensure that a companyâs cash record are correct and immune to fraudulent activities. It also helps in the mitigation of problems with respect to bounced checks and overdraft fees.
Odoo 14 helps the user for easy linking of your invoices and all other payment details with the bank statements. The reconciliation methods in Odoo can be carried out in two formats as given below:
Direct registering of payment with invoices.
Open invoices reconciled with bank statements.
Step 1: Make Bank Payment
First, create an Invoice for the customer.
You can do this by going to Accounting->Customers->Invoices
Create an Invoice.
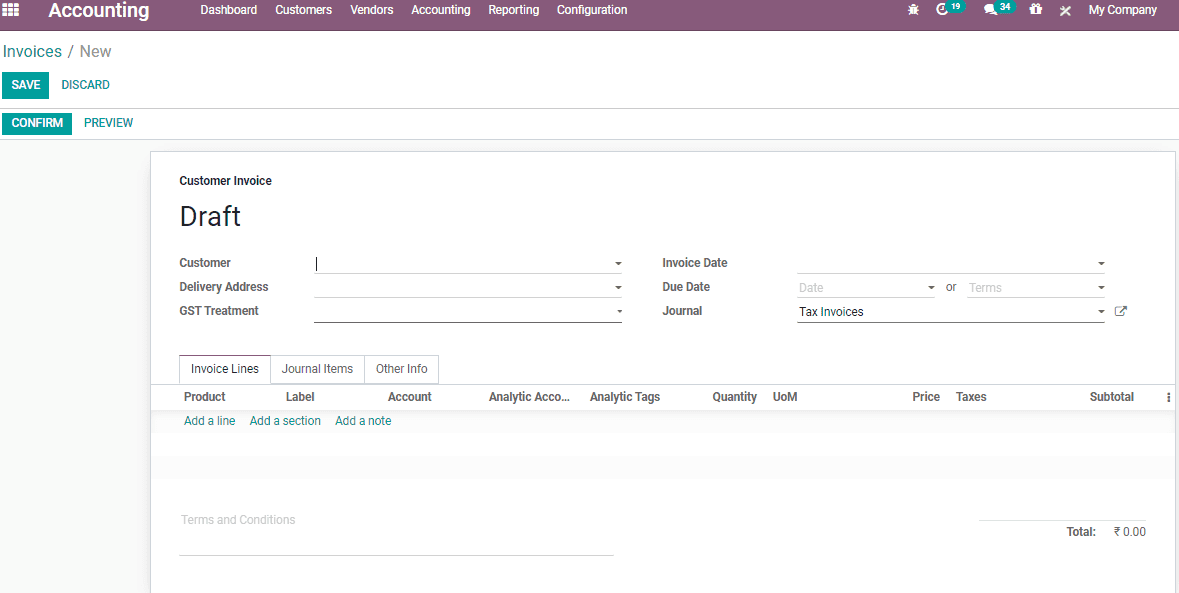
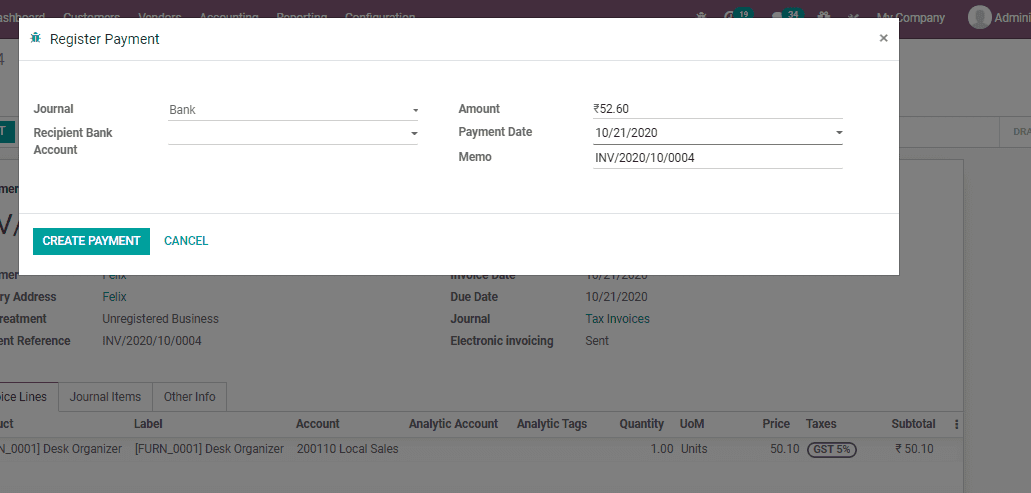
Whenever the customer makes the payment, click REGISTER PAYMENT.
Usually, a company accountant handles the bank statements only during weekends. It is at this time that the invoices are marked as paid. It is done so as to remember that the service with our customer can be started. Payment confirmation is send from the customer side, so payment registration can be done and the invoice can be marked as paid. Click REGISTER PAYMENT option. Then the user will get a new window to Create Payment. Fill in necessary details and click CREATE PAYMENT. Then the invoice status will be changed to in payment.
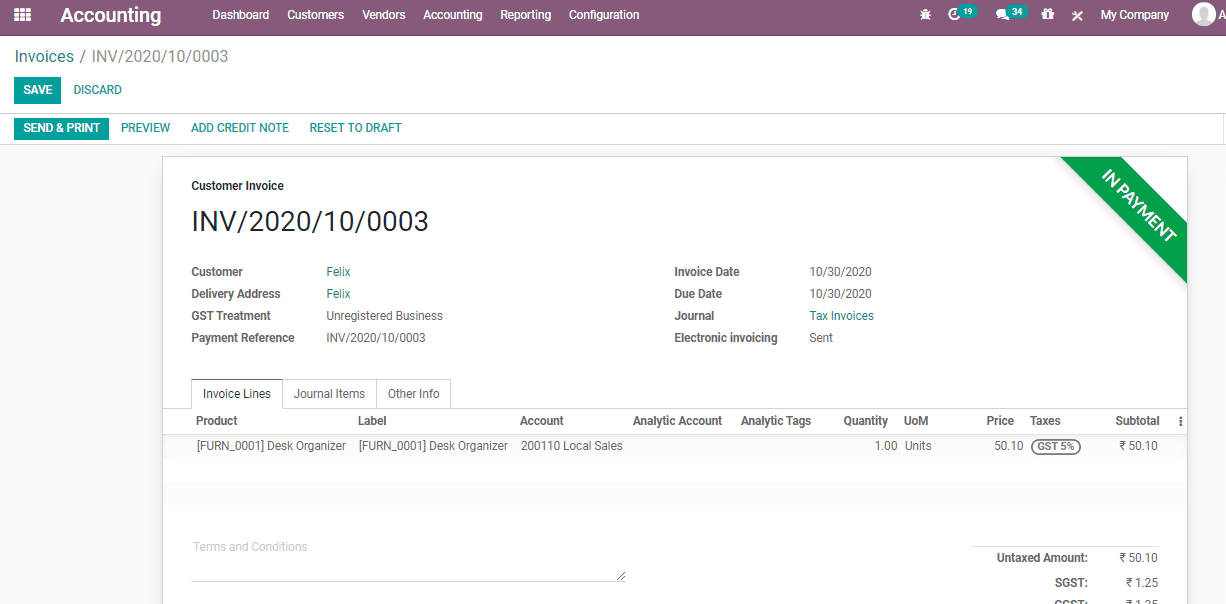
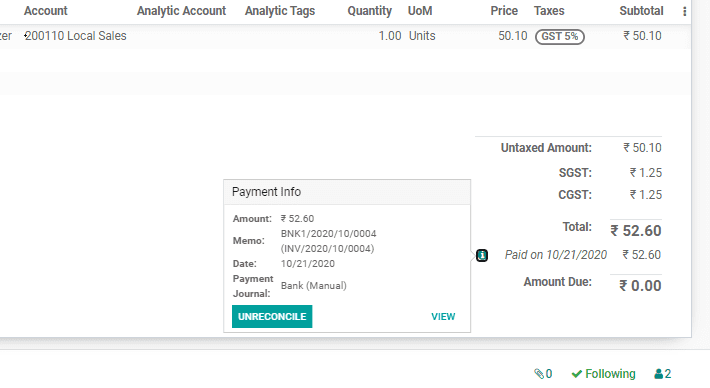
The user can find the payment details from the invoice. Here the user can find a green little icon. Click on the icon and you will get the payment information. Here, the user can find that the reconciliation process has been completed automatically.
Bank statement reconciliation case
Here the user can import or create bank statements. The documents have to be referred from the banks feed section.
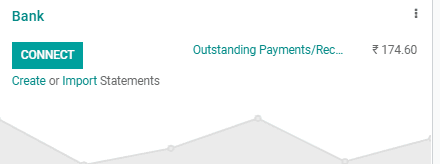
You can get reconciliation statement from here.

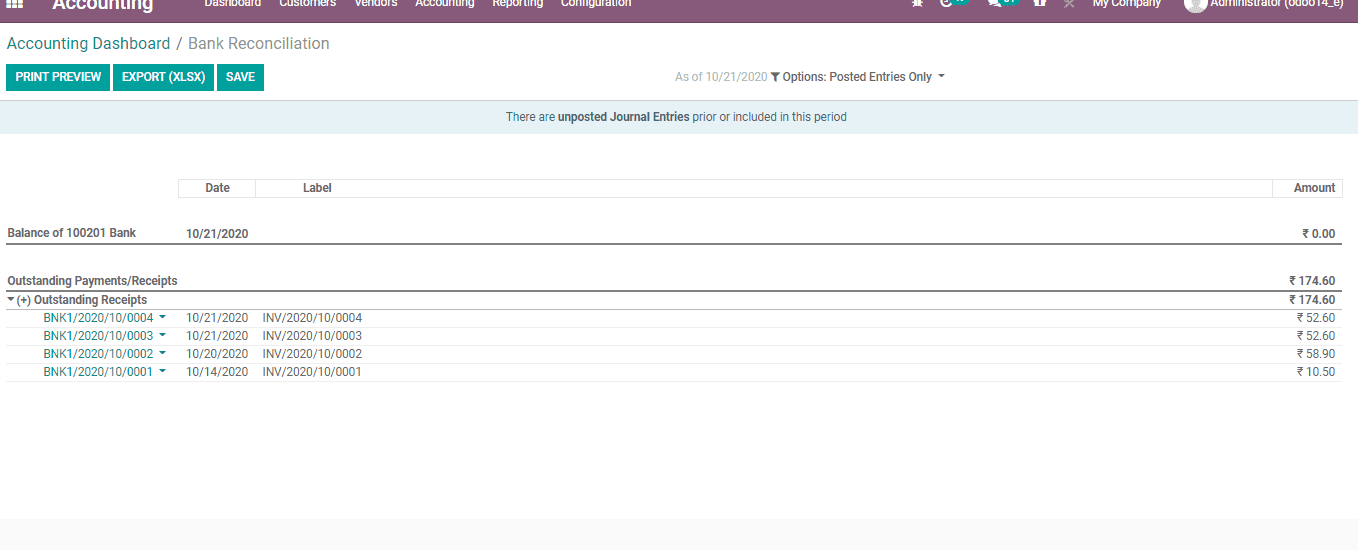
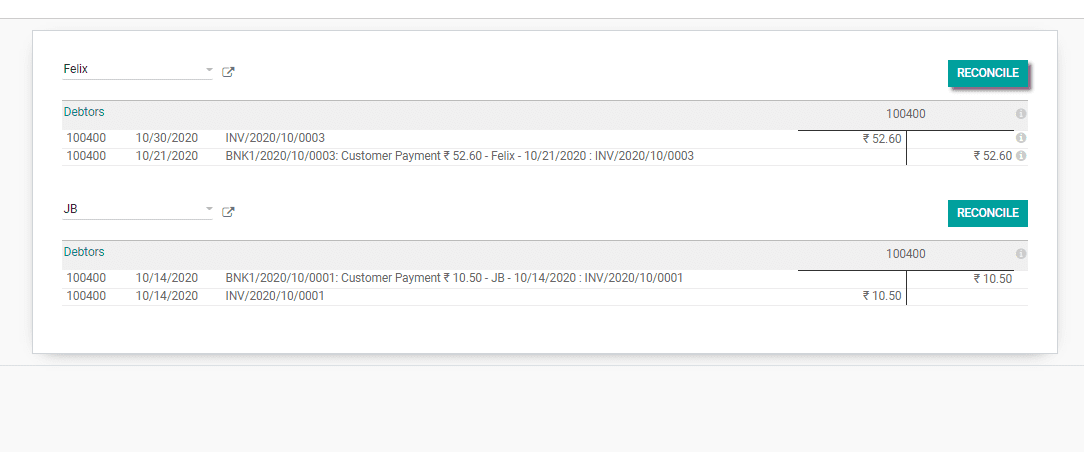
Odoo will help to automatically execute the reconciliation process if the name of the partner and the amount entered are correct
On completion of the reconciliation the user will get a plain window as given above.
In case the some inconsistencies occurred during the process, like the partner name is missing out, amount getting mismatched. Then you have to make use of manual actions.
Suppose if the partner name is not there in the bank statement, then you have to manually enter the details.