Odoo Help Desk - Odoo 15 Enterprise Book
Help Desk Teams
The option to create and manage a help desk team can be found under the Configuration menu of the Help Desk module. By allocating teams to the help desk, you can easily assign tickets to team members to perform the customer support operations.

Already created teams can be seen on this platform as shown in the image above. Using the Create button, you can easily create a new team for the help desk.
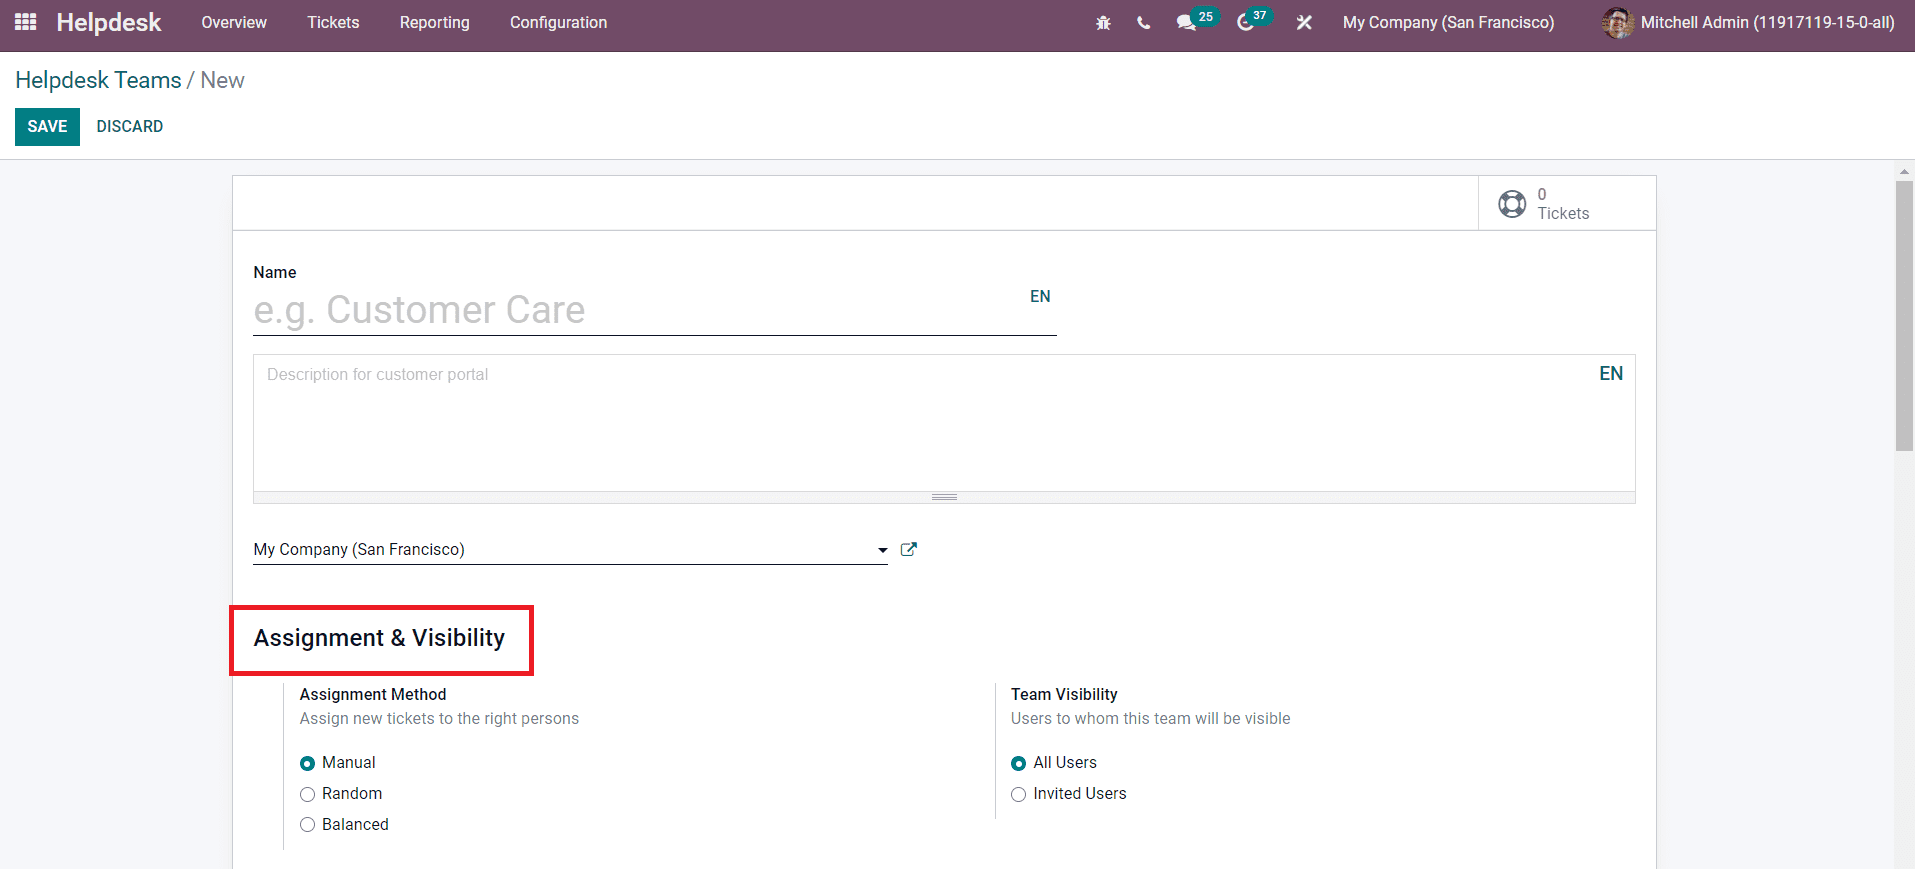
The name of the team and description for the customer portal can be added in the specified fields. In the Assignment & Visibility field, you can define the Assignment Method and Team Visibility. You can assign new tickets to the right person by selecting a suitable method from the given options. Selecting the Manual option as the Assignment Method will let you manually select team members to assign tickets. With Random Assignation, every user gets the same number of tickets. With Balanced Assignation, tickets are assigned to the user with the least amount of open tickets. You can set the users in the Team Visibility field as All Users or Invited Users to whom this team will be visible.
In the Channels fields, you can set the means for customers to create tickets from Email, Live Chat, and Website.

By activating the Email Alias field, Odoo will automatically create tickets if a customer sends an email to this alias. In this case, the subject line in the email will be considered as the name of 7the ticket. The customer can submit tickets through the live chat option by enabling the Live Chat field. The live chat operator will give support to customers to create tickets. Furthermore, you can activate the Website Form which will provide an online form for customers to submit tickets. It is also possible to create tickets manually in Odoo.
The Track & Bill Time tab can be used to set the options to track and bill the time spent on each ticket. Activate the Timesheets option to track the time spent on tickets and the Time Billing option to bill the time spent on your tickets to your customers.

To track the performance of the user, you can activate the SLA Policies. The Service Level Agreements will make sure tickets are handled on time. By activating this field, you will get an additional field to mention the working hours which is used to determine the deadline of SLA policies. Activating the Customer Ratings will track customer satisfaction on tickets. You can also enable the option to publish this teamâs ratings on your website.
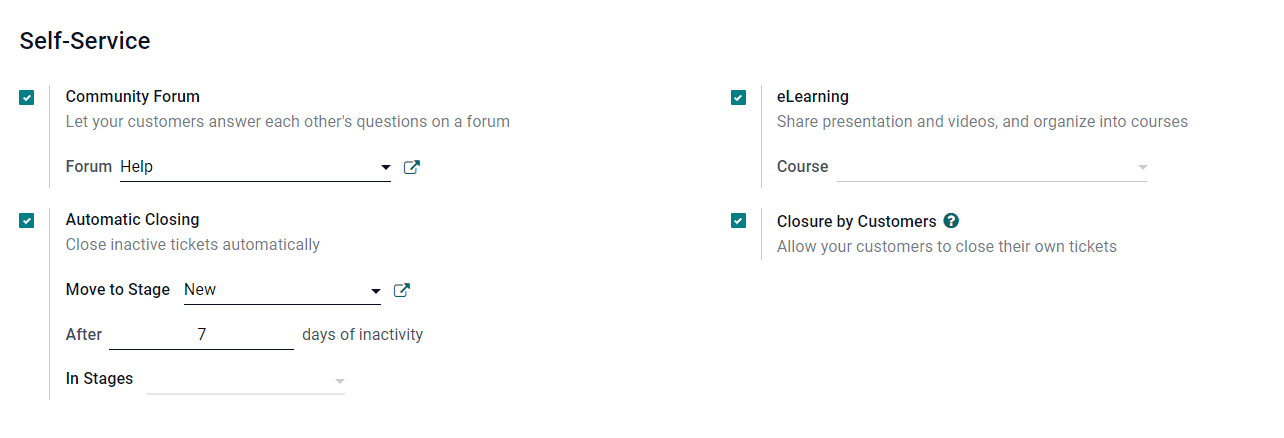
Activating the Community Forum under the Self-Service tab will help you to post a forum for customers. This will help your customers answer each otherâs questions on a forum. You can mention the Forum in the additional field that appears after activating the Community Forum option. To close inactive tickets automatically, you can enable the Automatic Closing option. You can specify the stage to which inactive tickets will be automatically moved once the period of inactivity is reached. This will be done after the specified days of inactivity. You can also mention stages to automatically close the inactive tickets in the specified stages. To share presentations, videos, and courses for customer support, you can activate the eLearning field and mention the name of the Course under the eLearning. Activating the Closure by Customers option will allow your customers to close their own tickets.

You can use the After-Sales tab to activate the Refunds option to issue credits notes, Returns options to return faulty products, Field Service option to plan onsite interventions, Coupons option to grant discounts or free products, and Repair option to send broken products for repair. By activating the Field Service option, you can easily convert tickets into field service tasks. You will get an additional field to mention the Project type of the Field Service activity. Finally, click on the Save button to save the new help desk team
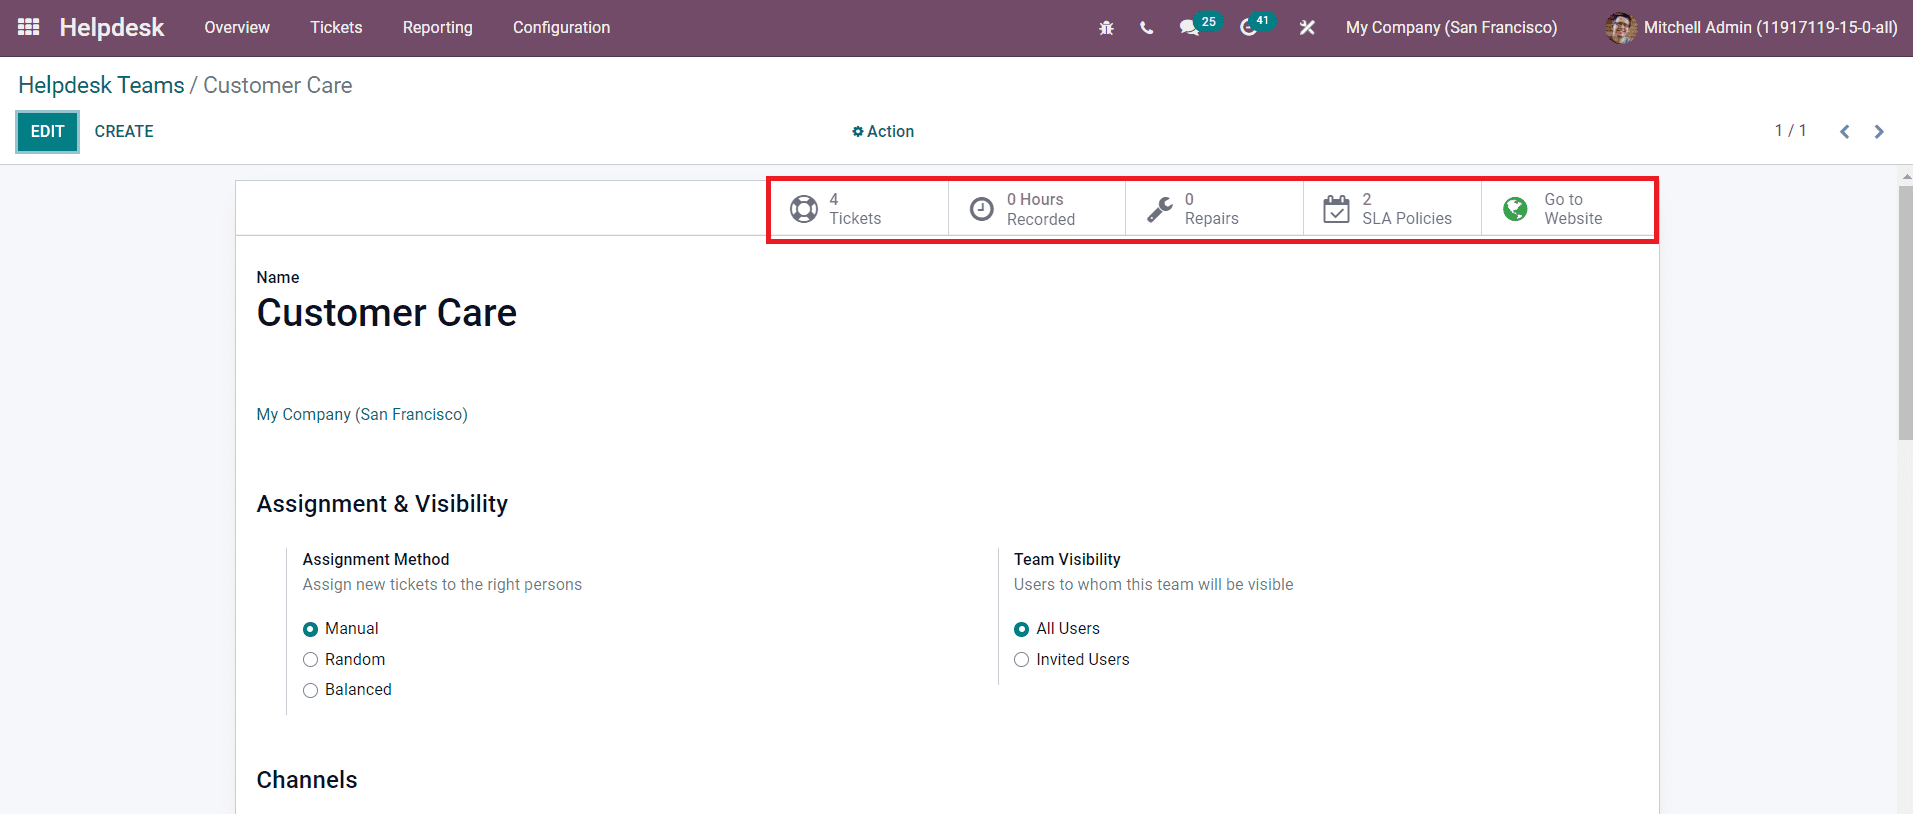
You will get some smart buttons on the Helpdesk Team window as shown above. The details regarding the tickets assigned for this team can be managed using the Tickets button. There are advanced smart buttons available to record the time taken to solve each ticket in timesheets, repair orders, and SLA policies. The Go to Website button will lead you to the web page of this help desk team. This option will be only available after activating the Website Form option to provide an online form to submit tickets.
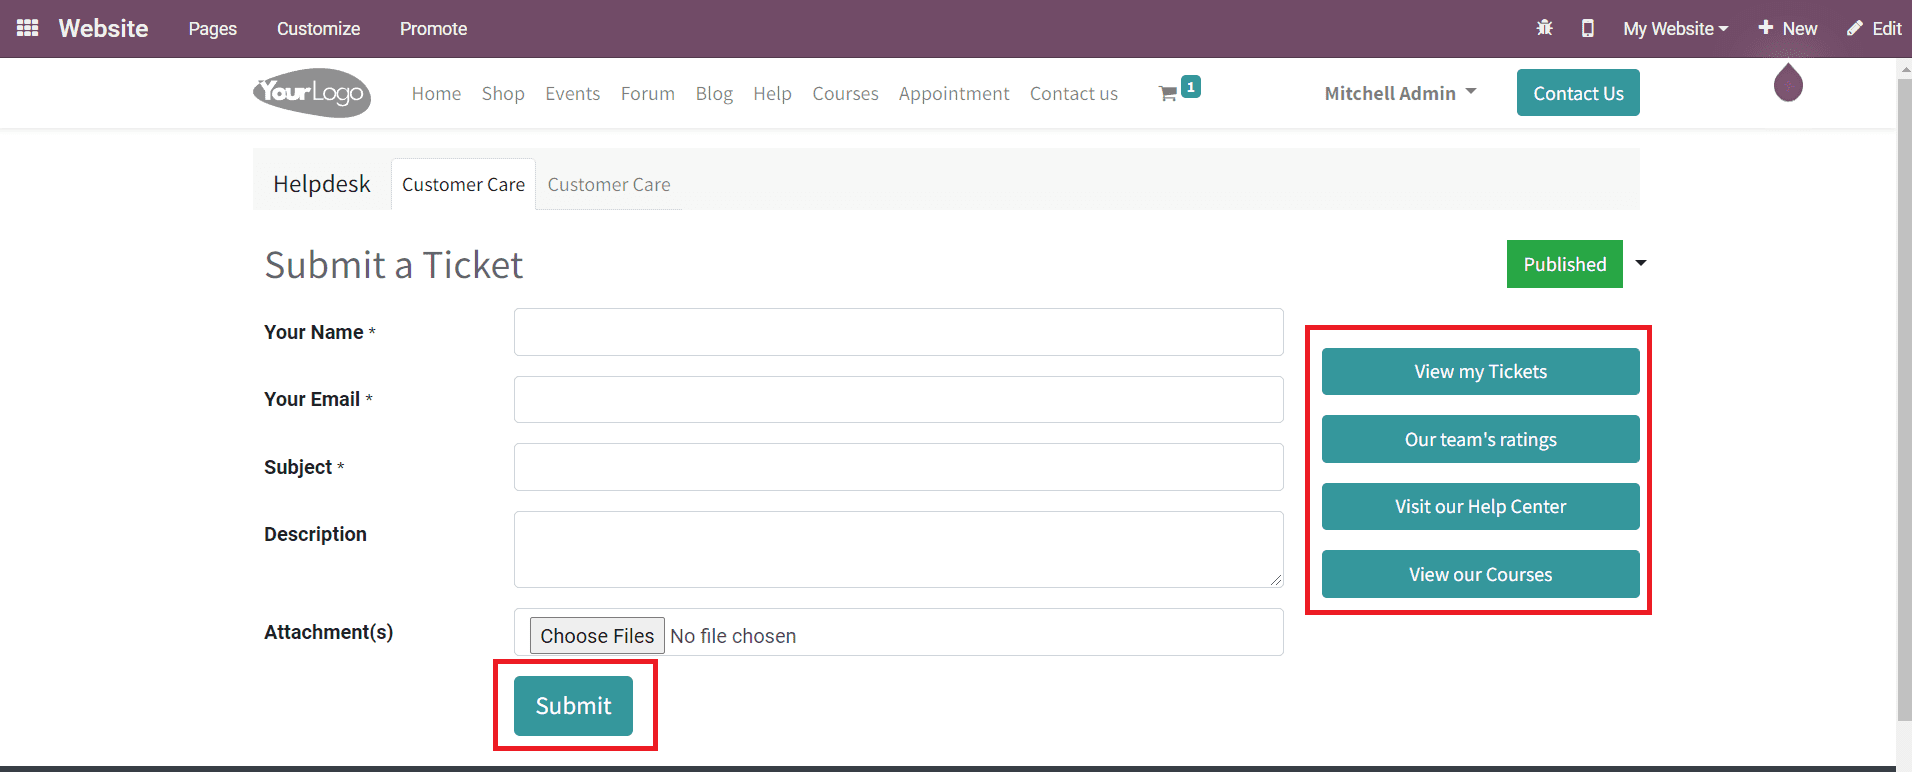
You will get the online form to submit tickets as shown above. The customer can specify their Name, Email, Subject, Description, and add an Attachment in the corresponding fields and click the Submit button. The web page will also show the details about the userâs tickets under the View my Tickets option, customer rating in the Our Teamâs Ratings, option to visit our Help Center, and Courses.
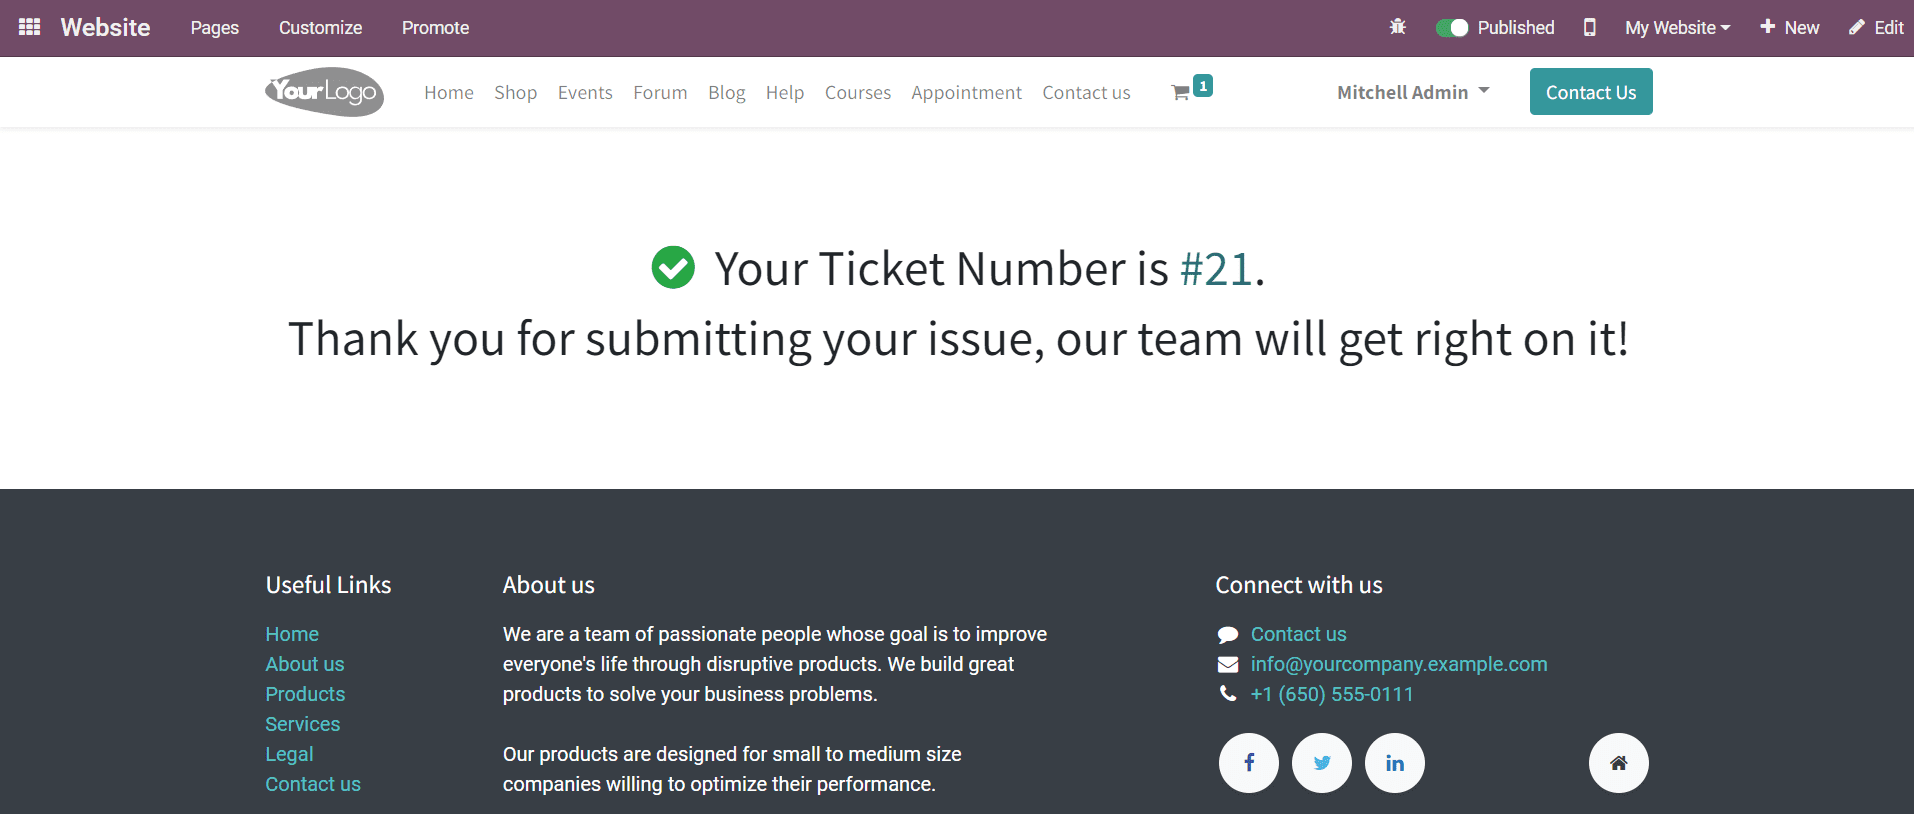
After submitting the ticket, the customer will get the ticket number and a message from the team.