Odoo Email Marketing - Odoo 15 Enterprise Book
Settings
La ventana Configuración del módulo de marketing por correo electrónico de Odoo incluye las siguientes opciones de campañas de correo, opción de lista negra cuando se emite suscripción y servidor dedicado
Discutamos cada uno de ellos a continuación
Mailing Campaigns
El módulo de marketing por correo electrónico de Odoo admite los programas de campaña de marketing, y el módulo construye una herramienta de campaña de correo eficiente en su sistema.Para comenzar con esta herramienta, debe activar elMailing Campaigns option from the Settings page of the Email Marketing module. So let us go to the Settings window.
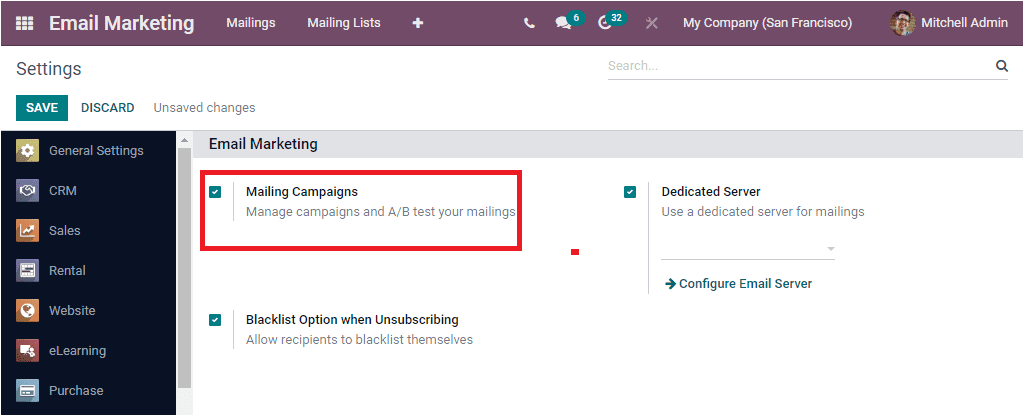
En la ventana Configuración, puede ver la opción de campaña de correo, y puede verificar la casilla cerca de la opción para activarla.Más tarde, no olvide hacer clic en el botón Guardar para guardar los detalles.
La función de campaña de correo será muy útil para administrar campañas y AB prueba sus correos.Se recomienda a esta herramienta si su campaña de marketing está compuesta por varios correos electrónicos.Ahora podemos hacer clic en el icono +disponible en la barra de menú principal para ver la opción activada, campañas

Puede hacer clic en el menú Campañas para acceder a la ventana de campaña.
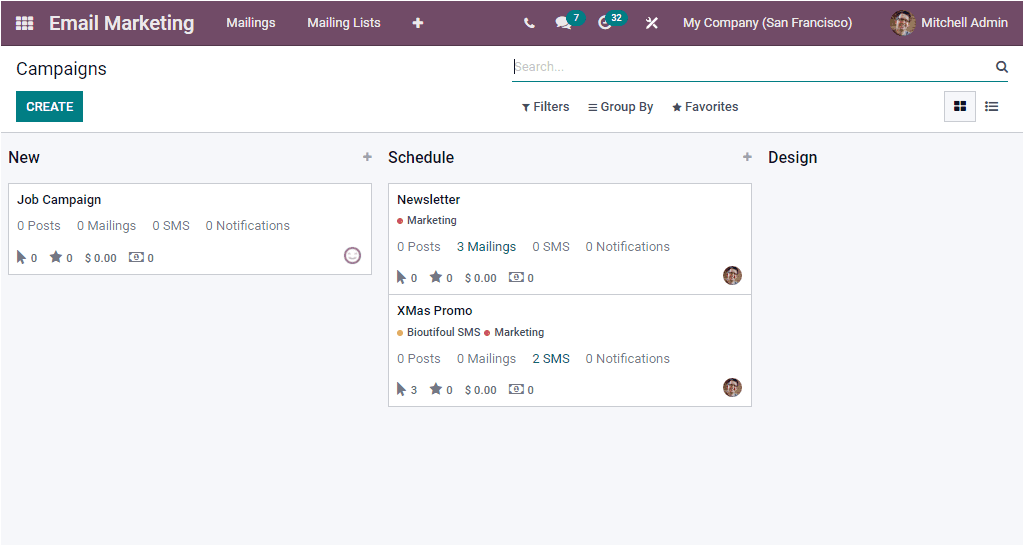
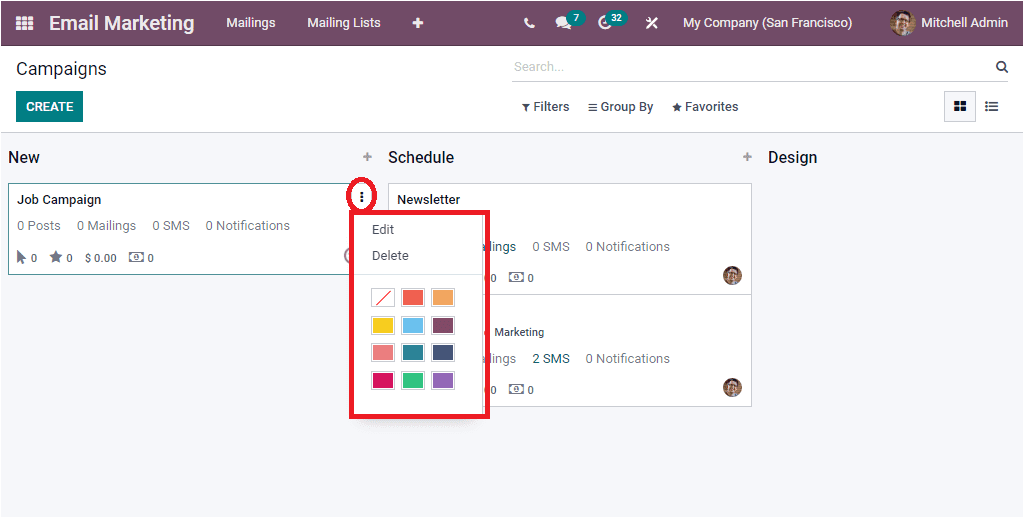
Como puede ver en la imagen de arriba, la ventana de campañas representará todas las campañas preconfiguradas tanto en formato Kanban como en la lista.La imagen de arriba muestra la vista Kanban de la ventana.Kanban View organizará y mostrará las campañas basadas en sus etapas.Aquí en esta captura de pantalla, puede ver las diferentes etapas como New, Schedule, Diseño y enviado.Puede crear varias etapas según los requisitos de su negocio.Las campañas en cada una de las etapas se gestionan con una estructura similar a una tarjeta.Este cuadro incluye todos los datos importantes sobre esa campaña en particular, como publicaciones, correos, SMS, notificaciones, clics, oportunidades, ingresos y citas.El menú desplegable denotado con tres puntos en la esquina superior derecha le ofrecerá las opciones de edición, eliminación y coloración.
Cada uno de los registros de la campaña se puede abrir para verlo en detalle.Es decir, puede hacer clic en ellos para verlo en detalle.
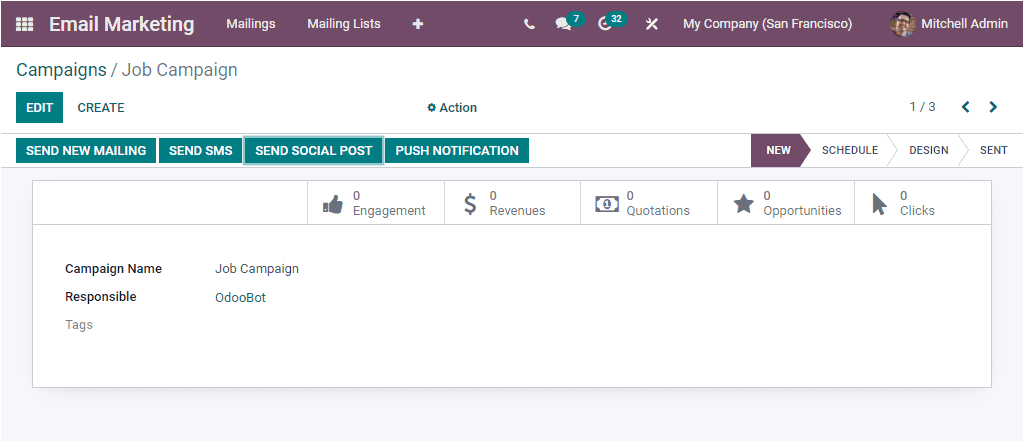
Aquí tiene la opción EDITAR, y usando esta opción, puede editar detalles.El botón de acción disponible en la ventana incluye las opciones de duplicado y eliminación.
Volviendo a la ventana de campañas, cada una de las etapas en la ventana incluye la configuración y el botón de agregar rápido en la parte superior derecha como se menciona en la imagen a continuación.
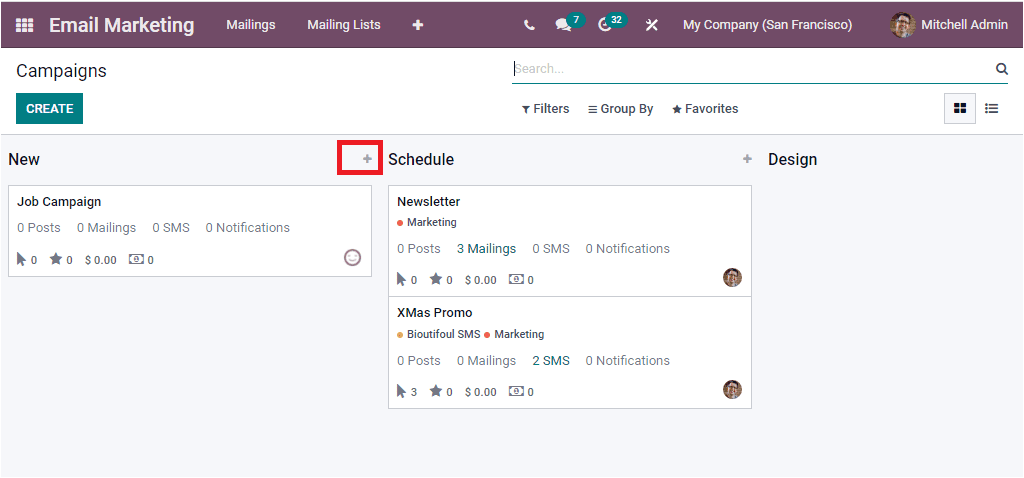
El botón Agregar rápido le permite agregar nuevas campañas al instante.Una vez que haga clic en este icono +, representará el formulario para crear una nueva campaña.
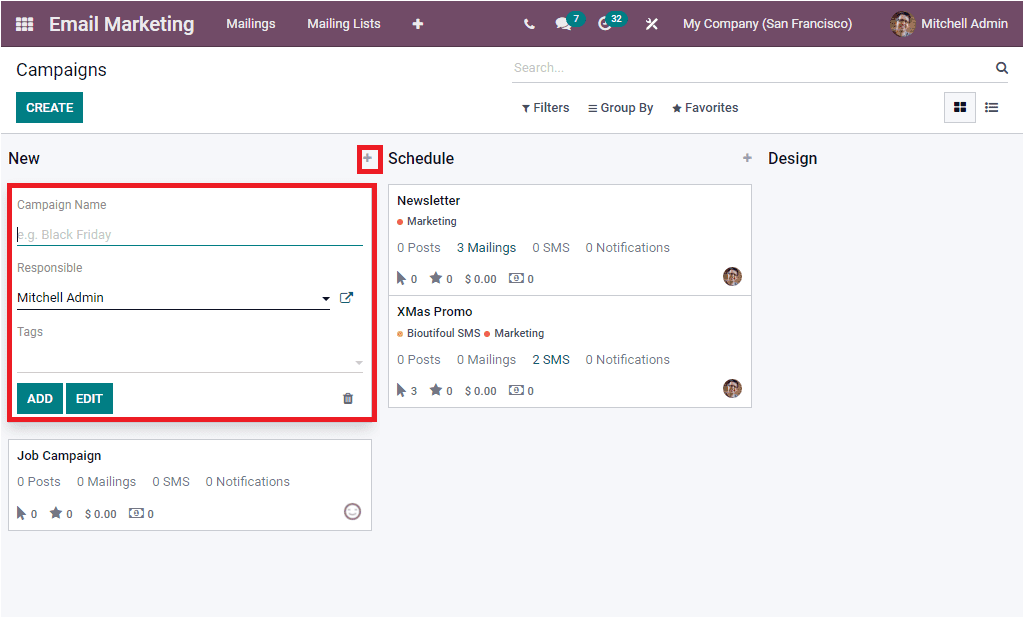
Here you can provide the Name of the Campaign, Responsible person, and Tags. Then click on the ADD button.
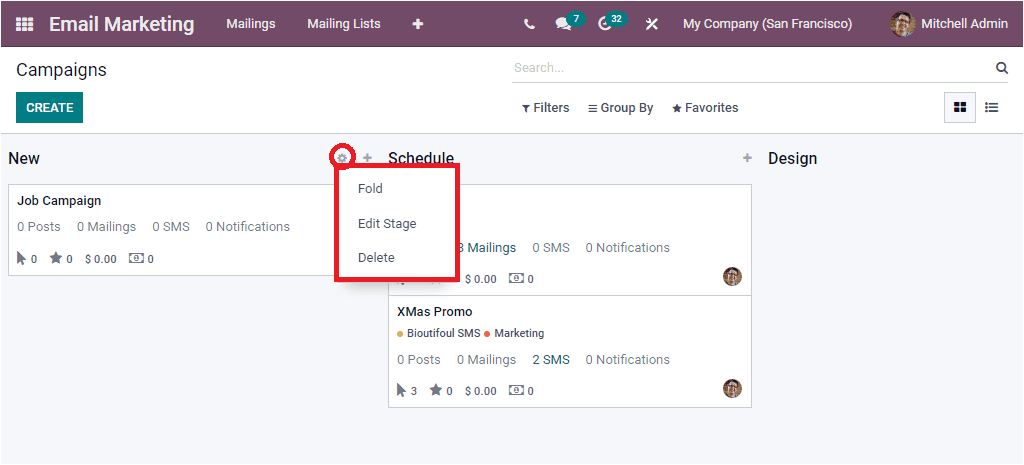
The Settings menu includes the Fold, Edit Stage, and Delete options. The Fold option can be used to fold the respective stage.
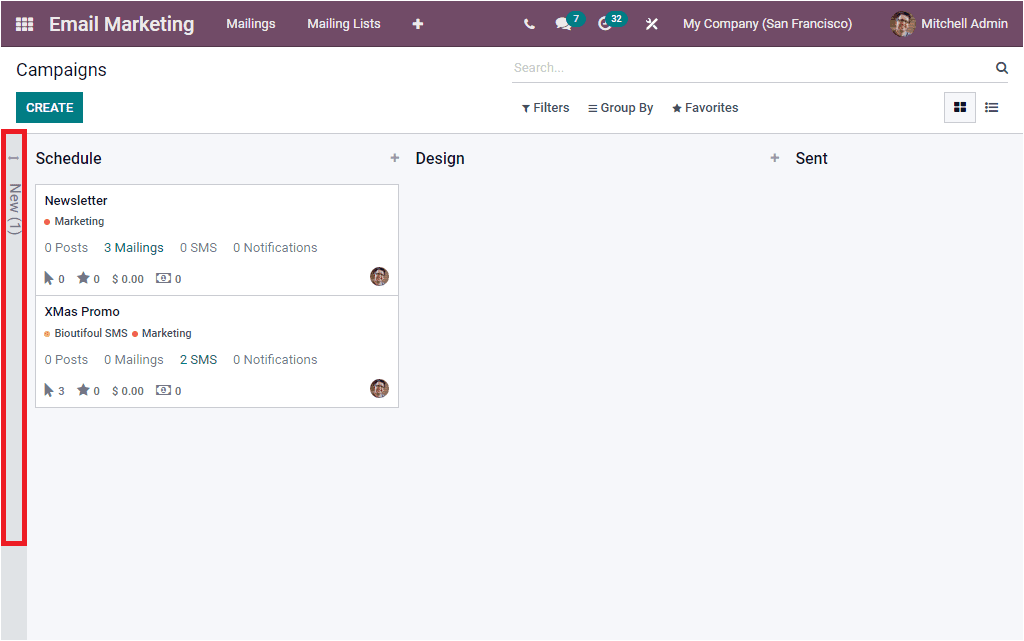
If a respective stage does not have any records or the window has so many stages to display, the Fold option will be beneficial for folding the respective stage. The Edit Stage option allows you to edit the column. If you click on this Edit button, you will depict the pop-up window to edit the details.
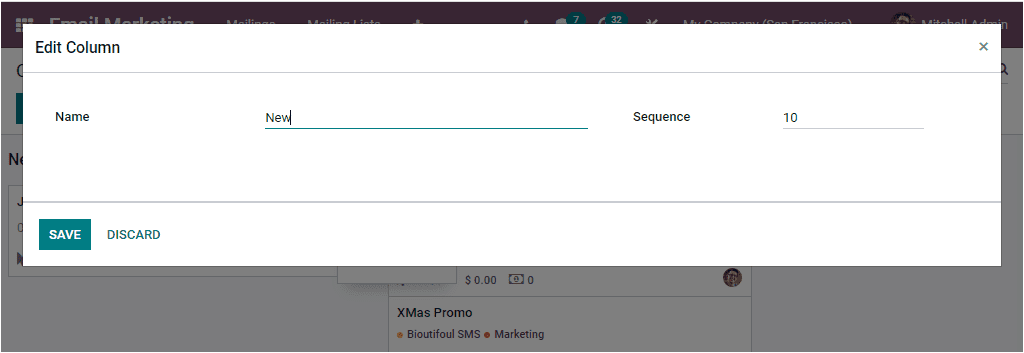
When you click on the Delete button, you will see a confirmation message asking you if it is safe to remove this column. If you want to proceed, you can click on the OK button.

When you scroll to the left side of the screen, you will see the Add a Column button, allowing you to add a new stage.
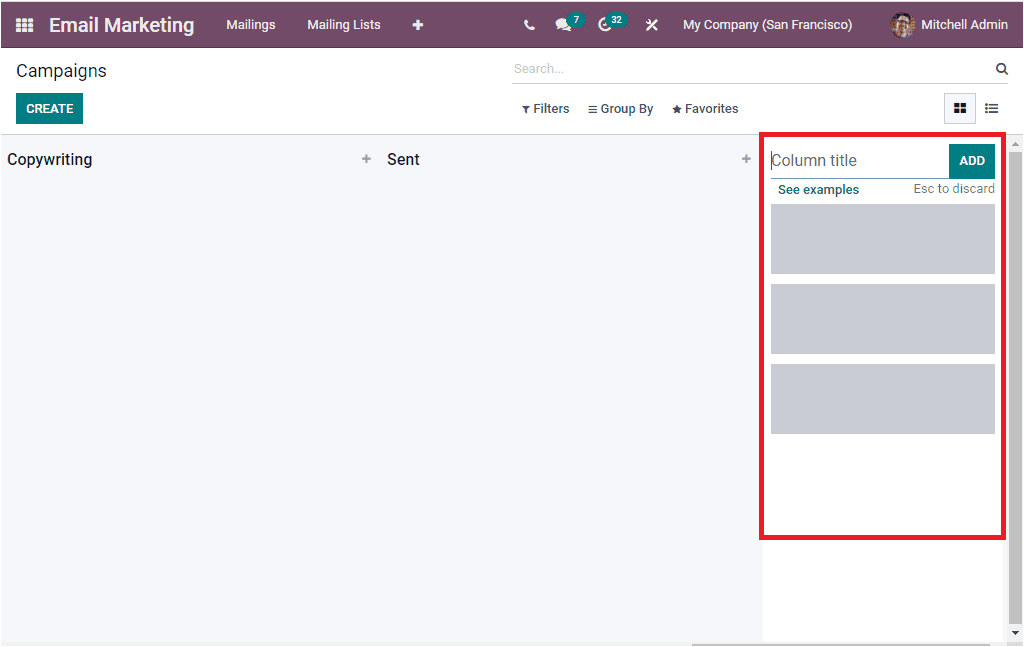
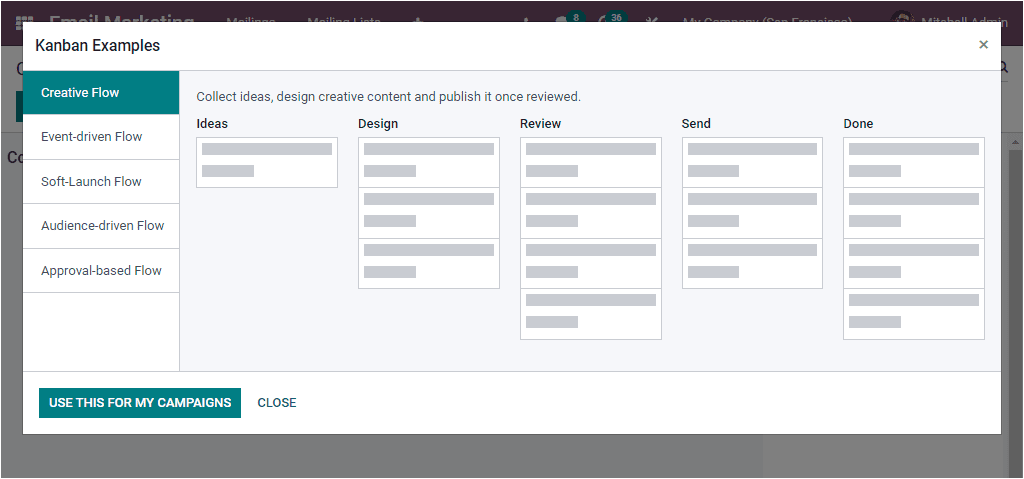
This option allows you to predesign various stages and use them based on your requirements. You can also see some Kanban examples, and you can use them by clicking on the USE THIS FOR MY CAMPAIGNS button.
Now let us have a look at the List view of the window. The list view of the Campaigns window will list out all the defined Campaigns in a list format along with their respective name, Responsible Person, Stage, and Tags. The window allows you to apply various customized filters based on your requirements. Moreover, you can categorize the campaigns based on their stage and responsible by using the default Group by options available.
To create a new Campaign, you can click on the CREATE button available in the top left corner. Let us see the screenshot of the Campaign creation window.
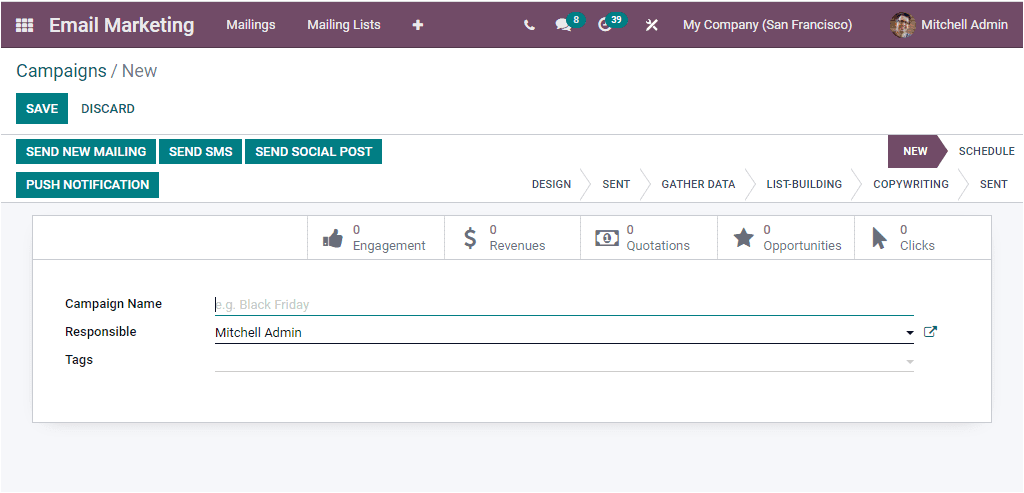
Here you can provide the Campaign Name, Responsible person, and associated Tags in the specified fields. Later you can click on the SAVE button to save the details. Just below the SAVE/EDIT button, you can view various action buttons designed explicitly for doing various operations. The action buttons are SEND NEW MAILING, SEND SMS, SEND SOCIAL POST, and PUSH NOTIFICATION.
In the right top of the window, you can view the various stages such as NEW, SCHEDULE,SEND etc. Moreover, the window also depicts some smart buttons based upon the module you were installed in your system. Engagement, Revenues, Quotations, Opportunities, and Clicks. These buttons will act as the direct link to the respective operation.
THE SEND NEW MAILING button allows you to send emails under the campaign. You can enter into the new mailing creation window by clicking on this button.
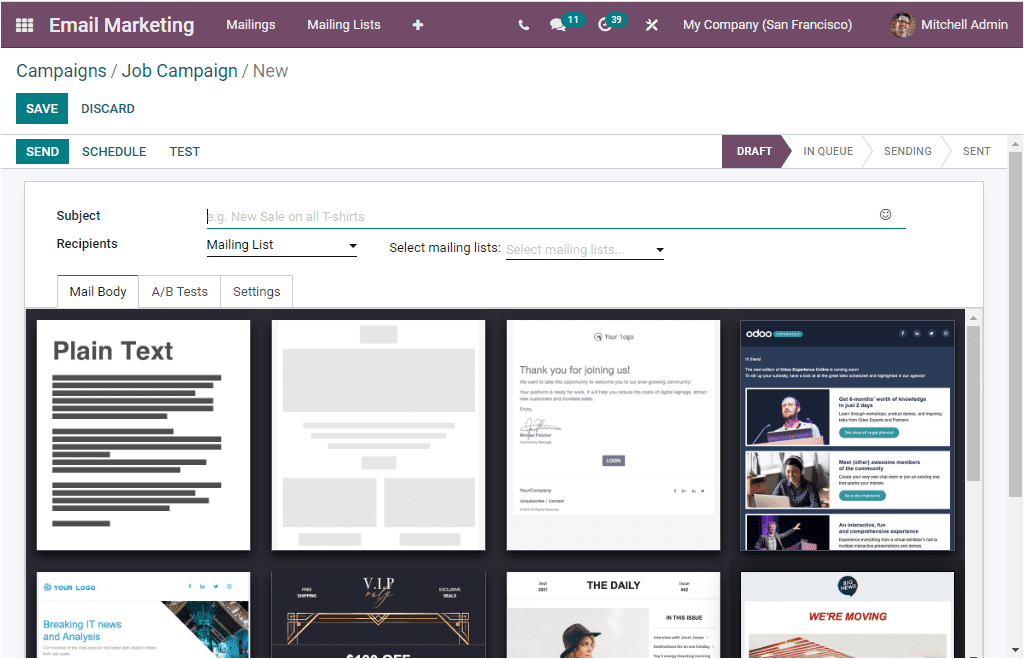
You can create and send a new mailing to the selected recipients using this window. To send the mail, you can click on the SEND button. Now go back to the respective Campaign window, where you will see the created mailing under the Mailings tab as shown in the image below.
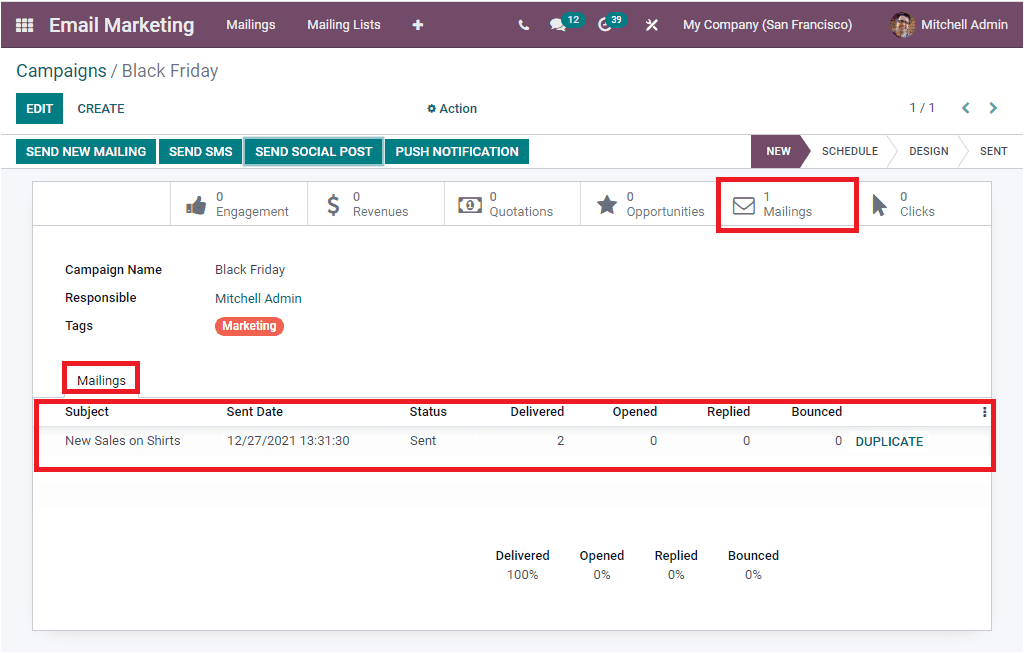
You can also have the direct link to the associated mailings window from the respective Campaign. This can be displayed in the form of a smart button called Mailings (it is highlighted in the above window).
In the same way, we send new mailings, the system allows you to send SMS to the recipients under a particular Campaign.
You can also send social posts by clicking on the SEND SOCIAL POST button. Once you select the button, you will navigate to another window as shown in the image below.
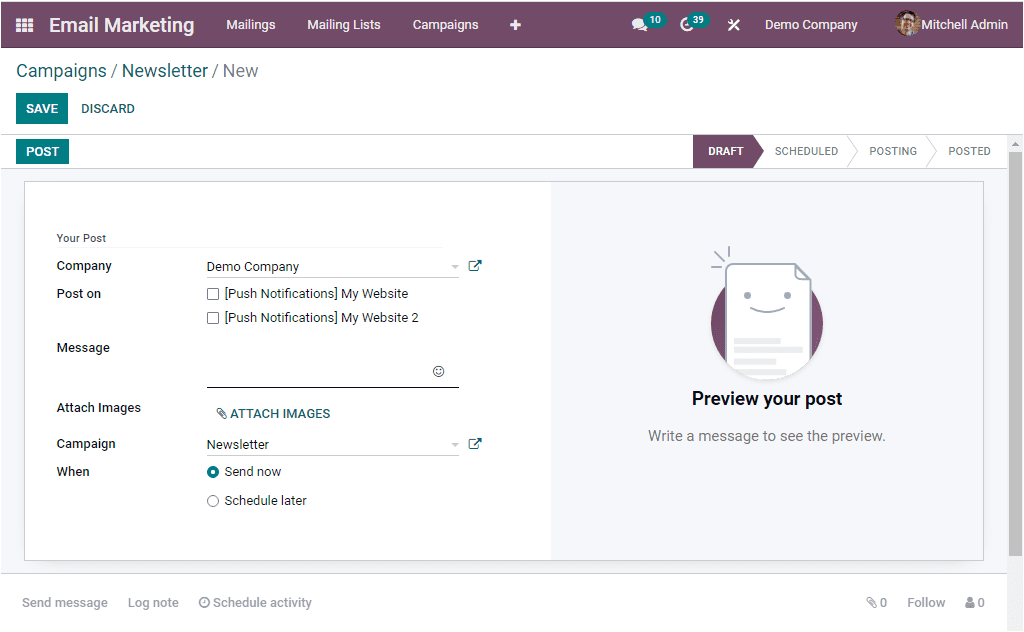
Here in the Your Post section, can see that the Company filed will be auto allocated based on the details given in the respective Campaign. Then you can select the accounts on which this post will be published. In addition, you can describe the Message along with smiles on the specified field. The Attach Image option allows you to attach images to your post if social media supports it. The Campaign name also will be auto mentioned in the respective field. Finally, the When field includes the Send now and Schedule later options. This option is defined to select whether your post wants to be published immediately or schedule it at a later time. After providing all the details, you can click on the POST button to post it
If you activate the Marketing Campaign option from the Settings window of the Email Marketing module, you will also receive the options for configuring Campaign Stages and Campaign Tags. You can access this option from the Configuration tab.
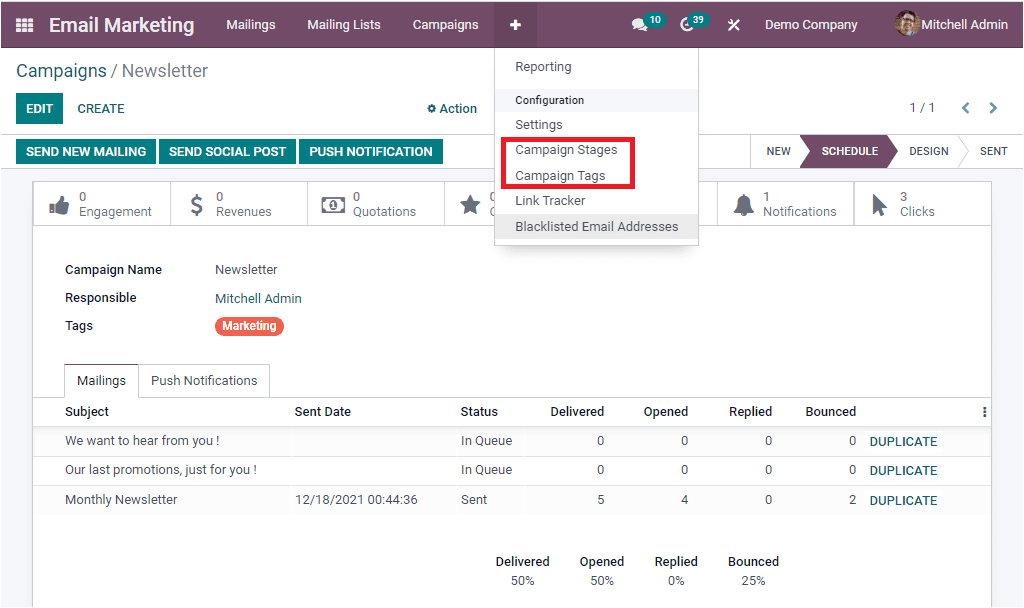
The Campaign Stages menu can be selected for viewing the UTM Stages window as shown in the image below.

The Campaign Stages window will depict all the Campaign stages described in the platform, and if you want to create a new stage, you can click on the CREATE button. Upon selecting this button, you will depict a new line where you can provide the name of the new stage.
When we look at the Campaign Stages option available under the Configuration tab, you can select it for viewing the Campaign Tags window as displayed below.

The Campaign Tags that we already described in the system can be seen in the window. To create new Campaign Tags, you can click on the CREATE button. The new line will be displayed in the same window and here, you can provide the details. After specifying the tag in the given space, you can select the SAVE button to save the newly created tag to the Campaign Tags list.
So far, we discussed the Campaign feature available in the Odoo Email Marketing module, and now let us look into the Link Tracker option available.